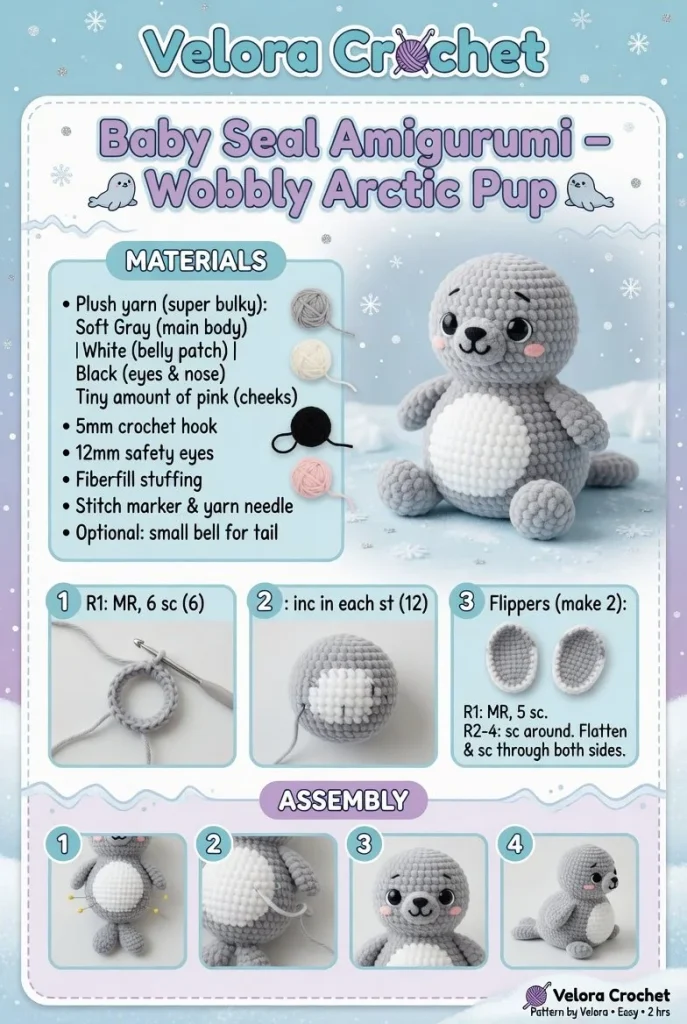
Start crafting your very own adorable Wobbly Arctic Pup with this crochet pattern for a baby seal amigurumi. This delightful mini crochet project is perfect for both beginners and experienced crafters alike. With clear instructions and a simple design, you’ll find joy in bringing this cuddly seal to life.
Materials
- Worsted weight yarn in gray, white, and black
- 4.0 mm crochet hook
- Polyester fiberfill stuffing
- Yarn needle
- Scissors
- Stitch marker (optional)
- Safety eyes (optional)
Abbreviations
- ch: chain
- sc: single crochet
- inc: increase (2 sc in the same stitch)
- dec: decrease (single crochet two stitches together)
- sl st: slip stitch
- st(s): stitch(es)
- R: round
Pattern Instructions
Head
- Start with gray yarn.
- R1: 6 sc in a magic ring (6).
- R2: inc in each st around (12).
- R3: (sc in 1, inc) repeat around (18).
- R4-6: sc in each st around (18).
- R7: (sc in 1, dec) repeat around (12).
- Insert safety eyes between R5 and R6, about 6 stitches apart.
- R8: dec in each st around (6).
- Fasten off, leaving a long tail for sewing.
Body
- Continue with gray yarn.
- R1: 6 sc in a magic ring (6).
- R2: inc in each st around (12).
- R3: (sc in 1, inc) repeat around (18).
- R4: (sc in 2, inc) repeat around (24).
- R5-8: sc in each st around (24).
- R9: (sc in 2, dec) repeat around (18).
- R10: (sc in 1, dec) repeat around (12).
- Stuff the body with fiberfill.
- R11: dec in each st around (6).
- Fasten off, leaving a long tail for sewing.
Arms
- Using gray yarn, make 2 identical pieces.
- R1: 6 sc in a magic ring (6).
- R2: inc in each st around (12).
- R3-4: sc in each st around (12).
- R5: (sc in 1, dec) repeat (8).
- R6: sc in each st around (8).
- Fasten off, leaving a tail for sewing.
Legs
- Using gray yarn, make 2 identical pieces.
- R1: 6 sc in a magic ring (6).
- R2: inc in each st around (12).
- R3: sc in each st around (12).
- R4: (sc in 1, dec) repeat (8).
- Fasten off, leaving a tail for sewing.
Ears / Details
- For the ears, use gray yarn.
- R1: 5 sc in a magic ring (5).
- R2: inc in each st around (10).
- R3: (sc in 1, inc) repeat (15).
- R4: sc in each st around (15).
- Fasten off and leave a tail for sewing.
Accessories
- You may add a scarf or bowtie using contrasting yarn colors for added charm.
Assembly & Finishing
- Sew the head to the body securely.
- Attach the arms on either side of the body.
- Sew the legs on the bottom, making sure they are positioned for a stable pose.
- Attach the ears on the top of the head.
- Weave in all ends and ensure the stuffing is distributed evenly.
Tips for Best Results
- Use a stitch marker to keep track of the beginning of each round.
- Make sure your stitches are tight to avoid gaps in your amigurumi.
- Take your time with assembly to ensure everything is secure and proportionate.
Conclusion
Creating this charming baby seal amigurumi is both fun and rewarding. With just a few materials and some basic crochet techniques, you’ll end up with a lovely mini crochet pup that’s perfect for gifts or home décor. Happy crocheting and enjoy your adventure into the world of amigurumi!



