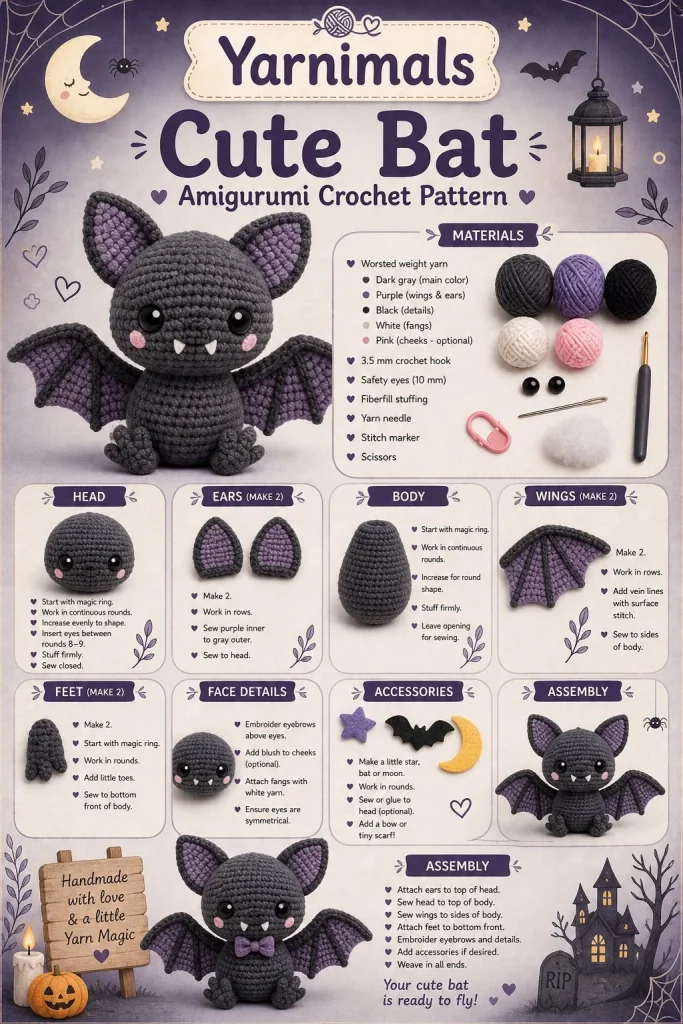
Creating adorable crochet characters is a delightful way to express your creativity, and this particular design seamlessly blends charm with beginner-friendly techniques. In this guide, you’ll learn how to craft a soft, handmade plushie inspired by the cute kawaii style that is perfect for cuddles or decorative accents in any space.
Materials
- Yarn: Soft worsted weight yarn in the following colors
- Main color: beige
- Accent color: dark brown
- White for eyes and details
- Crochet hook: 4mm (G)
- Fiberfill stuffing
- Safety eyes (12mm) or black yarn for embroidery
- Stitch marker
- Darning needle
- Scissors
Abbreviations
- MR: magic ring
- ch: chain
- sc: single crochet
- inc: increase
- dec: decrease
- sl st: slip stitch
Instructions
Head
- Start with a magic ring and make 6 sc in the ring. (6 stitches)
- Round 2: Inc in each stitch around. (12 stitches)
- Round 3: Sc in next stitch, inc in the next stitch; repeat around. (18 stitches)
- Round 4: Sc in next 2 stitches, inc in the next stitch; repeat around. (24 stitches)
- Rounds 5-8: Sc around. (24 stitches for 4 rounds)
- Round 9: Sc in next 2 stitches, dec in the next stitch; repeat around. (18 stitches)
- Round 10: Sc in next stitch, dec in the next stitch; repeat around. (12 stitches)
- Stuff the head firmly and sew on safety eyes or embroider eyes with white yarn.
- Round 11: Dec around. (6 stitches)
- Fasten off, leaving a long tail for sewing.
Body
- Start with a magic ring and make 6 sc in the ring.
- Round 2: Inc in each stitch around. (12 stitches)
- Round 3: Sc in next stitch, inc in the next stitch; repeat around. (18 stitches)
- Round 4: Sc in next 2 stitches, inc in the next stitch; repeat around. (24 stitches)
- Rounds 5-12: Sc around. (24 stitches for 8 rounds)
- Round 13: Sc in next 2 stitches, dec in the next stitch; repeat around. (18 stitches)
- Round 14: Sc in next stitch, dec in the next stitch; repeat around. (12 stitches)
- Stuff the body and close it by decreasing officers.
- Fasten off, leaving a long tail for sewing.
Arms (Make 2)
- Start with a magic ring and make 6 sc in the ring.
- Round 2: Inc in each stitch around. (12 stitches)
- Rounds 3-4: Sc around. (12 stitches for 2 rounds)
- Fasten off, leaving a long tail for sewing.
Legs (Make 2)
- Start with a magic ring and make 6 sc in the ring.
- Round 2: Inc in each stitch around. (12 stitches)
- Rounds 3-4: Sc around. (12 stitches for 2 rounds)
- Fasten off, leaving a long tail for sewing.
Ears (Make 2)
- Start with a magic ring and make 6 sc in the ring.
- Round 2: Inc in each stitch around. (12 stitches)
- Round 3: Sc around. (12 stitches)
- Fasten off, leaving a long tail for sewing.
Assembly and Finishing
- Begin by sewing the head onto the body securely.
- Attach the arms to the sides of the body.
- Position the legs at the base of the body and sew them on.
- Attach the ears to the top of the head, adjusting their placement to match your desired look.
- Embroider a smile or any desired facial features to give your plush personality.
- Weave in all loose ends for a clean finish.
Tips for the Best Result
- When stuffing your plushie, take care not to overstuff as it may distort the shape.
- Using a stitch marker can help keep track of your rounds, especially in the body sections.
- Feel free to experiment with colors to create unique variations or match your home decor.
Conclusion
This crochet character not only makes a delightful gift but is also a fun project that can brighten up any room. Whether you choose to create just one or make a whole collection, your handmade plushie will surely be cherished. Happy crocheting!



