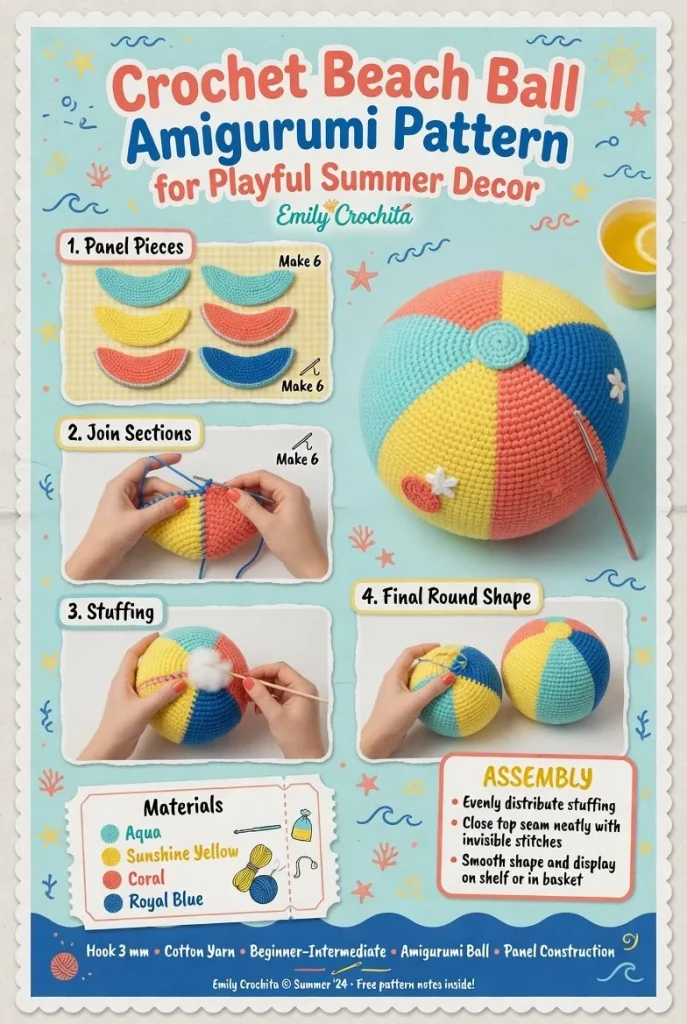
Create a delightfully colorful round beach ball crochet project that will bring a splash of fun to any child’s room or beach party. This easy crochet pattern features vibrant panels in white, aqua, sunshine yellow, coral, and royal blue, creating a soft, stuffed shape that’s perfect for play. Whether you’re a seasoned crocheter or just starting out, this beginner-friendly crochet project will charm both kids and adults alike.
Materials
- Worsted weight yarn in white, aqua, sunshine yellow, coral, and royal blue
- Size G (4.0 mm) crochet hook
- Fiberfill stuffing
- Yarn needle for weaving in ends
- Scissors
Abbreviations
- MR: magic ring
- ch: chain
- sc: single crochet
- hdc: half double crochet
- dc: double crochet
- inc: increase
- dec: decrease
- sl st: slip stitch
Instructions
Ball Panels
This project is worked in rounds to create each section of the beach ball. You will be making individual panels in the following order: white, aqua, sunshine yellow, coral, and royal blue.
Panel 1 (White)
- Make a MR, ch 2 (this counts as your first dc).
- Work 11 dc into the ring. Join with a sl st to the top of the starting ch-2 (12 dc).
- Round 2: Ch 2, inc in each dc around. Join (24 dc).
- Round 3: Ch 2, dc in next dc, inc in next dc; repeat from * around. Join (36 dc).
- Round 4: Ch 2, dc in next 2 dc, inc in next dc; repeat from * around. Join (48 dc).
- Fasten off and weave in ends.
Repeat the instructions above for the following panels, using different colors for each one:
Panel 2 (Aqua)
Panel 3 (Sunshine Yellow)
Panel 4 (Coral)
Panel 5 (Royal Blue)
Make sure to keep your tension consistent to ensure each panel shapes evenly.
Joining Panels
After all panels are completed, it’s time to join them together. Start with the first two panels (white and aqua) and arrange them so they are touching.
- With your first panel facing you, hold the second panel behind it.
- Use a slip stitch to join the first and second panels along the edge. Continue joining the rest of the panels in the same manner, ensuring the colors alternate as desired.
- Leave the last panel unjoined to create an opening for stuffing.
Stuffing
Before closing the ball completely, fill it with fiberfill stuffing. Be sure to stuff it evenly for a nice round shape. I recommend taking your time with this step to avoid overstuffing, which can affect the integrity and shape of your beach ball.
Closing the Seam
Once the ball is stuffed to your liking, it’s time to finish joining the last panel.
- Use a slip stitch to attach the final panel to the open edge of the previous panel.
- Continue until you’ve completed the seam, then fasten off and weave in any loose ends.
Tips for the Best Result
- Keep your tension even to ensure the beach ball retains its shape nicely.
- When joining the panels, make sure the seams are neat and tightly stitched to avoid gaps.
- Experiment with color placements; mixing and matching can lead to unique festive looks for summer events or home decor.
This round beach ball crochet creation will not only brighten up playtime but also serve as a fun decor piece in your home or as a thoughtful handmade gift. Try out different color combinations to match your decor or personality, and enjoy the creative process! For additional crochet projects, check out this charming crochet plush pattern as you expand your crafting repertoire.



