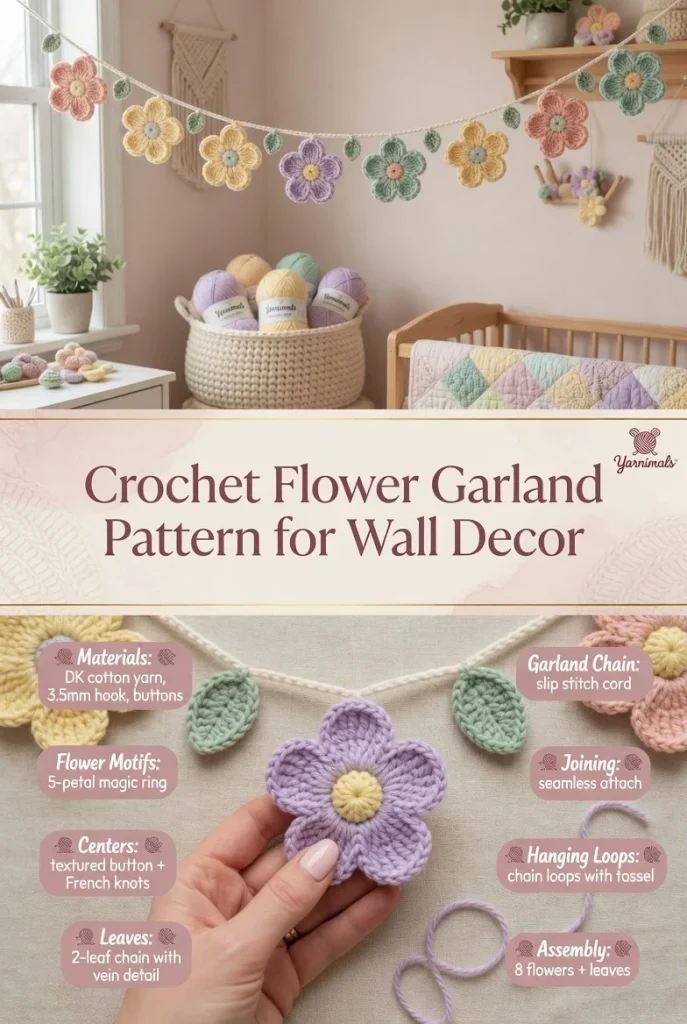
Creating a charming crochet flower garland is a delightful project that infuses your space with warmth and color. This easy crochet project allows you to add a touch of handmade beauty to your home decor, whether draped across a mantelpiece or used to brighten up a nursery. With simple motifs that repeat throughout the design, this flower garland is perfect for crochet enthusiasts of all skill levels.
Materials
- Yarn: Choose a variety of colors for your flowers, preferably in a lightweight cotton or acrylic.
- Hook: A 4mm (G) crochet hook.
- Scissors: For cutting your yarn.
- Yarn Needle: For weaving in ends.
Abbreviations
- MR: magic ring
- ch: chain
- sc: single crochet
- hdc: half double crochet
- dc: double crochet
- inc: increase
- dec: decrease
- sl st: slip stitch
Flower Motifs
Begin with the flower motifs, as they are the centerpiece of your garland. Start by making a magic ring and work your first round of stitches into the ring. This allows for a snug center that holds its shape beautifully.
- Round 1: Create 6 sc in the MR. Pull the ring tight and join with a sl st to the first sc.
- Round 2: Ch 2 (counts as 1 dc), then in the same stitch, work 2 dc. Repeat for each stitch around, increasing as you go (total of 12 dc). Join with a sl st.
- Round 3: Ch 2, then 1 dc in the next dc, 2 dc in the next. Repeat around for a total of 18 dc. Join with a sl st.
Repeat the above steps to create several flower motifs in your chosen colors.
Centers
For the centers of each flower, you can either crochet a small contrasting circle or use a bead. To crochet a circle, simply ch 2, then work 6 sc in the second chain from the hook. This adds a bit of personality to each flower.
Leaves
To make the leaves, create a small chain of 5.
- Row 1: In the second ch from the hook, work 1 sc, 1 hdc, and 1 dc in that stitch.
- Row 2: Turn your work, crochet a dc, a hdc, and an sc in the same order, finishing with a slip stitch to create a leaf shape. Adjust the length of the chain for larger leaves.
Garland Chain
For the garland chain, use a long length of yarn and crochet a simple chain. You might want it to be about 2-3 feet long, depending on your preferred display space. This chain will hold the flowers and leaves together beautifully.
Joining
To assemble your garland, neatly space out your flowers and leaves along the chain. Use your yarn needle to sew each flower and leaf in place securely. Ensure they are evenly spaced for a balanced look.
Hanging Loops
At each end of your garland, create hanging loops for easy display. Simply chain 10-15 stitches and then join them back to the main garland body with a slip stitch. These loops will allow you to hang your beautiful creation effortlessly.
Assembly and Finishing
Now that you’ve crafted all the components, it’s time for assembly. Lay out the flowers and leaves on your chain as per your design. Attach each piece securely, ensuring everything is stable and to your liking. Take a moment to step back and enjoy the colorful display you’re creating.
Tips for the Best Result
- Keep your tension consistent throughout the project for neat and even stitches.
- Use a yarn needle to weave in any loose ends when you finish each flower and leaf.
- Consider varying the sizes of the flowers for added visual interest in your garland.
This crochet flower garland not only makes a lovely decor piece but also works beautifully as a handmade gift. You can experiment with different color combinations or even try making an additional section to create a longer garland. For more inspiration, check out this crochet tutorial that offers even more creative ideas.



