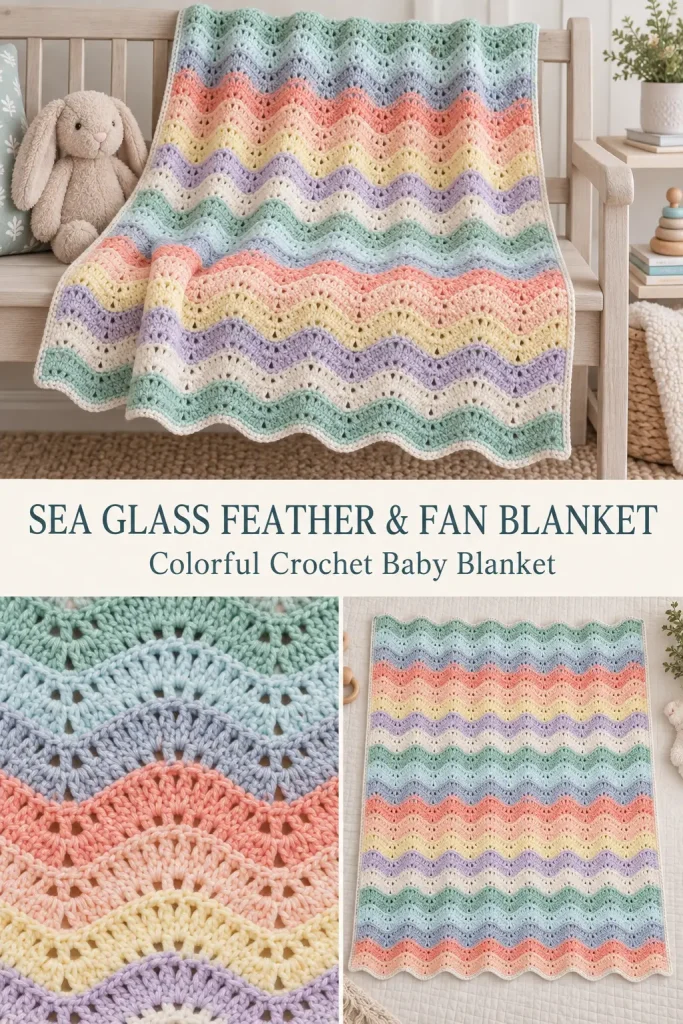
This colorful Feather & Fan crochet blanket combines soft waves with playful stripes for a lightweight, drapey fabric that looks much more complicated than it is.
The repeating increases and decreases create broad rounded fans and gentle valleys, while changing colors every two rows gives the blanket a lively hand-dyed look.
This pattern works especially well for baby blankets, stroller blankets, lap blankets, lightweight throws, mini-skein projects, and colorful scrap-yarn blankets.
Skill Level
Confident Beginner / Intermediate
You should know how to:
- chain
- single crochet
- double crochet
- work 2 double crochets together
- work increases
- change colors
- count stitches
Once the shaping row is established, the pattern becomes repetitive and easy to recognize.
Finished Size
The sample baby blanket measures approximately:
33 inches wide × 41 inches long
before blocking.
Finished dimensions depend on yarn and tension.
Materials
- Fingering / 4-ply yarn
- Approximately 1,200–1,400 yards total for the sample baby blanket
- 3.5 mm crochet hook
- Yarn needle
- Scissors
- Stitch markers
- Measuring tape
Suggested Color Palette
Use one main color plus several contrasting mini-skein colors.
For a sea-glass inspired version:
- seafoam
- pale aqua
- soft gray-blue
- coral
- peach
- butter yellow
- lavender
- cream
A variegated or lightly speckled yarn also works beautifully because the simple ripple structure lets the color changes remain visible.
Abbreviations — US Terms
ch – chain
sc – single crochet
dc – double crochet
dc2tog – double crochet 2 together
sl st – slip stitch
st(s) – stitch(es)
Special Stitch
Double Crochet 2 Together — dc2tog
Yarn over.
Insert hook into the next stitch.
Yarn over and pull up a loop.
Yarn over and pull through 2 loops.
Yarn over.
Insert hook into the following stitch.
Yarn over and pull up a loop.
Yarn over and pull through 2 loops.
Yarn over and pull through all 3 loops remaining on the hook.
Two stitches have become one.
Stitch Multiple
The main ripple uses:
18 stitches per repeat
For the sample blanket:
198 working stitches
This gives:
11 complete feather-and-fan repeats
To begin with 198 working stitches:
Chain 199.
Understanding the Ripple
Each 18-stitch section contains:
- three decreases
- six increases
- three decreases
The decreases pull the fabric downward into a valley.
The increases spread the fabric upward into a broad rounded fan.
One complete repeat is:
dc2tog 3 times, 2 dc in each of next 6 sts, dc2tog 3 times
The stitch count remains unchanged.
Foundation Row
Using your first color:
Ch 199.
Sc in the second chain from the hook and in every remaining chain.
You should have:
198 sc
Ch 2 and turn.
The turning chain does not count as a stitch.
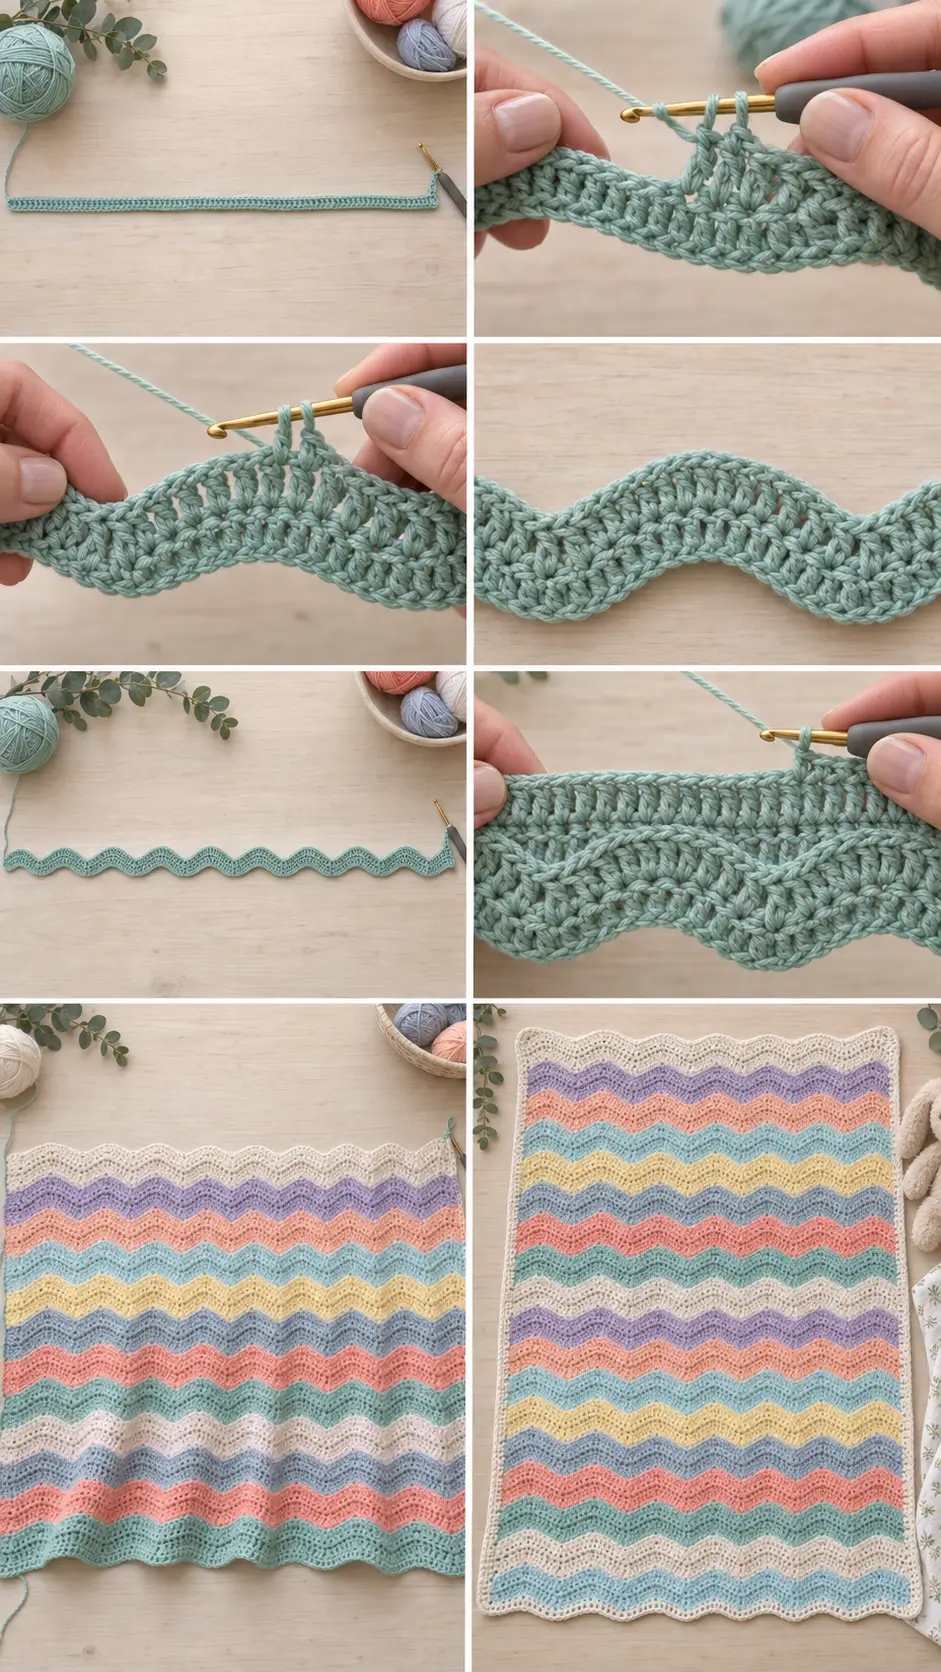
Row 1 — Feather & Fan Shaping Row
Work the following repeat across:
*dc2tog 3 times, 2 dc in each of next 6 sts, dc2tog 3 times*
Repeat from * to * across all 198 stitches.
You should complete:
11 repeats
and still have:
198 stitches
Ch 2 and turn.
What You Should See
Each repeat should form:
- a low valley
- a broad rounded rise
- another low valley
The fabric may look only slightly wavy after the first row. The ripple becomes much more obvious after several repeats.
Row 2 — Plain Double Crochet Row
Dc in every stitch across.
198 dc
Ch 2 and turn.
This plain row stabilizes the previous increases and decreases while preserving the wave.
Row 3 — Shaping Row
Repeat Row 1:
*dc2tog 3 times, 2 dc in each of next 6 sts, dc2tog 3 times*
Repeat across.
198 sts
Ch 2 and turn.
Row 4 — Plain Row
Dc in every stitch across.
198 dc
Ch 2 and turn.
Pattern Repeat
Continue repeating:
Rows 3–4
for the entire blanket.
In simplified form:
Odd Pattern Rows
Feather-and-fan shaping.
Even Pattern Rows
Plain double crochet.
This alternation gives the fabric a softer wave than working the shaping row continuously.
Color Sequence
For a colorful blanket, change color every 2 rows.
That means each color completes:
- one shaping row
- one plain row
before changing.
A possible sequence is:
Rows 1–2
Seafoam
Rows 3–4
Coral
Rows 5–6
Soft gray-blue
Rows 7–8
Butter yellow
Rows 9–10
Aqua
Rows 11–12
Peach
Rows 13–14
Lavender
Rows 15–16
Cream
Then repeat the palette in a different order.
This keeps the blanket colorful without creating overly thin stripes.
Mini-Skein Variation
This stitch is particularly useful for leftover yarn because each stripe can use a different color.
For a more spontaneous look:
- work 2 rows in one color
- 4 rows in another
- 2 rows in the next
- 6 rows in your main color
- return to 2-row accent stripes
Try to distribute very dark or bright shades rather than placing them all beside one another.
Changing Color Neatly
On the last dc of the old color:
Work until 2 loops remain on the hook.
Drop the old yarn.
Yarn over with the new color.
Pull the new color through the final 2 loops.
Turn.
Continue with the new shade.
This places the color change directly at the edge.
Continue to Blanket Length
Work until the blanket measures approximately:
40 inches long
before adding the border.
Depending on gauge, this may require roughly:
70–80 rows
but use the actual measurement rather than relying only on row count.
Finish after a plain double crochet row.
Why the Stitch Count Stays Constant
Each 18-stitch repeat begins with:
3 dc2tog
Those decreases consume 6 stitches and produce 3.
The middle section contains:
2 dc in each of 6 stitches
Those increases consume 6 stitches and produce 12.
The final three decreases again consume 6 stitches and produce 3.
So:
3 + 12 + 3 = 18 stitches
The increases and decreases balance each other exactly.
Identifying the Valley
The valley is created by neighboring decreases.
When one repeat ends with three dc2tog stitches and the next repeat begins with three more, the decrease zone becomes especially deep.
Keep those decreases stacked over the same positions on every shaping row.
Identifying the Fan
The fan is the broad raised section made by:
2 dc in each of 6 consecutive stitches
That produces:
12 dc
from 6 stitches.
The next shaping row should place the increases over the same fan area.
Optional Stitch Markers
While learning the pattern, place one stitch marker after every:
18 stitches
You should have:
11 sections
across the sample blanket.
Markers make it much easier to locate a missed increase or decrease.
Simple Border
The ripple already creates a decorative top and bottom edge, so this version uses a simple border that does not overpower the waves.
Border Round 1
After completing the final plain row, do not fasten off.
Ch 1.
Sc evenly around the blanket.
Along the top and bottom, follow the natural wave.
Do not try to force the ripple edge completely straight.
Along the long sides, distribute sc evenly through the row ends.
At each outer blanket corner, work:
3 sc
Join with a sl st.
Border Round 2
Ch 1.
Sc in every stitch around.
At each corner:
3 sc in the center corner stitch
Join.
Fasten off.
Optional Contrast Border
For a more colorful finish, use your main color for Border Round 1 and one contrast color for Border Round 2.
A solid darker border can visually contain a very colorful scrap blanket.
Optional Scalloped Final Round
If you want a softer decorative finish, add:
skip 2 sts, 5 dc in next st, skip 2 sts, sl st in next st
around the long sides.
Keep the naturally rippled top and bottom simpler so the blanket does not become overly busy.
How to Make the Blanket Narrower
Remove complete 18-stitch repeats.
Useful working stitch counts include:
- 144 sts = 8 repeats
- 162 sts = 9 repeats
- 180 sts = 10 repeats
- 198 sts = 11 repeats
Remember to add 1 extra foundation chain.
For example:
180 working stitches = chain 181
How to Make the Blanket Wider
Add complete 18-stitch repeats.
For example:
Wider Baby Blanket
216 working stitches
Chain 217
Small Throw
252 working stitches
Chain 253
Wider Throw
288 working stitches
Chain 289
Always crochet several rows and measure before committing to a very large project.
Small Baby Blanket
For a more compact blanket, use:
162 working stitches
Begin with:
Chain 163
Work until approximately:
34–36 inches long
Then add the border.
Larger Baby Blanket
Use:
216 working stitches
Begin with:
Chain 217
Continue until approximately:
42–44 inches long
Lap Blanket
Use:
252 working stitches
Begin with:
Chain 253
Work until approximately:
50–55 inches long
Throw Blanket
Use:
288 working stitches
Begin with:
Chain 289
Work until approximately:
58–62 inches long
Because fingering-weight blankets use a substantial amount of yarn, calculate your yarn needs from a swatch before beginning a large throw.
Yarn Choice
The linked design is listed for fingering / 4-ply yarn and a 3.5 mm hook, which makes the feather-and-fan texture light and drapey. (Ravelry)
Good choices for this original version include:
- hand-dyed sock yarn
- smooth merino
- wool blends
- cotton blends
- acrylic baby yarn
- mini-skein sets
For a baby blanket, prioritize softness and easy care.
Using Hand-Dyed Yarn
This stitch works particularly well with hand-dyed yarn because the waves break up pooling.
Try alternating:
- one semi-solid main color
- speckled contrast shades
- tonal mini skeins
If one yarn is strongly variegated, pair it with quieter solids so the feather-and-fan shape remains visible.
Tips for Clean Ripples
Count Every Shaping Row
If even one increase or decrease is missed, the wave can shift.
Keep the Plain Rows Truly Plain
Do not accidentally repeat the increases on Row 2 or Row 4.
Those rows are simply:
dc across
Use Smooth Tension
Very tight decreases can make the valleys pucker.
Work dc2tog stitches with the same relaxed tension as ordinary dc.
Check the First Few Repeats
After the first three or four shaping rows, lay the fabric flat.
All peaks should line up.
All valleys should line up.
Correct mistakes early.
Common Problems
Blanket Gets Wider
You may have:
- added too many increases
- skipped a decrease
- accidentally worked into the turning chain
Recount each 18-stitch repeat.
Blanket Gets Narrower
Check that every repeat contains:
six increase stitches
with 2 dc in each.
A missed increase removes one stitch.
Waves Drift Sideways
The increases or decreases are no longer stacked over their previous positions.
Use stitch markers to divide the row into 18-stitch sections.
Fabric Ruffles Excessively
Your increase stitches may be too loose or the hook may be too large.
Try a slightly smaller hook.
Fabric Pulls Into Deep Pleats
Your decreases may be too tight.
Relax the dc2tog stitches or move up slightly in hook size.
Blocking
Blocking helps the waves settle into smooth curves.
After weaving in the ends:
- Wash or dampen according to the yarn label.
- Lay the blanket flat.
- Straighten both long sides.
- Gently shape every peak.
- Smooth every valley.
- Allow the blanket to dry completely.
Do not aggressively stretch the ripple flat.
The wave is part of the finished design.
Color Ideas
Sea Glass
Aqua + seafoam + gray-blue + coral + cream
Wildflower
Lavender + pink + yellow + green + cream
Autumn
Olive + rust + mustard + burgundy + oatmeal
Coastal
Navy + denim + pale blue + sand + white
Pastel Baby
Blush + mint + lavender + pale yellow + cream
Neutral
Cream + camel + taupe + gray + chocolate
Why Feather & Fan Works So Well With Scraps
The repeated rises and valleys naturally break colors into moving bands instead of rigid horizontal stripes.
That makes small amounts of yarn feel intentional rather than leftover.
A two-row stripe may use only a small quantity of one mini skein, so you can incorporate many colors without needing a full ball of every shade.
Sea Glass Feather & Fan Blanket
The appeal of this blanket comes from the balance between simple mathematics and lively color.
Three groups of decreases create each valley, six paired increases create the broad fan, and the next plain row gives the fabric room to relax. Repeating that structure produces smooth waves across the entire blanket.
With solid yarn, the texture becomes the main feature. With hand-dyed yarn, mini skeins, or scraps, the same repeat turns into flowing bands of color—making this a particularly satisfying blanket for using small quantities of beautiful yarn.