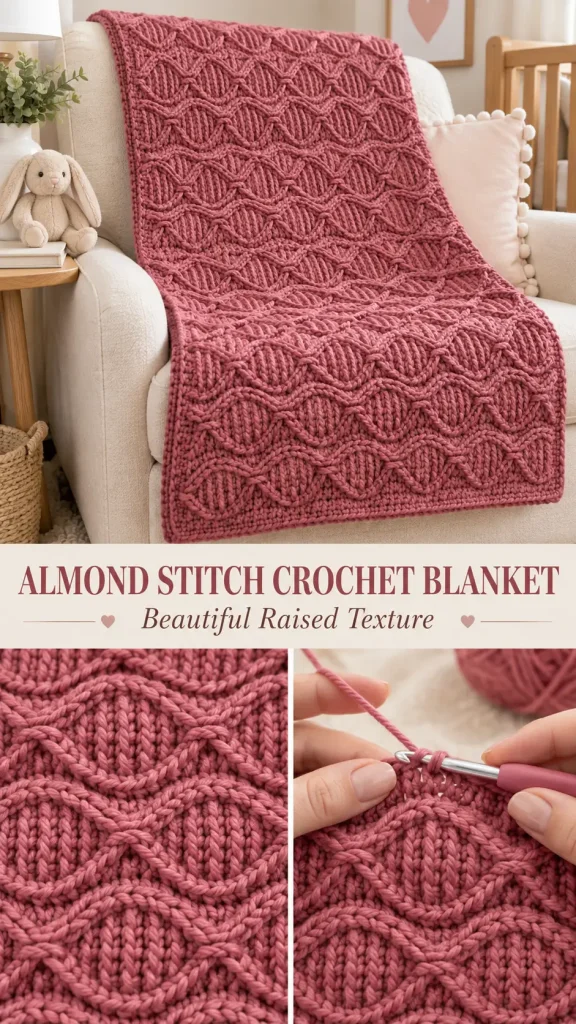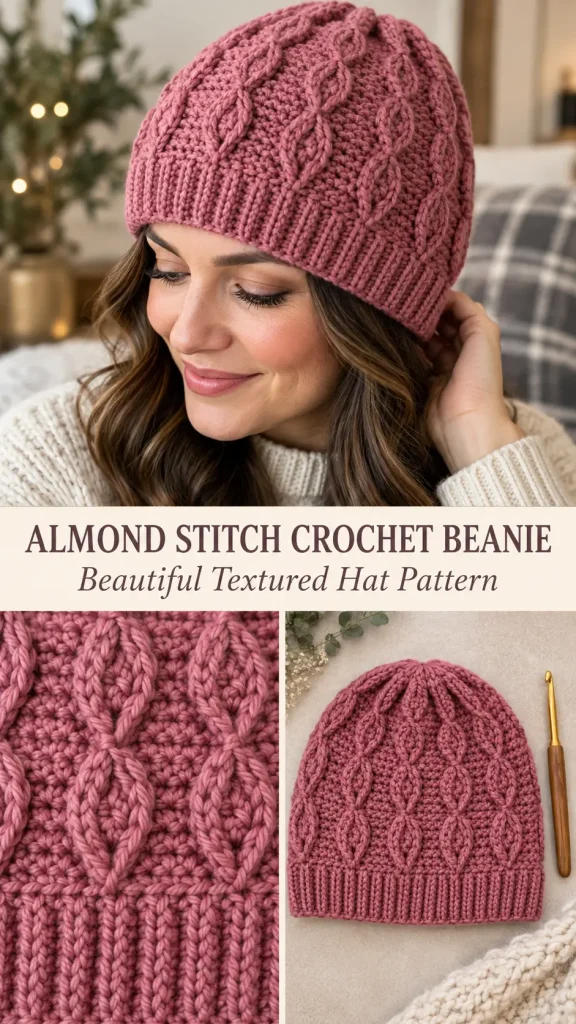
This cozy crochet beanie combines the deeply textured Almond Stitch with a stretchy ribbed brim. The hat is worked side to side in rows, so the foundation chain determines the height of the hat while the number of rows determines the circumference.
The texture is created entirely with simple stitches worked in the back loops. Groups of short slip stitches alternate with taller half double crochets, causing the unused front loops to curve around the raised sections and form the distinctive almond-shaped ridges.
A section of half double crochet slip stitches at one end of every row creates the flexible brim. After the rectangular panel reaches the correct circumference, the first and last rows are joined, and the crown edge is gathered closed.
Skill Level
Confident Beginner / Advanced Beginner
You should know how to:
- chain
- slip stitch
- half double crochet
- work in the back loop only
- seam crochet rows
- gather a hat crown
- weave in ends
Sizes
Adult Fitted
Finished height:
Approximately 9¼–9½ inches
Designed for an average adult head approximately:
21–22½ inches circumference
Adult Slouchy
Finished height:
Approximately 11–11½ inches
Designed for the same general adult circumference but with extra height at the crown.
The circumference is easy to customize.
Materials
- Medium #4 / Aran-weight yarn
- Approximately 140–170 yards for fitted version
- Approximately 175–210 yards for slouchy version
- 4 mm crochet hook
- Yarn needle
- Scissors
- Measuring tape
- Stitch markers
Choose a yarn with some elasticity and good stitch definition.
Wool, wool blends, acrylic-wool blends, and smooth acrylic yarns work particularly well.
Abbreviations — US Terms
ch – chain
sl st – slip stitch
hdc – half double crochet
hdcss – half double crochet slip stitch
BLO – back loop only
st(s) – stitch(es
RS – right side
WS – wrong side
yo – yarn over
Special Stitch — Half Double Crochet Slip Stitch
The brim is made with the hdcss.
Yarn over.
Insert hook into the indicated stitch.
Yarn over and pull up a loop.
You now have 3 loops involved in the stitch.
Instead of completing a normal hdc, continue pulling the newly drawn-up loop directly through the remaining loops on the hook.
One hdcss is complete.
This stitch is shorter and flatter than an ordinary hdc and creates excellent ribbing when worked BLO.
Special Technique — Back Loop Only
After the foundation row, all body stitches and brim stitches are worked:
BLO
Insert the hook under only the back loop of the stitch.
Leave the front loop untouched.
Those unused front loops create the raised lines that outline the almond motifs.
Almond Stitch Structure
The textured section alternates groups of:
4 slip stitches
and:
4 half double crochets
Two rows maintain the same physical stitch heights.
The next two rows reverse them.
This produces the almond-shaped texture.
Because the hat is worked back and forth, the written stitch order reverses on alternate rows so the groups remain stacked correctly.
Hat Construction
Each row contains two sections:
Almond Body
The textured section running from the crown toward the brim.
Ribbed Brim
The final 8 stitches at the lower edge of the hat.
For the fitted version:
32 body stitches + 8 brim stitches = 40 stitches
For the slouchy version:
40 body stitches + 8 brim stitches = 48 stitches
FITTED HAT
Foundation
Ch 41.
You will have:
40 working stitches
after Row 1.
The first 32 stitches form the textured hat body.
The final 8 stitches form the brim.
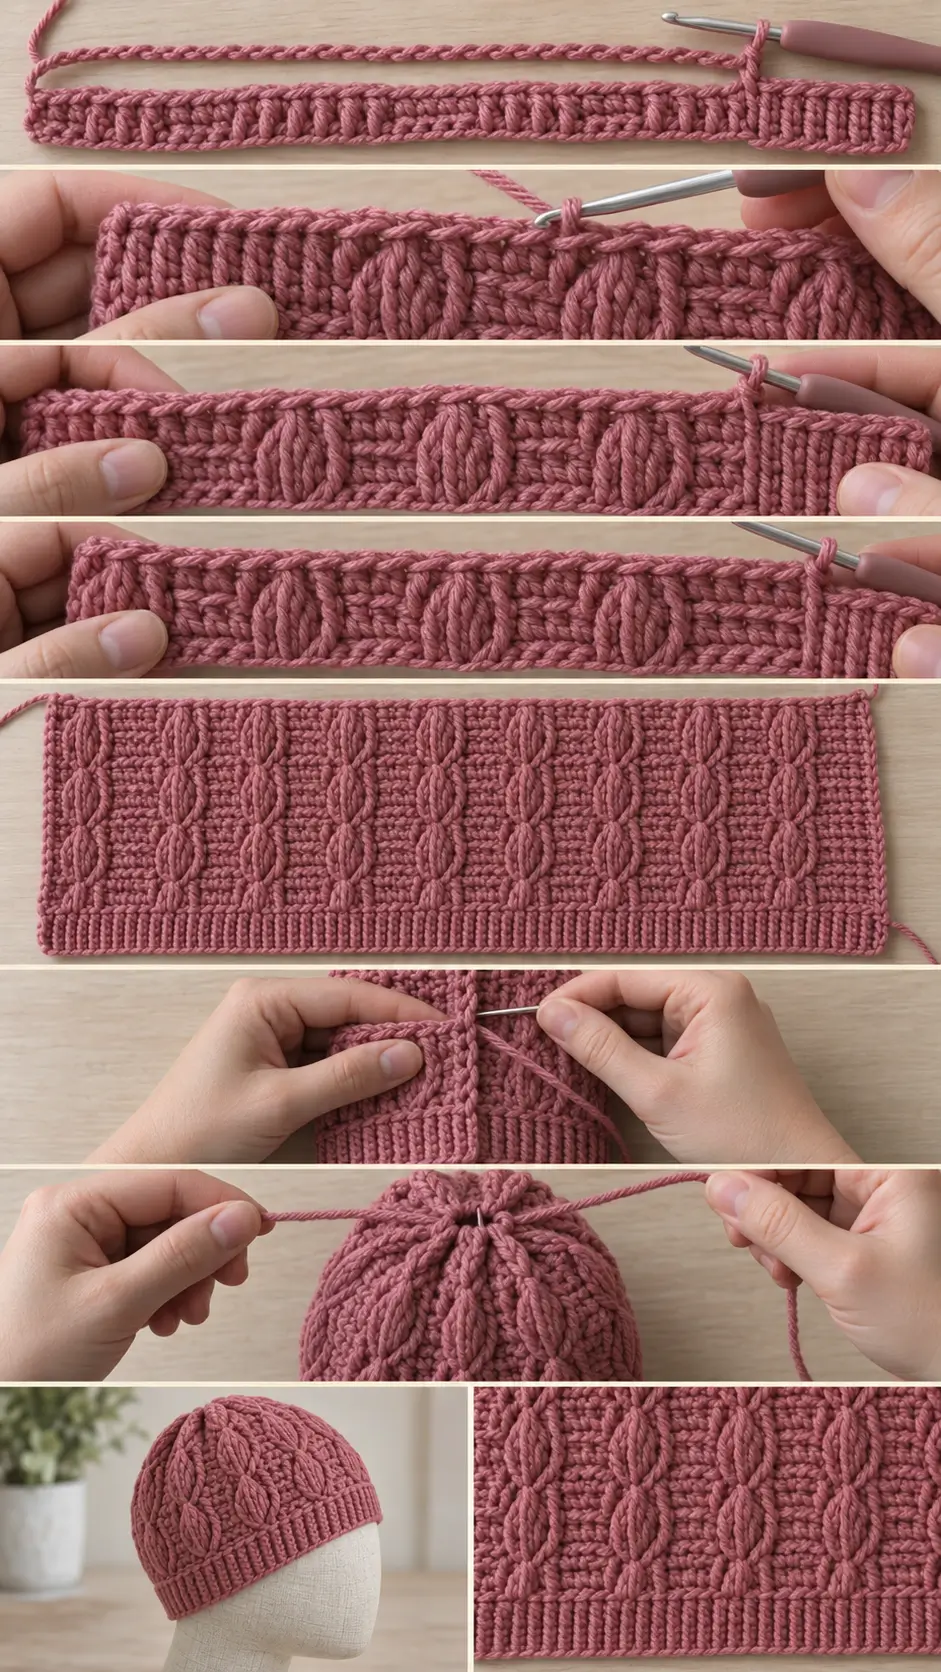
Row 1 — Crown to Brim
Sl st in the second chain from the hook and in each of the next 3 chains.
4 sl st
Hdc in each of next 4 chains.
Continue across the body:
*sl st in next 4 ch, hdc in next 4 ch*
until you have worked:
32 body stitches
You should have completed four 8-stitch texture groups.
Now work the brim:
hdcss in each of final 8 chains
40 sts total
Ch 1.
Turn.
The ch-1 does not count as a stitch.
Row 2 — Brim to Crown
From now on, work all stitches:
BLO
Hdcss BLO in first:
8 sts
This is the brim.
Now work the textured body:
hdc BLO in next 4 sts
sl st BLO in next 4 sts
Repeat:
*hdc BLO in next 4, sl st BLO in next 4*
until the end.
Ch 1.
Turn.
Why the Order Looks Reversed
You are crocheting in the opposite direction.
Working hdc first on this row places the tall stitches directly over the physical hdc section from Row 1.
The texture therefore remains aligned.
Row 3 — Switch the Almond Heights
Work:
hdc BLO in first 4 sts
sl st BLO in next 4 sts
Repeat:
*hdc BLO in next 4, sl st BLO in next 4*
across the complete 32-stitch body.
Then work:
hdcss BLO in final 8 brim sts
Ch 1.
Turn.
The stitch heights have now switched.
Areas that were short in Rows 1–2 are becoming tall.
Row 4 — Maintain the Reversed Alignment
Hdcss BLO in first:
8 brim sts
Then work:
sl st BLO in next 4 sts
hdc BLO in next 4 sts
Repeat:
*sl st BLO in next 4, hdc BLO in next 4*
to the end.
Ch 1.
Turn.
Row 5
Repeat Row 1’s body arrangement, but work everything BLO.
Work:
sl st BLO in next 4
hdc BLO in next 4
Repeat across the 32 body stitches.
Then:
hdcss BLO in final 8 brim sts
Ch 1.
Turn.
Main Four-Row Repeat
The Almond Stitch is now established.
Repeat:
Rows 2–5
for the remainder of the hat.
In simplified form, the texture follows:
Two Rows
Physical sections remain:
4 short stitches / 4 tall stitches
Next Two Rows
They reverse:
4 tall stitches / 4 short stitches
Then repeat.
The 8 brim stitches are always worked:
hdcss BLO
What the Fabric Should Look Like
After approximately 8–12 rows, you should see:
- elongated almond-shaped ridges
- strong vertical texture
- flexible ribbed brim
- dense fabric
- no large holes
- noticeable stretch across the rows
The almond motifs run vertically from the brim toward the crown.
SLouchy VERSION
For the taller version:
Ch 49
This gives:
48 working stitches
Divide them as:
40 Almond Stitch body stitches
plus:
8 hdcss brim stitches
The Almond section contains five complete 8-stitch groups instead of four.
Work the same four-row sequence.
How Many Rows to Crochet
Do not rely only on an exact row count because yarn and tension vary.
Continue until the rectangle measures approximately:
Adult Fitted
17½–18½ inches wide unstretched
Adult Larger / Looser
18½–19½ inches wide unstretched
The fabric should stretch comfortably several inches beyond its resting measurement.
Your final row count must be:
a multiple of 4
so the Almond Stitch joins cleanly.
Useful stopping points include:
- 72 rows
- 76 rows
- 80 rows
- 84 rows
Always measure the actual fabric around the head before seaming.
Checking the Fit Before Joining
Wrap the rectangle around the head with the ribbed section along the forehead.
The short ends should meet with moderate stretch.
The hat should feel:
- snug
- comfortable
- secure
but not painfully tight.
Crochet fabric relaxes with wear, so a slightly snug initial fit is preferable to an oversized tube.
Understanding Negative Ease
A hat usually needs to be smaller than the wearer’s actual head circumference.
For example, for a:
22-inch head
a finished unstretched hat circumference around:
18–19 inches
can work well if the chosen yarn and stitch fabric stretch comfortably.
Always test your own fabric because yarn fibers behave differently.
PART 2 — JOIN THE SIDE SEAM
Finish after completing a full four-row repeat.
Do not fasten off.
Place the first and final rows together.
Make sure:
- brim meets brim
- crown edge meets crown edge
- Almond Stitch groups line up
- fabric is not twisted
Slip Stitch Join
Insert the hook through the corresponding loops of:
- the final row
- the foundation edge
Work a loose slip stitch seam from the brim toward the crown.
Do not make the seam tight.
The join should stretch approximately as much as the surrounding fabric.
Continue across all stitches.
Fasten off, leaving a long tail of approximately:
20–24 inches
for closing the crown.
Optional Mattress-Stitch Seam
For a less visible seam, fasten off with a long tail instead.
Thread the tail onto a yarn needle.
Place the edges together.
Sew back and forth through corresponding edge loops using mattress stitch.
Pull gently every few inches.
Do not overtighten.
The Almond texture should flow across the seam as smoothly as possible.
PART 3 — CLOSE THE CROWN
The edge opposite the hdcss brim is the crown.
Thread the long yarn tail onto a yarn needle.
Starting at the seam, weave the needle in and out through the edge of every row around the complete crown opening.
Use approximately:
one pickup per row
or every second row if the yarn is extremely thick.
When you return to the starting point:
Pull the yarn slowly.
The crown opening will gather closed.
Tighten the Crown
Continue pulling until the opening is as small as possible.
Pass the needle through the center opening several times.
Pull firmly.
Make several secure stitches across opposite sides of the gathered center.
Tie off securely on the inside.
Weave the remaining tail through several stitches.
Reducing Crown Bulk
If your yarn is thick and the gathered top feels bulky, use this method:
When weaving the crown tail, pick up:
every second row edge
during the first pass.
Pull closed.
Then make a second pass through the remaining gaps.
This distributes the gathers more evenly.
Shape the Crown
Turn the hat right side out.
Use your fingers to arrange the gathered folds evenly.
The vertical Almond Stitch columns should travel naturally toward the center.
For the slouchy version, the extra fabric creates a softer gathered crown.
PART 4 — FINISH THE BRIM
The hdcss section already creates the brim, so no additional edging is necessary.
The finished band should show narrow vertical ribs around the forehead.
If you want a slightly firmer lower edge, join yarn at the seam and work:
1 round of loose slip stitches
around the opening.
Do not work tightly or the hat may no longer stretch comfortably.
Almond Stitch Close-Up
Each almond is created by four stitches changing height over four rows.
For example, one physical 4-stitch section behaves like:
Rows 1–2
Short:
sl st BLO
Rows 3–4
Tall:
hdc BLO
Then it repeats.
The adjacent section does the opposite:
Rows 1–2
Tall:
hdc BLO
Rows 3–4
Short:
sl st BLO
The exposed front loops curve naturally around the height changes.
That creates the almond outline.
The Most Important Rule: Loose Slip Stitches
If the slip stitches are tight, the hat will become stiff and difficult to crochet.
When making a sl st BLO:
Insert the hook.
Yarn over.
Pull through the stitch and the loop already on the hook.
Then stop.
Do not tug the working yarn.
Keep the new stitch resting around the full diameter of the hook.
Working Into Tight Slip Stitches
If you cannot comfortably insert the hook on the next row, undo the tight section.
Trying to force the hook through tight slip stitches for an entire hat will make the project unnecessarily difficult.
You can also use:
4.5 mm hook
instead of 4 mm if your natural tension is tight.
Keeping the Brim Stretchy
The hdcss stitches should also remain relaxed.
Because the brim runs vertically, every row contributes to the circumference.
Consistent hdcss tension produces neat ribbing with excellent stretch.
Keep the Brim Separate From the Almond Pattern
Always count the first or final:
8 brim stitches
depending on the direction of the row.
A stitch marker can help.
Place a marker between:
brim stitch 8
and:
the first Almond Stitch body stitch
Move the marker upward each row.
This prevents accidentally extending the texture into the brim.
Common Problems
My Almond Shapes Are Not Appearing
Check three things.
1. Are You Working BLO?
The exposed front loops create the visible outline.
2. Are Your Groups Exactly Four Stitches?
Every texture block contains:
4 stitches
3. Are You Keeping Each Arrangement for Two Rows?
The heights switch after two physical rows, not every row.
My Hat Is Getting Narrower From Brim to Crown
One or more edge stitches are being missed.
Mark:
- first stitch
- final stitch
and count periodically.
The fitted version must maintain:
40 stitches
The slouchy version must maintain:
48 stitches
The Panel Is Becoming Shorter
Your slip stitches are probably too tight.
The slip-stitch sections can compress dramatically.
Relax your tension.
The Brim Looks Wider Than the Hat Body
Your hdcss stitches may be significantly looser than your Almond stitches.
Use slightly firmer tension on the brim or loosen the Almond slip stitches.
The two sections should remain approximately equal in row height.
The Seam Is Stiff
Undo it and join more loosely.
The seam must stretch with the hat.
A mattress stitch seam is an excellent alternative.
The Crown Has a Large Hole
Make a second gathering pass through the remaining opening.
Then sew back and forth across the center several times.
The Crown Is Too Bulky
Gather fewer edge loops during each pass and distribute the fabric before pulling tight.
A slightly thinner yarn also creates a cleaner crown.
Adjusting the Circumference
The easiest way to resize the hat is to change the number of rows.
Always add or remove rows in groups of:
4
For a smaller hat, stop earlier.
For a larger hat, continue additional four-row repeats.
Do not alter the foundation chain unless you want to change the hat’s height.
Adjusting the Height
For a fitted adult hat:
Ch 41
For a slouchier hat:
Ch 49
For a slightly shorter hat:
Ch 33
This gives:
- 24 Almond Stitch body stitches
- 8 brim stitches
Before committing to a shorter version, confirm that the crown-to-brim measurement fits the intended wearer.
Child Size
For an older child, try:
Ch 33
with:
24 textured stitches + 8 brim stitches
Work four-row repeats until the panel measures approximately:
15–16½ inches unstretched
depending on age and yarn stretch.
Check the actual head before seaming.
Two-Color Version
The Almond Stitch can also be worked in broad vertical color sections.
Change color only after a complete:
4-row repeat
For example:
- 8 rows cream
- 8 rows dusty rose
- 8 rows cream
Because the hat is worked sideways, the color bands will appear vertically around the finished hat.
Tonal Version
Try two shades from the same family:
- blush + dusty rose
- cream + camel
- sage + olive
- pale blue + denim
- gray + charcoal
Use one shade for several four-row repeats before changing.
Contrasting Brim
For a two-tone hat, use one color for the Almond body and a second color for the hdcss brim.
To do this neatly, carry the unused brim color only if you are comfortable with colorwork.
An easier method is to crochet the main panel in one color and add a separate contrasting ribbed band afterward.
Optional Pom-Pom
The Almond Stitch hat works well with a pom-pom.
After closing the crown, attach:
- yarn pom-pom
- faux-fur pom-pom
- removable snap-on pom-pom
For washing convenience, a removable pom-pom is especially practical.
Yarn Suggestions
The stitch looks best in yarn with good definition.
Ideal fibers include:
- wool
- wool-alpaca blends
- wool-acrylic blends
- smooth acrylic
- merino blends
Avoid extremely fuzzy yarn when learning the stitch because the back loops become harder to identify.
Color Ideas
The raised Almond Stitch looks beautiful in:
- dusty rose
- terracotta
- cream
- camel
- forest green
- sage
- mustard
- dusty blue
- charcoal
- plum
Solid colors make the almond outlines especially easy to see.
Gauge Swatch
Before making the hat, crochet at least:
24 stitches × 20 rows
using the same stitch combination.
Measure the swatch relaxed, without stretching.
More important than matching an exact gauge is understanding how much your fabric stretches.
Wrap the swatch gently around your hand or arm and compare:
- relaxed width
- comfortably stretched width
This will help you choose the best finished panel circumference.
Finishing
After closing the crown:
- weave in all yarn ends
- inspect the seam
- shape the crown
- straighten the brim
- gently arrange the almond ridges
Light blocking can improve the texture.
Lay the hat flat or shape it over an appropriate form.
Do not aggressively stretch it.
Do not flatten the raised ridges.
Almond Stitch Crochet Beanie
The finished hat gets its distinctive appearance from two textures working together.
At the lower edge, half double crochet slip stitches create a snug vertical ribbed brim. Above it, alternating groups of four slip stitches and four half double crochets change height every two rows while exposed front loops outline the raised sections.
Once the four-row rhythm is established, the entire hat is made as one flat side-to-side rectangle. Joining the short edges creates the tube, and gathering the opposite edge closes the crown, making this textured beanie much simpler to construct than its finished appearance suggests.