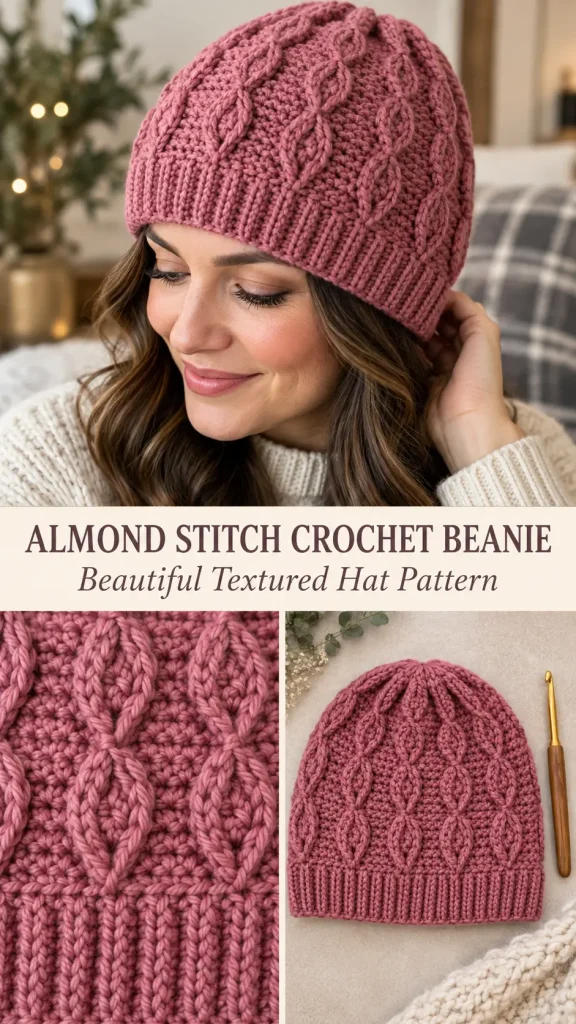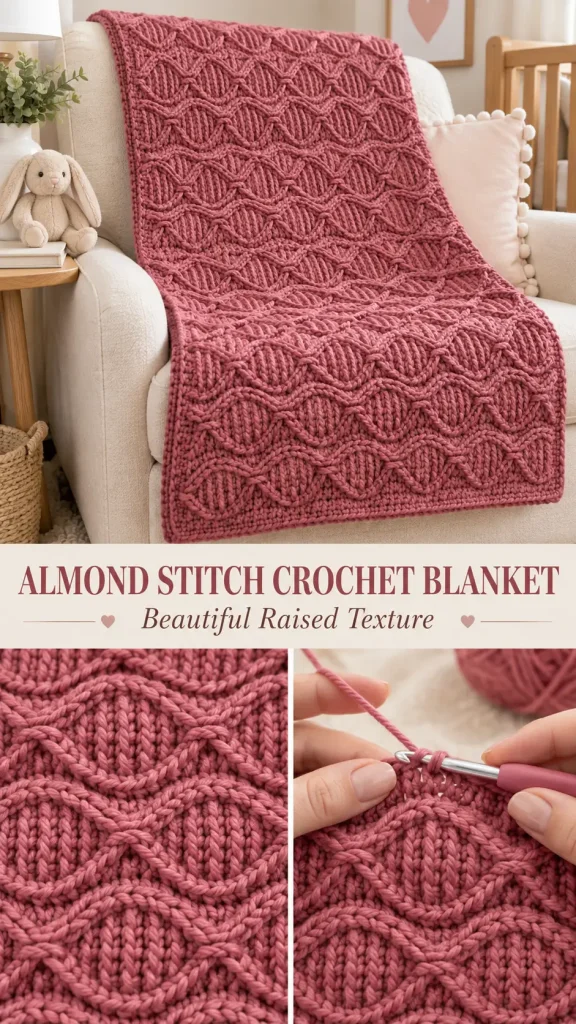
The Almond Stitch creates a dense crochet fabric filled with softly raised oval shapes that resemble overlapping almonds. Alternating groups of half double crochet and slip stitches create the height changes, while working into the back loops leaves continuous raised ridges outlining every motif.
The stitch uses a simple four-row repeat and only two basic stitches, making it much easier to crochet than the finished texture suggests. The classic Almond Stitch is formed with groups of four stitches worked in the back loops, alternating between slip stitches and half double crochet.
This texture works especially well for:
- baby blankets
- throws
- scarves
- cushion covers
- bags
- winter accessories
- textured home decor
Skill Level
Confident Beginner
You should know how to:
- chain
- slip stitch
- half double crochet
- work in the back loop only
- turn rows
- recognize groups of four stitches
Finished Blanket Size
Approximately:
35–37 inches wide × 40–42 inches long
The pattern is easy to resize.
Materials
- Medium weight #4 yarn
- Approximately 1,300–1,500 yards
- 5.5 mm crochet hook
- Yarn needle
- Scissors
- Stitch markers
- Measuring tape
A smooth yarn with good stitch definition works best because the raised almond outlines are created by exposed crochet loops.
Abbreviations — US Terms
ch – chain
sl st – slip stitch
hdc – half double crochet
sc – single crochet
st(s) – stitch(es)
BLO – back loop only
Special Technique — Back Loop Only
Every crochet stitch has two loops across its top:
- front loop
- back loop
For BLO stitches, insert the hook underneath only the back loop.
The unused front loop remains visible on the surface.
As the stitch pattern changes height between short slip stitches and taller half double crochets, those exposed loops curve around the taller sections and create the raised almond-shaped outlines.
Important Slip Stitch Tip
The slip stitches must remain relaxed.
Do not pull them tightly against the hook.
If your slip stitches are much tighter than your half double crochets:
- the fabric will become difficult to work into
- the blanket may shrink in width
- the almond shapes can become distorted
Use the widest part of the hook shaft to size each slip stitch.
Stitch Multiple
The Almond Stitch begins with:
multiple of 8 + 5 chains.
Examples:
- 37 chains
- 45 chains
- 53 chains
- 69 chains
- 85 chains
- 101 chains
- 117 chains
- 133 chains
- 149 chains
For this baby blanket:
Chain 133.
This gives:
132 working stitches
after the first skipped chain.
Practice Swatch
Before beginning the full blanket:
Chain 37.
This gives:
36 working stitches
and allows you to practice several complete almond repeats.
Work Rows 1–5 at least twice.
The almond shapes should become obvious after several rows.
Foundation Chain
Using your main color:
Ch 133 loosely.
If your foundation chains tend to be tight, use a 6 mm hook for the chain only, then switch to the 5.5 mm hook.
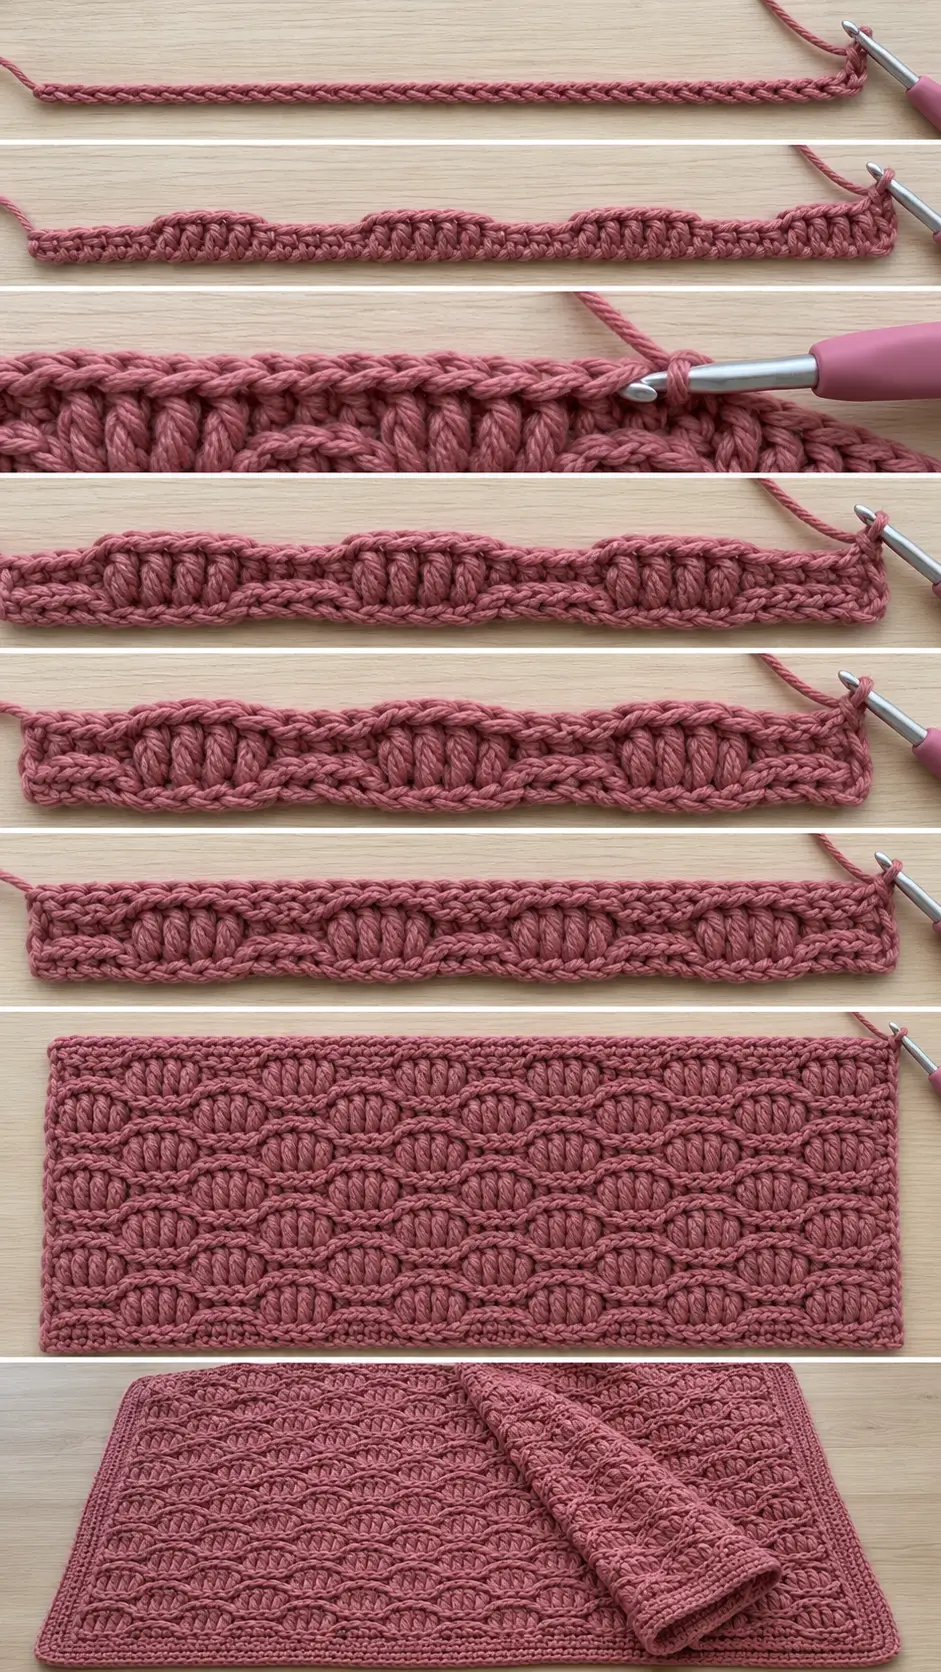
Row 1 — Establish the Stitch Groups
Sl st in the second chain from the hook.
Sl st in each of the next 3 chains.
You now have:
4 sl sts
Next work:
hdc in each of the next 4 chains
Then:
sl st in each of the next 4 chains
Repeat across:
*hdc in next 4 ch, sl st in next 4 ch*
Continue until the end.
You should have:
132 stitches
Ch 1.
Turn.
Row 1 Structure
The row alternates:
4 sl st | 4 hdc | 4 sl st | 4 hdc
The height difference between these two stitch groups begins forming the first curved sections.
Row 2 — Repeat the Same Alignment in BLO
From this point forward, work all pattern stitches into the:
back loop only
Sl st BLO in each of the first:
4 stitches
Then repeat:
*hdc BLO in next 4 sts, sl st BLO in next 4 sts*
Repeat across.
Ch 1.
Turn.
What You Should Notice
The unused front loops from Row 1 should now remain visible as a raised horizontal line.
Near the hdc groups, that line begins curving upward.
Row 3 — Reverse the Stitch Heights
Hdc BLO in each of the first:
4 stitches
Then repeat:
*sl st BLO in next 4 sts, hdc BLO in next 4 sts*
Repeat across.
Ch 1.
Turn.
The stitch groups have now changed position.
Where the previous rows were short, this row becomes tall.
Where the previous rows were tall, this row becomes short.
This reversal begins closing the first almond shapes.
Row 4
Repeat Row 3 exactly:
Hdc BLO in first 4 sts
Then:
*sl st BLO in next 4 sts, hdc BLO in next 4 sts*
Repeat across.
Ch 1.
Turn.
Row 5
Sl st BLO in each of the first:
4 stitches
Then repeat:
*hdc BLO in next 4 sts, sl st BLO in next 4 sts*
Repeat across.
Ch 1.
Turn.
Main Pattern Repeat
The Almond Stitch is now established.
Repeat:
Rows 2–5
until the blanket reaches the desired length. (Rich Textures Crochet)
The four-row repeat is:
Repeat Row A
4 sl st, 4 hdc
across.
Repeat Row B
4 hdc, 4 sl st
across.
Repeat Row C
Repeat Row B.
Repeat Row D
Return to:
4 sl st, 4 hdc
across.
All stitches are worked:
BLO
How the Almond Shape Forms
The shape comes entirely from changing stitch height.
Slip stitch groups are extremely short.
Half double crochet groups are much taller.
When four hdc stitches sit between groups of shorter slip stitches, the fabric rises.
Two rows later, the stitch heights reverse.
The exposed front loops from the BLO technique bend around these raised sections.
This produces the repeated oval or almond outline.
No:
- post stitches
- cables
- surface crochet
- bobbles
- special clusters
are required.
Reading the Fabric
After several repeats, you should be able to see groups of four clearly.
A complete section will appear as:
raised almond | raised almond | raised almond
across the fabric.
If you lose track of the written row, look at the previous row.
If the first four stitches are visibly tall hdc stitches, check whether the next row should continue that height or switch to slip stitches according to your four-row repeat.
Use Stitch Markers
While learning the pattern, place a marker after every:
8 stitches
This separates each complete repeat into:
- 4 stitches of one type
- 4 stitches of the other type
Markers are especially helpful on long blanket rows.
Keeping Slip Stitches Loose
This is the most important part of the stitch.
When making a slip stitch:
- Insert into the back loop.
- Yarn over.
- Pull through the stitch.
- Continue pulling through the loop already on the hook.
- Stop before tightening the loop.
Allow the new loop to rest naturally around the hook shaft.
Do not tug the working yarn afterward.
If the Slip Stitch Row Is Difficult to Work Into
The previous slip stitches were probably too tight.
Try:
- intentionally loosening your slip stitches
- using a 6 mm hook for the entire project
- making the slip stitches on the thicker shaft of the hook
Do not force the hook through extremely tight loops.
That quickly becomes uncomfortable on a full blanket.
Keep the Edge Stitches Visible
The first and last stitches can become difficult to identify because of the alternating stitch heights.
Place one stitch marker in:
- first stitch
- final stitch
of every row.
Move the markers upward as you crochet.
This prevents the blanket from gradually narrowing.
Stitch Count
Maintain:
132 stitches
across every row.
Do not work into the ch-1 turning chain.
The turning chain:
does not count as a stitch
Continue to Blanket Length
Repeat Rows 2–5 until the blanket measures approximately:
39–40 inches
before the border.
For the cleanest finish, stop after completing a full four-row repeat.
Final Straightening Row
To create a stable edge before the border:
Ch 1.
Turn.
Sc loosely across all:
132 stitches
working through both loops.
Fasten off if changing colors for the border.
Simple Single Crochet Border
The Almond Stitch already contains a strong decorative texture, so a simple border works well.
Border Round 1
Attach yarn at one corner.
Ch 1.
Sc evenly across the top.
At the corner:
3 sc
Work sc evenly down the first long side.
At the next corner:
3 sc
Work across the foundation edge.
At the next corner:
3 sc
Work evenly up the final side.
At the last corner:
3 sc
Join with sl st.
Side Border Placement
Because the Almond Stitch alternates very short and taller rows, the side edges can be uneven.
Do not automatically place exactly one sc in every row end.
Instead, space the stitches so the border lies flat.
Check the edge every few inches.
If it:
ruffles: reduce stitches.
If it:
pulls inward: add stitches.
Border Round 2
Ch 1.
Sc in every stitch around.
At each corner:
3 sc in the center corner stitch
Join with sl st.
Optional Almond-Style Ribbed Border
For a more textured border, add one round of half double crochet after the single crochet rounds.
Round 3
Ch 1.
Hdc in every stitch around.
At each corner:
3 hdc
Join.
Round 4
Work hdc around in the third loop of each previous hdc.
This pushes the top loops outward and creates a raised ridge framing the blanket.
Fasten off.
Finished Size
After light blocking:
approximately 35–37 × 40–42 inches
Your actual measurement depends on:
- yarn thickness
- hook size
- slip stitch tension
- blocking
Smaller Stroller Blanket
Try:
Chain 101
This follows the required multiple.
Work until approximately:
30–34 inches long
Add the same border.
Larger Baby Blanket
Try:
Chain 149
Work until approximately:
42–45 inches long
Lap Blanket
Try:
Chain 181
Work until approximately:
50–54 inches long
Throw Blanket
For a larger sofa throw:
Chain 213
Work until approximately:
58–64 inches long
Because this stitch is dense, larger blankets can require substantial yardage.
How to Calculate Your Own Foundation
Choose a multiple of:
8
Then add:
5
Examples:
12 repeats
12 × 8 = 96
96 + 5 = 101 chains
16 repeats
16 × 8 = 128
128 + 5 = 133 chains
18 repeats
18 × 8 = 144
144 + 5 = 149 chains
22 repeats
22 × 8 = 176
176 + 5 = 181 chains
One-Color Blanket
The almond texture is easiest to see in a solid color.
Beautiful options include:
- dusty rose
- cream
- sage
- camel
- dusty blue
- terracotta
- charcoal
- lavender
Medium colors often show the shadows around the raised ridges particularly well.
Two-Color Version
You can change colors after every complete four-row repeat.
For example:
Rows 1–5: cream
next 4-row repeat: sage
next repeat: cream
next repeat: sage
This produces broad textured stripes without interrupting individual almond motifs.
Gradient Version
A tonal gradient can make the raised ridges especially attractive.
Try:
- blush
- dusty rose
- mauve
- plum
or:
- cream
- beige
- camel
- chocolate
Change colors only after completing a full four-row repeat.
Self-Striping Yarn
The stitch also works with slow self-striping yarn.
Because the almond texture creates shadows and ridges, color changes break across the motifs rather than forming perfectly straight stripes.
Choose a smooth yarn rather than a fuzzy one so the raised front loops remain visible.
Best Yarn for Almond Stitch
Smooth yarn is easiest to work with.
Good choices include:
- acrylic
- cotton-acrylic blend
- smooth wool blend
- washable merino
- soft baby yarn
Very fuzzy yarn can make the back loops hard to identify.
Hook Size
For medium #4 yarn:
5.5 mm
is a useful starting point.
If the slip stitches are difficult to work into:
use a 6 mm hook.
If the fabric feels excessively loose:
try 5 mm.
The finished fabric should be:
- dense
- flexible
- deeply textured
- comfortable to drape
Common Problems
Almond Shapes Are Not Appearing
Check that every stitch after Row 1 is worked:
BLO
Working through both loops removes much of the raised ridge effect.
Also confirm that your stitch groups contain exactly:
4 stitches
each.
The Shapes Look Uneven
Check the four-row sequence.
Two consecutive rows need one arrangement of stitch heights before switching back.
If you alternate every single row, the almonds will not form correctly.
Blanket Is Becoming Narrower
Your slip stitches may be too tight.
You may also be missing the final stitch.
Count the row and loosen your slip stitch tension.
Blanket Is Becoming Wider
Do not work into the turning chain.
Maintain exactly:
132 working stitches
for this blanket.
My Hook Will Not Enter the Slip Stitches
They were made too tightly.
Undo the previous row and work the slip stitches more loosely.
This is much easier than fighting through hundreds of tight stitches later.
Raised Ridges Are Hard to See
Make sure you are working in the:
back loop only
The unused front loop creates the ridge.
Fabric Feels Extremely Stiff
Move up a hook size.
Almond Stitch naturally produces a dense fabric, so slightly looser tension usually improves the drape.
Edges Wave
Your slip stitch and hdc tension may be very different.
Try to keep both stitch types relaxed and consistent.
A simple border will correct small edge variations.
Blocking
Light blocking improves the almond shapes.
After finishing:
- Weave in every yarn end.
- Wash or lightly dampen according to the yarn label.
- Lay the blanket flat.
- Straighten the sides.
- Gently shape the raised almond ridges.
- Allow the blanket to dry completely.
Do not aggressively stretch the fabric.
Do not press the raised ridges flat.
Matching Almond Stitch Pillow
For a coordinating pillow, begin with a foundation chain following:
multiple of 8 + 5
Work until the panel is approximately square.
Make two matching panels.
Place them together.
Sc around three sides.
Insert a pillow form.
Sc the final edge closed.
Almond Stitch Scarf
For a textured winter scarf:
Chain 37
Work the Almond Stitch until approximately:
65–70 inches long
Finish with one sc row at each end.
The dense texture makes this stitch especially warm.
Almond Stitch Bag Panel
For a structured handbag or tote, use cotton or a firm cotton blend.
Crochet two matching rectangles.
Add:
- solid gusset
- lining
- reinforced handles
The dense Almond Stitch fabric works especially well for bags because it has very little open space.
Almond Ridges Crochet Blanket
The distinctive almond shapes come from an unusually simple combination: four short slip stitches beside four taller half double crochets, all worked through the back loops.
By repeating one stitch-height arrangement for two rows and then reversing it, the exposed front loops curve naturally around the raised sections and form the overlapping almond outlines.
Once the four-row rhythm becomes familiar, the stitch requires very little counting and can be adapted easily to blankets, scarves, cushions, bags, and other projects that benefit from a dense, highly textured crochet fabric.