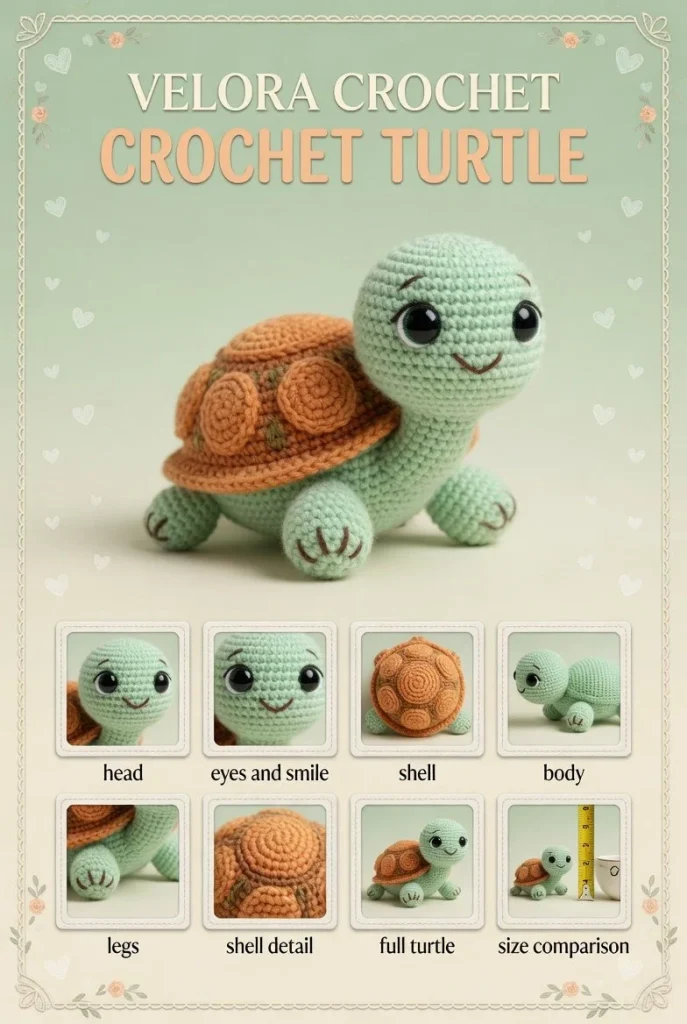
Create your very own adorable mini crochet turtle with this easy beginner-friendly amigurumi pattern! This delightful project features a rounded shell in a warm burnt orange hue and a charming light sage green body, all crafted using tight single crochet stitches worked in spiral rounds. With the addition of small black safety eyes and a simple embroidered smile, this soft and inviting handmade toy is perfect for beginners looking to dive into the world of amigurumi.
Materials
- Medium-weight yarn:
- Burnt orange (for the shell)
- Light sage green (for the body)
- Black safety eyes (10mm)
- Embroidery thread (for the smile)
- Crochet hook (size G/4.0 mm)
- Scissors
- Yarn needle
- Stitch marker
Abbreviations
- ch = chain
- sc = single crochet
- inc = increase (2 sc in the same stitch)
- st = stitch
- rnd = round
- sl st = slip stitch
Pattern Instructions
Head
- Start with a magic ring, ch 1.
- Round 1: 6 sc in the magic ring (6)
- Round 2: inc around (12)
- Round 3: (1 sc, inc) x 6 (18)
- Round 4: (2 sc, inc) x 6 (24)
- Rounds 5-6: sc around (24)
- Fasten off, leaving a long tail for sewing.
Body
- Start with a magic ring, ch 1.
- Round 1: 6 sc in the magic ring (6)
- Round 2: inc around (12)
- Round 3: (1 sc, inc) x 6 (18)
- Round 4: (2 sc, inc) x 6 (24)
- Rounds 5-9: sc around (24)
- Fasten off, leaving a long tail for sewing.
Arms
- Start with a magic ring, ch 1.
- Round 1: 5 sc in the magic ring (5)
- Rounds 2-4: sc around (5)
- Fasten off, leaving a long tail for sewing. Make 4.
Legs
- Start with a magic ring, ch 1.
- Round 1: 6 sc in the magic ring (6)
- Rounds 2-4: sc around (6)
- Fasten off, leaving a long tail for sewing. Make 4.
Ears / Details
- For each ear, ch 4.
- Row 1: sc in the 2nd ch from the hook, then sc in the next 2 ch (3)
- Fasten off, leaving a long tail for sewing. Make 2.
Accessories (if any)
- You can enhance your turtle with a small flower or a bow, using basic crochet techniques or embellishing with felt.
Assembly & Finishing
- Attach the head to the body using the yarn tail, securing it firmly.
- Position and sew the arms and legs onto the body.
- Attach the ears to the top of the head.
- Secure the black safety eyes on the head, ensuring they are evenly spaced.
- Use the embroidery thread to stitch a small smile onto the face.
Tips for Best Results
- Keep your tension consistent to ensure even stitches throughout your project.
- Use a stitch marker to help keep track of the beginning of each round.
- Take your time with assembly to ensure everything is securely attached and looking neat.
- Experiment with different colors and embellishments to make your turtle unique.
- Don’t hesitate to re-do any parts if you’re not satisfied; practice makes perfect!
Conclusion
This cute amigurumi turtle is a fantastic project for crochet beginners looking to explore the art of crafting soft toys. With simple stitches and detailed instructions, you’ll have a charming little friend that showcases your creativity and skills. Happy crocheting!



