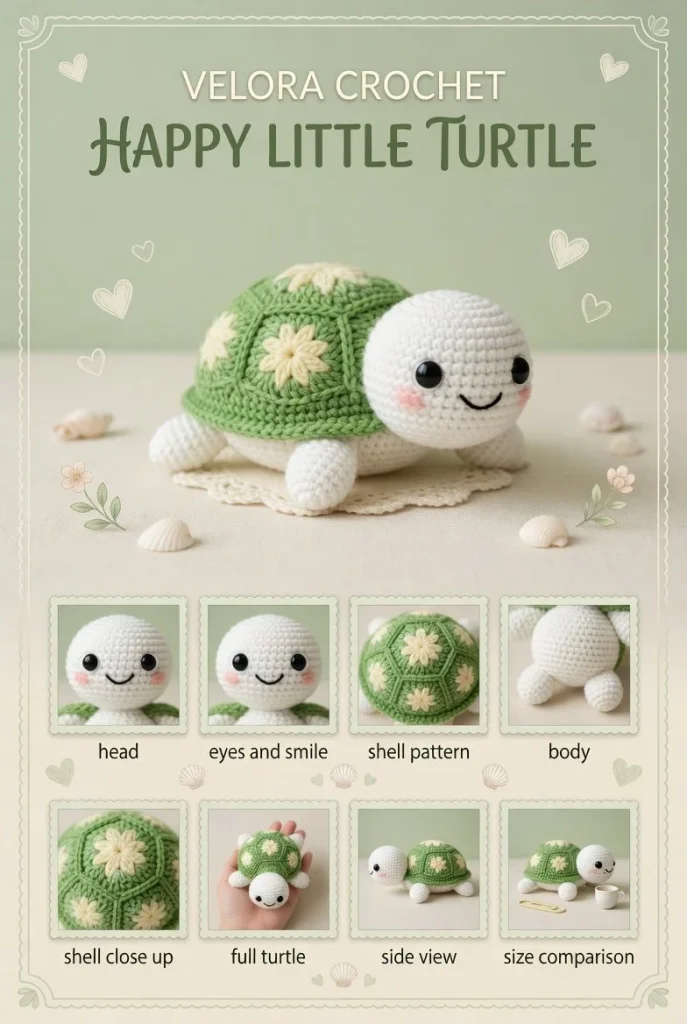
Creating an adorable amigurumi turtle is a delightful project for beginners in crochet. This engaging pattern will guide you through crafting a charming mini crochet turtle featuring a soft beige body, round embroidered black eyes, rosy pink cheeks, and a beautifully detailed green shell adorned with hexagonal segments. Let’s dive into this fun and straightforward crochet pattern that ensures durability and cuteness.
Materials
- Medium-weight yarn in soft beige, green, and a hint of pink
- Crochet hook suitable for medium-weight yarn (typically 4mm or G/6)
- Black embroidery thread for eyes
- Yarn needle for weaving ends
- Scissors
- Polyester fiberfill for stuffing
Abbreviations
- ch: chain
- sc: single crochet
- inc: increase (2 sc in the same stitch)
- dec: decrease (single crochet two stitches together)
- sl st: slip stitch
- st: stitch
Pattern Instructions
Head
- Start with a magic ring.
- Round 1: 6 sc in the ring (6 sts)
- Round 2: inc in each st (12 sts)
- Round 3: sc in next st, inc repeat around (18 sts)
- Round 4-6: sc in each st (18 sts)
- Round 7: sc in next st, dec repeat around (12 sts)
- Stuff lightly and continue to decrease.
- Round 8: dec around (6 sts)
- Fasten off, leaving a long tail for sewing.
Body
- Start with a magic ring.
- Round 1: 6 sc in the ring (6 sts)
- Round 2: inc in each st (12 sts)
- Round 3: sc in next st, inc repeat around (18 sts)
- Round 4-10: sc in each st (18 sts)
- Round 11: sc in next st, dec repeat around (12 sts)
- Round 12: dec around (6 sts)
- Stuff the body and fasten off, leaving a long tail for sewing.
Arms
- Begin with a magic ring.
- Round 1: 5 sc in the ring (5 sts)
- Round 2-5: sc in each st (5 sts)
- Fasten off, leaving a tail for sewing. Make 2.
Legs
- Start with a magic ring.
- Round 1: 6 sc in the ring (6 sts)
- Round 2-7: sc in each st (6 sts)
- Fasten off, leaving a tail for sewing. Make 4.
Ears / Details
- Use soft beige yarn: ch 3, sl st in the first chain to form a loop.
- Round 1: 5 sc into the loop (5 sts)
- Round 2-3: sc in each st (5 sts)
- Fasten off, leaving a tail for sewing. Make 2.
Accessories (if any)
- Optional: Create a small bow using pink yarn. Chain 6, sc back, and tie it in the center.
Assembly & Finishing
- Attach head to the body using a yarn needle.
- Sew on arms and legs in appropriate positions.
- Position ears on top of the head and secure with stitches.
- Embroider the black eyes and add pink blush using pink yarn.
- Carefully sew the hexagonal segments onto the turtle’s back for the shell design.
Tips for Best Results
- Use a stitch marker to keep track of your rounds.
- Ensure all parts are stuffed firmly for a structured shape.
- Take your time with the assembly to ensure everything is aligned properly.
- Practice tension to keep stitches even, especially for beginners.
- Don’t hesitate to customize colors for a unique touch!
Conclusion
Congratulations on crafting your very own amigurumi turtle! This beginner crochet project not only enhances your skills but also results in a delightful handmade toy. Keep practicing, and soon you’ll be creating all sorts of adorable crochet creatures! Happy crocheting!




This Pattern is incomplete. the
shell pattern is not included. Also this pattern gives Ears for a Turtle who has no Ears.