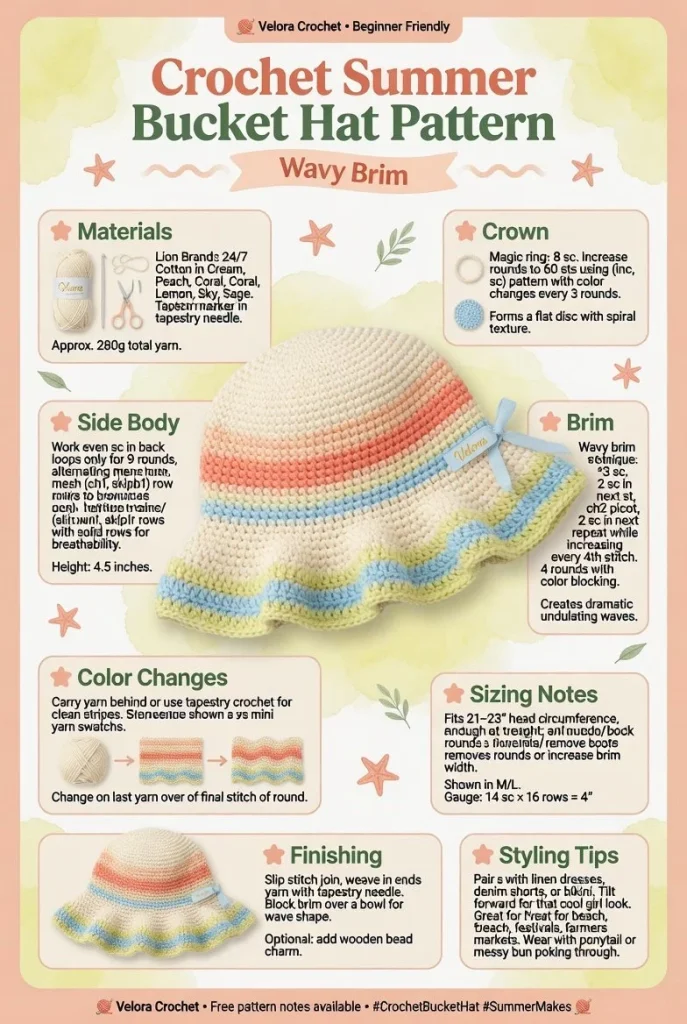
Crocheting a summer bucket hat is the perfect project to showcase your skills while adding a stylish accessory to your wardrobe. This Velora Crochet Bucket Hat features a comfortable crown, a beautiful stitch texture, and a slightly floppy or wavy brim. With the option to add vibrant color stripes, it becomes a standout piece for beach days or casual outings. Let’s dive into the details of this fun and trendy crochet pattern!
Materials
- Worsted weight cotton yarn (or yarn of your choice)
- Size H (5.0 mm) crochet hook
- Scissors
- Tapestry needle
- Measuring tape
Abbreviations
- MR: magic ring
- ch: chain
- sc: single crochet
- dc: double crochet
- inc: increase
- dec: decrease
- sl st: slip stitch
Crown
To start, create the crown of the hat using the magic ring method.
- Round 1: Make 10 sc in the MR. Pull tight to close. (10 sts)
- Round 2: Inc in each st around. (20 sts)
- Round 3: *Sc in next st, inc in next st; repeat from * around. (30 sts)
- Round 4: *Sc in next 2 sts, inc in next st; repeat from * around. (40 sts)
- Round 5: *Sc in next 3 sts, inc in next st; repeat from * around. (50 sts)
The crown should feel snug but not tight on your head. Make sure to check the fit frequently.
Side Body
Continue by working the side body of the bucket hat.
- Row 1: Ch 1, sc in each st around. Join with sl st to the first sc.
- Repeat Row 1 until the height measures approximately 4 inches or your desired length.
This part creates a lovely structure, so keep your tension even to ensure it maintains its shape.
Brim
Now, it’s time to create the wavy brim.
- Round 1: Ch 1, *dc in next st, ch 1, skip 1 st; repeat from * around. Join with sl st.
- Round 2: Ch 1, *sc in next ch-1 space; repeat from * around. Join with sl st.
- Round 3: Ch 1, *dc in next sc, ch 1; repeat from * around with a final sl st to join.
For a floppy brim, try blocking it gently, which can give it a nice drape while retaining your desired waves.
Color Changes (Optional)
If you’d like to incorporate color stripes, here’s how:
- At the beginning of any round while working on the brim, change your yarn color by completing the last yarn over of the last stitch in the previous color.
- Continue with your new color for the desired number of rounds to create stripes.
Don’t hesitate to mix and match colors based on your style!
Sizing Notes
This pattern creates a standard adult size hat. If you wish to adjust the size, consider adding or reducing rounds in the crown and side body. Measure around your head for accuracy to make the perfect fit.
Finishing
To finish, weave in all loose ends with a tapestry needle. You might also want to steam block your hat gently to smooth out the stitches and ensure it holds its structure beautifully.
Styling Tips
This summer bucket hat is versatile and can be styled in numerous ways:
- Pair it with a lightweight sundress for a breezy summer look.
- Wear it with a casual t-shirt and shorts for an effortless day out.
- Accessorize with some beachy jewelry and sunglasses for a fun beach day.
When crocheting your bucket hat, remember that adjusting the tension can significantly influence its final shape. I always recommend checking your fit throughout the process to ensure a cozy and flattering finish!
In conclusion, this Velora Crochet Bucket Hat is not only a fun DIY crochet project but also a useful accessory for summertime adventures. Feel free to experiment with colors or add personal touches to make it uniquely yours! Happy crocheting!



