Introduction
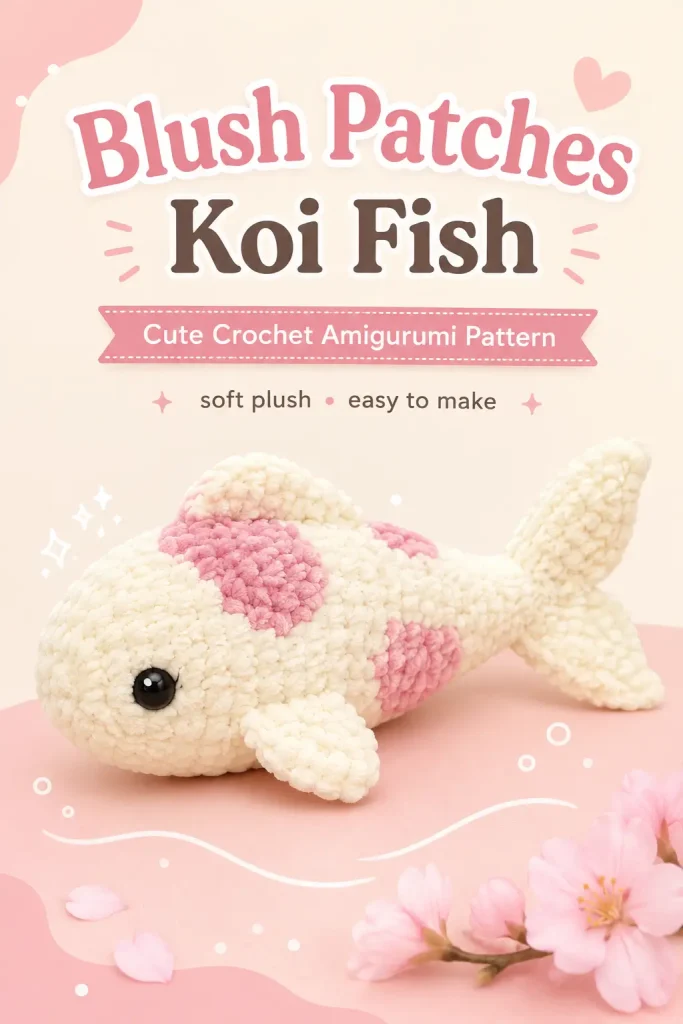
A crochet koi fish plush has such a soft, peaceful charm. The long body, rounded face, flowing fins, and gentle patchy colors make it feel like a handmade little pond friend you can keep on a shelf, gift to a fish lover, or add to a plush amigurumi collection.
This Blush Patches Koi Fish Amigurumi is an original pattern inspired by the design idea in the screenshot: a white plush koi fish with soft pink patches, black eyes, fins, and a tapered tail. The construction, stitch counts, shaping, fins, tail, patches, and assembly are written fresh so the design is unique and buildable.
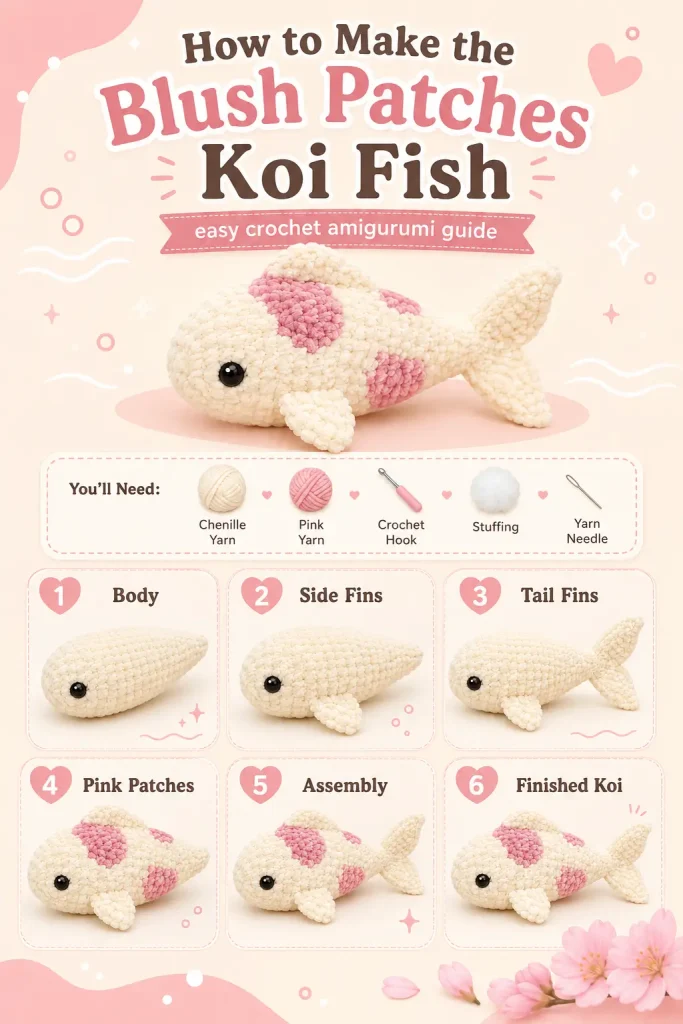
The finished fish has a soft cream-white body, pastel blush-pink patches, rounded head, tapered tail end, side fins, dorsal fin, flowing tail fins, and a cute simple face.
Description
This amigurumi koi fish is made with plush chenille yarn for a soft, squishy finish. The body is worked from the nose toward the tail in continuous rounds, increasing into a rounded head and belly, then narrowing toward the tail.
The pink patches are made as small appliqué pieces and sewn onto the body so you can place them naturally, just like koi markings. The fins are made separately and attached after the body is stuffed. The tail is built from two soft fin pieces that sit at the back and give the fish a flowing shape.
This easy crochet pattern is a lovely plush crochet toy, beginner-friendly amigurumi project for confident beginners, and a sweet handmade gift idea.
Materials
- Super bulky chenille yarn in soft cream white for the main body
- Super bulky chenille yarn in blush pink for the patches
- Super bulky chenille yarn in soft cream white for fins and tail
- Small amount of black yarn for embroidered eyes, or 12 mm safety eyes
- 6 mm crochet hook
- Yarn needle
- Scissors
- Stitch marker
- Polyester fiberfill
- Pins for assembly
Finished Size
Approximate finished size with super bulky chenille yarn:
- Length: 11–13 inches
- Body width: 4–5 inches
- Tail width: 4–5 inches
Finished size may vary depending on yarn, hook size, stuffing, and tension.
Gauge
Gauge is not strict for this plush fish.
Your stitches should be tight enough to hold stuffing.
If stuffing shows through, use a smaller hook.
If the fabric feels too stiff, use a slightly larger hook.
Abbreviations
- MR: magic ring
- ch: chain
- sc: single crochet
- hdc: half double crochet
- dc: double crochet
- inc: increase, 2 sc in the same stitch
- dec: invisible decrease
- sl st: slip stitch
- st: stitch
- sts: stitches
- BLO: back loop only
- FO: fasten off
Pattern Notes
This pattern is written in US crochet terms.
The fish body is worked in continuous rounds.
Do not join rounds unless instructed.
Use a stitch marker to mark the first stitch of each round.
Stuff the body gradually as you work.
The fins, tail, and pink patches are made separately and sewn on.
For baby-safe toys, embroider the eyes instead of using safety eyes.
Step-by-Step Instructions
Body
Use soft cream-white yarn.
Round 1
Make a MR.
Work 6 sc into the ring. (6)
Round 2
Inc in each st around. (12)
Round 3
Repeat around: sc in next st, inc in next st. (18)
Round 4
Sc in each st around. (18)
Round 5
Repeat around: sc in next 2 sts, inc in next st. (24)
Round 6
Sc in each st around. (24)
Round 7
Repeat around: sc in next 3 sts, inc in next st. (30)
Rounds 8–13
Sc in each st around. (30)
If using safety eyes, place them between Rounds 5 and 6, about 7 stitches apart on the front of the head.
Round 14
Repeat around: sc in next 8 sts, dec. (27)
Rounds 15–17
Sc in each st around. (27)
Begin stuffing the head and front body.
Shape the front into a rounded fish head.
Round 18
Repeat around: sc in next 7 sts, dec. (24)
Rounds 19–21
Sc in each st around. (24)
Continue stuffing lightly.
Round 22
Repeat around: sc in next 6 sts, dec. (21)
Rounds 23–25
Sc in each st around. (21)
Round 26
Repeat around: sc in next 5 sts, dec. (18)
Rounds 27–29
Sc in each st around. (18)
The body should now begin tapering toward the tail.
Round 30
Repeat around: sc in next 4 sts, dec. (15)
Rounds 31–33
Sc in each st around. (15)
Add more stuffing, but do not overstuff the tail end.
Round 34
Repeat around: sc in next 3 sts, dec. (12)
Rounds 35–36
Sc in each st around. (12)
Flatten the opening slightly.
Sc through both layers across the tail opening. (6)
FO and weave in end.
This flattened end will hold the tail fins.
Side Fins
Make 2 using soft cream-white yarn.
Round 1
Make a MR.
Work 6 sc into the ring. (6)
Round 2
Inc in each st around. (12)
Round 3
Sc in each st around. (12)
Round 4
Repeat around: sc in next 2 sts, dec. (9)
Flatten the fin.
Do not stuff.
Sc through both layers across the opening. (4)
FO, leaving a long tail for sewing.
Shape each fin into a soft oval paddle.
Dorsal Fin
Use soft cream-white yarn.
This fin sits on top of the fish.
Row 1
Ch 9.
Sc in 2nd ch from hook.
Hdc in next ch.
Dc in next 4 ch.
Hdc in next ch.
Sc in last ch.
Ch 1, turn.
Row 2
Sc in first st.
Hdc in next st.
Dc in next 4 sts.
Hdc in next st.
Sc in last st.
FO, leaving a long tail for sewing.
The dorsal fin should look softly curved and slightly triangular.
Tail Fins
Make 2 using soft cream-white yarn.
Row 1
Ch 8.
Sc in 2nd ch from hook.
Hdc in next ch.
Dc in next 3 ch.
Hdc in next ch.
Sc in last ch.
Ch 1, turn.
Row 2
Sc in first st.
Hdc in next st.
Dc in next 3 sts.
Hdc in next st.
Sc in last st.
Ch 1, turn.
Row 3
Sc2tog.
Hdc in next st.
Dc in next st.
Hdc in next st.
Sc2tog.
FO, leaving a long tail for sewing.
Make the second tail fin the same way.
These two pieces will be sewn to the flattened tail end, one angled upward and one angled downward.
Small Belly Fin
Optional, make 2 using soft cream-white yarn.
Fin
Ch 6.
Sc in 2nd ch from hook.
Hdc in next ch.
Dc in next ch.
Hdc in next ch.
Sc in last ch.
FO, leaving a long tail for sewing.
These small fins can be added under the fish near the belly for a fuller koi look.
Pink Body Patches
Make 3–4 patches using blush pink yarn.
Make different sizes so the koi markings look natural.
Small Patch
Make 2.
Round 1
Make a MR.
Work 6 sc into the ring. (6)
Round 2
Work 2 sc in first st.
Hdc in next st.
Dc in next st.
Hdc in next st.
Sc in next st.
Sl st in last st.
FO, leaving a long tail for sewing.
Medium Patch
Make 1 or 2.
Round 1
Make a MR.
Work 6 sc into the ring. (6)
Round 2
Inc in each st around. (12)
Round 3
Sc in next 2 sts.
Hdc in next 3 sts.
Dc in next 2 sts.
Hdc in next 3 sts.
Sc in next 2 sts.
Sl st to finish.
FO, leaving a long tail for sewing.
Long Patch
Make 1 for the back.
Row 1
Ch 8.
Sc in 2nd ch from hook.
Hdc in next ch.
Dc in next 3 ch.
Hdc in next ch.
Sc in last ch.
Now work along the opposite side of the chain.
Sc in same end stitch.
Hdc in next ch.
Dc in next 3 ch.
Hdc in next ch.
Sc in last ch.
Sl st to finish.
FO, leaving a long tail for sewing.
Face
If you did not use safety eyes, embroider two black eyes on the front sides of the head between Rounds 5 and 6.
Optional: embroider a tiny curved mouth with black yarn.
Keep the expression simple and sweet.
Do not add too many face details because the koi shape and patches should stay the main focus.
Assembly
Pin all pieces before sewing.
Attach the Pink Patches
Place the largest blush pink patch on the top back of the fish.
Place one medium patch on one side of the body.
Place one small patch near the tail.
Place another small patch near the side or top of the head if desired.
Sew around each patch with matching pink yarn.
Do not pull too tightly.
The patches should sit flat against the plush body.
Attach the Side Fins
Place one side fin on each side of the fish, slightly behind the head.
Angle the fins slightly backward.
Sew the flattened edge to the body.
Leave the rounded end free so it looks like a soft fin.
Attach the Dorsal Fin
Place the dorsal fin along the top of the fish, beginning behind the head and ending before the tail narrows.
Pin in place.
Sew along the lower edge of the fin.
Keep the top edge free and softly raised.
Attach the Tail Fins
Place the two tail fins at the flattened tail end.
One fin should angle upward.
The other fin should angle downward.
Sew each fin securely to the tail opening.
Add a few extra stitches through the center where both fins meet.
Attach the Belly Fins
If using the optional belly fins, place them underneath the fish, slightly behind the side fins.
Sew them securely at the base.
Final Shaping
Hold the fish gently in both hands.
Smooth the body into a long koi shape.
Round the head with your fingers.
Shape the tail end slightly flatter.
Adjust the fins so they flow backward.
Check that the pink patches are secure.
Finishing
Weave in all yarn tails.
Trim any fuzzy chenille ends carefully.
Check all sewn pieces.
Make sure the eyes are secure.
If using as a toy, tug lightly on all fins and patches to test the stitching.
Optional Keychain or Hanging Loop
For a small hanging version, join yarn at the top of the body behind the head.
Ch 12.
Sl st back into the same space.
FO and weave in ends securely.
Attach a keychain ring or hanging cord.
For a plush toy version, skip this step.
Tips & Variations
Use cream white and blush pink for a soft kawaii koi look.
Use orange patches for a classic koi fish style.
Use gold patches for a warm pond-fish design.
Use black and red patches for a dramatic koi version.
Make the fins slightly longer for a more flowing fish shape.
Use embroidered eyes for baby-safe toys.
Use safety eyes only for older children or display plushies.
Sew patches after stuffing so you can place them naturally on the rounded body.
Keep the tail lightly stuffed so it does not become bulky.
FAQ
Is this koi fish pattern beginner-friendly?
This pattern is best for confident beginners. The body uses simple rounds, but the fins, patches, and assembly need careful placement.
Is this the exact pattern from the screenshot?
No. This is a new original koi fish amigurumi pattern inspired by the visible design idea: a white plush koi fish with pink patches, fins, and tail. The stitch counts, shaping, patch placement, fins, and assembly are original.
What yarn works best?
Super bulky chenille yarn works best for a soft plush fish. Cotton or acrylic yarn can be used for a smaller, firmer amigurumi.
How do I make the fish longer?
Add extra straight rounds between Rounds 19–25 before beginning the final taper.
How do I make the koi markings look natural?
Use patches in different sizes and place them unevenly. Avoid making both sides perfectly symmetrical.
Conclusion
The Blush Patches Koi Fish Amigurumi is soft, cute, and full of handmade charm. The cream-white plush body, blush pink markings, rounded head, side fins, dorsal fin, and flowing tail give it a sweet koi-inspired look while keeping the construction clear and buildable.
Make it as a plush crochet toy, bag charm, nursery decoration, pond-themed gift, or special amigurumi piece for your handmade collection.



