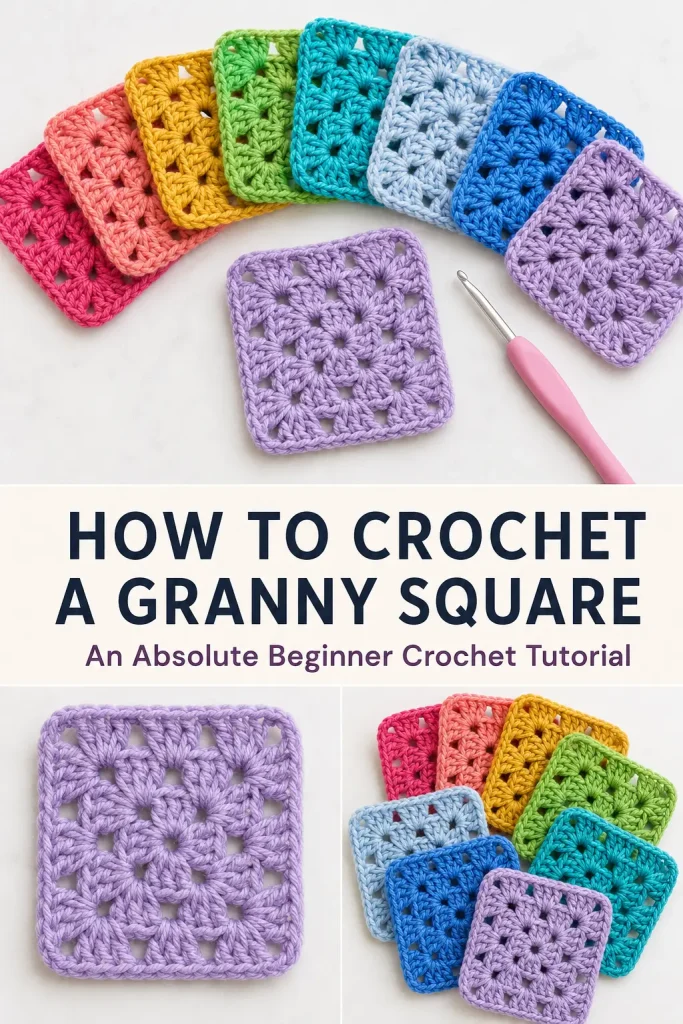
A classic granny square is one of the best places to begin learning crochet. It introduces the basic movements you will use in many future projects, including chaining, slip stitching, double crochet, single crochet, working into spaces, turning your work, and fastening off.
This beginner granny square pattern creates a small three-round motif with four clear corners and evenly spaced clusters. The instructions below follow the supplied tutorial’s construction, including the chain-ring center, chain-two corners, turning after each round, and the special single-crochet corner finish used to position the hook for the next round.
Description
The finished project is a traditional three-round crochet granny square made from groups of three double crochet stitches. The center begins with a small chain ring, and each corner is formed with a chain-two space. The square is turned after each completed round to help it remain balanced and straight. Worked in a single color, this small motif is ideal for beginner practice, coasters, bunting, patchwork bags, blankets, scarves, and other granny square projects.
Materials
- DK or worsted-weight yarn
- Crochet hook suitable for the chosen yarn
- Yarn needle
- Scissors
Abbreviations
- ch: chain
- ch-sp: chain space
- dc: double crochet
- sc: single crochet
- sl st: slip stitch
- sp: space
- st: stitch
- sts: stitches
Pattern Notes
- This pattern uses US crochet terminology.
- The beginning ch 3 counts as one double crochet.
- Groups of three double crochet stitches form the sides of the square.
- Ch 2 forms each regular corner space.
- Work into the chain spaces rather than into the tops of the double crochet stitches.
- Turn the square after Rounds 1 and 2 before beginning the next round.
- At the end of Rounds 1 and 2, use ch 1 and sc in the top of the beginning ch 3. The single crochet completes the corner while positioning the hook near the middle of the corner space.
- At the end of Round 3, finish with ch 2 and a slip stitch because no additional round follows.
- Leave yarn tails approximately 5–6 inches long so they can be woven in securely.
- Difficulty level: absolute beginner.
Step-by-Step Instructions
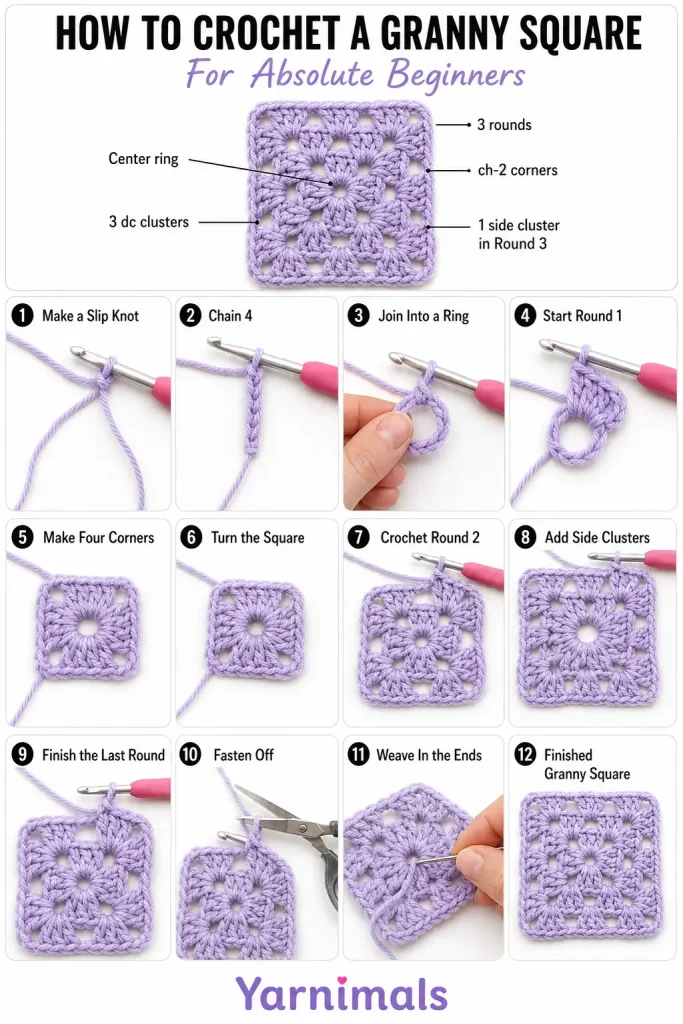
How to Hold the Crochet Hook and Yarn
Hold the crochet hook in whichever way feels most comfortable.
One beginner-friendly method is the knife grip:
- Hold the crochet hook as you would hold a table knife.
- Keep your hand relaxed rather than gripping the hook tightly.
- Hold the cut yarn end with the ring finger and little finger of your other hand.
- Bring the working yarn over the first finger.
- Pinch the yarn with the thumb and middle finger.
- Maintain enough tension to control the yarn while still allowing it to move smoothly through your fingers.
There is no single correct way to hold the hook and yarn. Comfort and consistent tension are more important than copying an exact hand position.
Make the Starting Loop
Leave a yarn tail at least 5–6 inches long.
Form a slip knot and place it on the crochet hook.
Tighten it gently so it fits the hook without becoming difficult to move.
Crochet the Starting Chain
Ch 4.
To make each chain:
- Yarn over.
- Rotate the hook slightly to catch the yarn.
- Pull the yarn through the loop already on the hook.
Do not count the loop currently on the hook as a chain.
Join the Chain Into a Ring
Insert the hook into the first chain.
Yarn over and pull through:
- The first chain
- The loop already on the hook
This creates one slip stitch and closes the four chains into a small ring.
The opening in the center of this ring is where Round 1 will be worked.
Round 1
Ch 3.
The beginning ch 3 counts as the first double crochet.
Work 2 dc into the center ring.
You now have the first group of three double crochet stitches:
- Beginning ch 3
- 2 dc
Ch 2 to form the first corner.
Work 3 dc into the center ring.
Ch 2.
Work 3 dc into the center ring.
Ch 2.
Work 3 dc into the center ring.
At this point, the round contains four groups of three double crochet stitches.
For the final corner:
Ch 1.
Work 1 sc into the top of the beginning ch 3.
The ch 1 and sc together act as the final chain-two corner while leaving the hook positioned near the center of the corner.
Round 1 structure:
- Four groups of 3 dc
- Four corner spaces
The square may still look slightly rounded. Gently pull the four corners outward to help define the shape.
Round 2
Ch 3.
Turn the square over so you work from the opposite side.
Work 2 dc into the same corner space.
The beginning ch 3 and 2 dc form the first group of three double crochets.
Move to the next corner space.
Work the following into that corner:
- 3 dc
- Ch 2
- 3 dc
Move to the next corner space.
Work:
- 3 dc
- Ch 2
- 3 dc
Move to the next corner space.
Work:
- 3 dc
- Ch 2
- 3 dc
Return to the corner where the round began.
Work 3 dc into the same beginning corner space.
To finish the corner:
Ch 1.
Work 1 sc into the top of the beginning ch 3.
The completed round has two groups of three double crochets at every corner.
Round 3
Ch 3.
Turn the square over again.
Work 2 dc into the same corner space.
The beginning ch 3 and 2 dc form the first group of three double crochets.
First Side Space
Move to the next space along the side.
Work 3 dc into that space.
First Full Corner
Move to the next corner space.
Work:
- 3 dc
- Ch 2
- 3 dc
Second Side Space
Move to the next side space.
Work 3 dc.
Second Full Corner
Move to the next corner space.
Work:
- 3 dc
- Ch 2
- 3 dc
Third Side Space
Move to the next side space.
Work 3 dc.
Third Full Corner
Move to the next corner space.
Work:
- 3 dc
- Ch 2
- 3 dc
Fourth Side Space
Move to the next side space.
Work 3 dc.
Complete the Beginning Corner
Return to the corner where the round began.
Work 3 dc into that same corner space.
Ch 2.
Join with a sl st into the top of the beginning ch 3.
Because this is the final round, use a full ch-2 corner and a slip-stitch join rather than the ch-1 and sc finish used in the earlier rounds.
Fasten Off
Ch 1.
Cut the yarn, leaving a tail approximately 5–6 inches long.
Pull the yarn tail completely through the chain.
Tighten gently to secure the final stitch.
Weave In the Ends
Thread one yarn tail onto a yarn needle.
Weave it through several nearby stitches on the wrong side of the granny square.
Change direction and weave through another group of stitches.
Trim the remaining yarn close to the fabric.
Repeat with the second yarn tail.
Avoid cutting the tails too short before weaving them in, as they may work loose during washing or use.
Shape the Granny Square
Hold one corner in each hand and gently pull outward.
Repeat with the remaining corners.
The motif should have:
- Four defined corners
- Straight sides
- Even groups of three double crochets
- One open chain-two space at each corner
- One side space between the corners in Round 3
For a more polished finish, lightly block the granny square.
How the Granny Square Grows
Every new round follows the same general structure.
In Every Corner Space
Work:
- 3 dc
- Ch 2
- 3 dc
In Every Side Space
Work:
- 3 dc
Each new round adds one additional side space along every side of the square.
For example:
- Round 1 has no side spaces between the corners.
- Round 2 still consists mainly of corner groups.
- Round 3 has one side cluster between each pair of corners.
- Round 4 will have two side clusters between each pair of corners.
- Round 5 will have three side clusters between each pair of corners.
Continue turning the square after each round for a balanced, straight motif.
Tips and Variations
Use a light-colored, smooth yarn for your first granny square. Dark, fuzzy, or heavily textured yarn can make the chain spaces harder to see.
Place a stitch marker in the top of the beginning ch 3 if you have difficulty locating it at the end of the round.
Keep the corner chains relaxed. Tight chain spaces can make the square curl or pull inward.
Do not crochet into the tops of the double crochet stitches. Traditional granny square clusters are worked into the open spaces between groups.
Count the four corners after every round. Missing a corner is one of the most common reasons a granny square loses its shape.
Turn the work after every round to reduce twisting and help the square remain straight.
Use one color for beginner practice. Once you feel comfortable, change colors at the beginning of each round.
To create a larger square, repeat the established pattern until it reaches the desired size.
For a blanket, make many squares of the same size and join them after blocking.
Frequently Asked Questions
Does the beginning chain three count as a stitch?
Yes. In this pattern, the beginning ch 3 counts as the first double crochet of the first cluster.
Why do I turn the granny square after every round?
Turning changes the direction of the stitches in each round. This can help reduce twisting and keep the square more balanced.
Why finish Rounds 1 and 2 with a single crochet?
The ch 1 and sc complete the chain-two corner while positioning the hook near the middle of the corner space. This makes it easier to begin the next round in the correct place.
Conclusion
This beginner granny square teaches the essential crochet skills needed for many future projects. Once you can make the starting ring, double crochet clusters, chain-two corners, and side spaces, you can continue adding rounds or combine multiple motifs into a larger handmade project. Practice the square in a few different colors, save the pattern, and use your finished motifs for blankets, bags, scarves, cushions, or simple crochet home décor.



