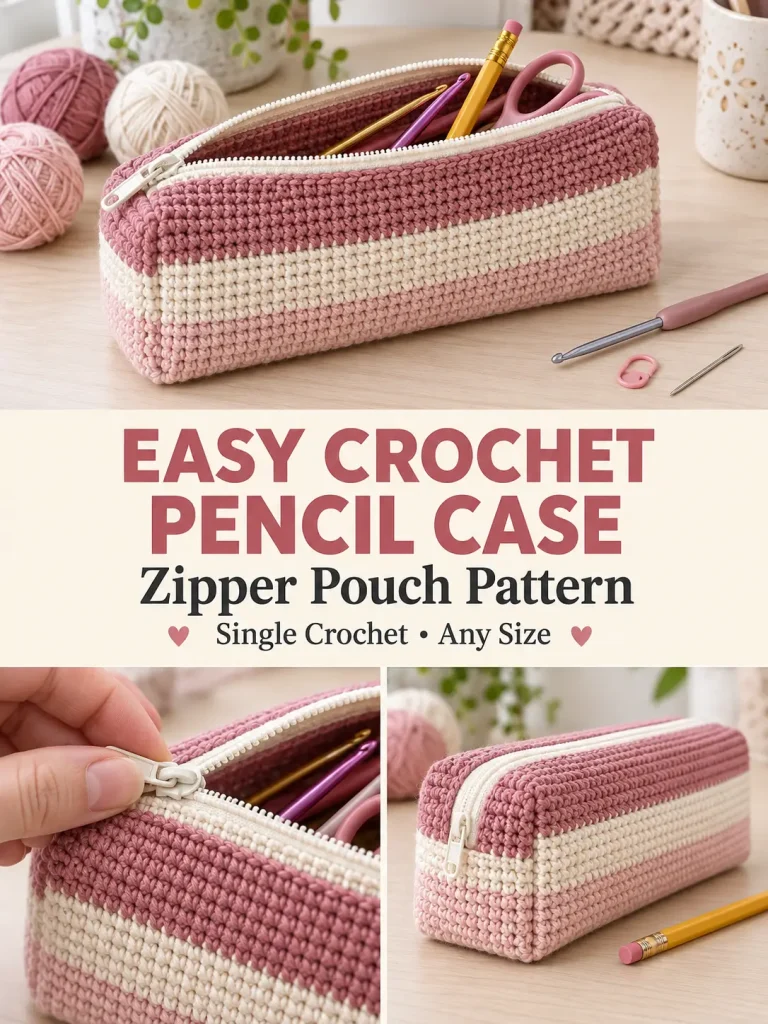
This striped crochet pencil case is a simple way to turn basic single crochet into a useful, structured zipper pouch.
The finished case works for much more than pencils. Use it for crochet hooks, small notions, makeup, travel accessories, sewing supplies, chargers, or everyday items.
The rectangular pouch style is easy to customize because the zipper determines the usable opening while simple crochet panels determine the height and depth.
This version uses a straightforward panel construction with a separate zipper top, so the dimensions are easy to understand and resize.
Pattern at a Glance
Skill level: Advanced beginner
Terminology: US crochet terms
Finished size: Approximately 8″ wide × 3¼” high × 3″ deep
Yarn: Sport / Category 2 cotton
Hook: 3.5 mm
Main stitch: Single crochet
Construction: One-piece front/bottom/back + 2 side gussets + 2 zipper bands
Zipper: 8-inch zipper
Colors: Dusty rose, blush, cream
Materials
You will need:
- approximately 175–225 yards sport-weight cotton yarn
- 3.5 mm crochet hook
- 8-inch zipper
- yarn needle
- sewing needle
- strong matching polyester sewing thread
- scissors
- stitch markers
- measuring tape
- pins or sewing clips
Optional:
- lightweight cotton fabric for lining
- fabric marker
- small awl if your zipper tape is unusually stiff
Yarn Colors
For the striped version:
Color A
Dusty Rose
Color B
Warm Cream
Color C
Soft Blush
You can also make the entire case in one color.
Cotton is especially useful for this project because it creates a firm fabric with clear stitches and very little stretch.
Gauge
In single crochet:
22 sts × 24 rows = 4 inches
Gauge matters more than usual because the crochet needs to fit the zipper.
If your gauge differs, adjust the number of stitches rather than forcing an incorrect-size panel onto the zipper.
Finished Measurements
Approximately:
8 inches long
3¼ inches high
3 inches deep
The zipper runs along the center of the top.
Abbreviations
- ch = chain
- sc = single crochet
- sl st = slip stitch
- st = stitch
- sts = stitches
- RS = right side
- WS = wrong side
Important Stitch Rule
The turning chain does not count as a stitch.
At the end of every row:
Ch 1, turn.
Then work the first sc into the first actual stitch.
Always count:
44 sc
across the main body and zipper bands.
Keeping this count consistent is what gives the pencil case straight edges.
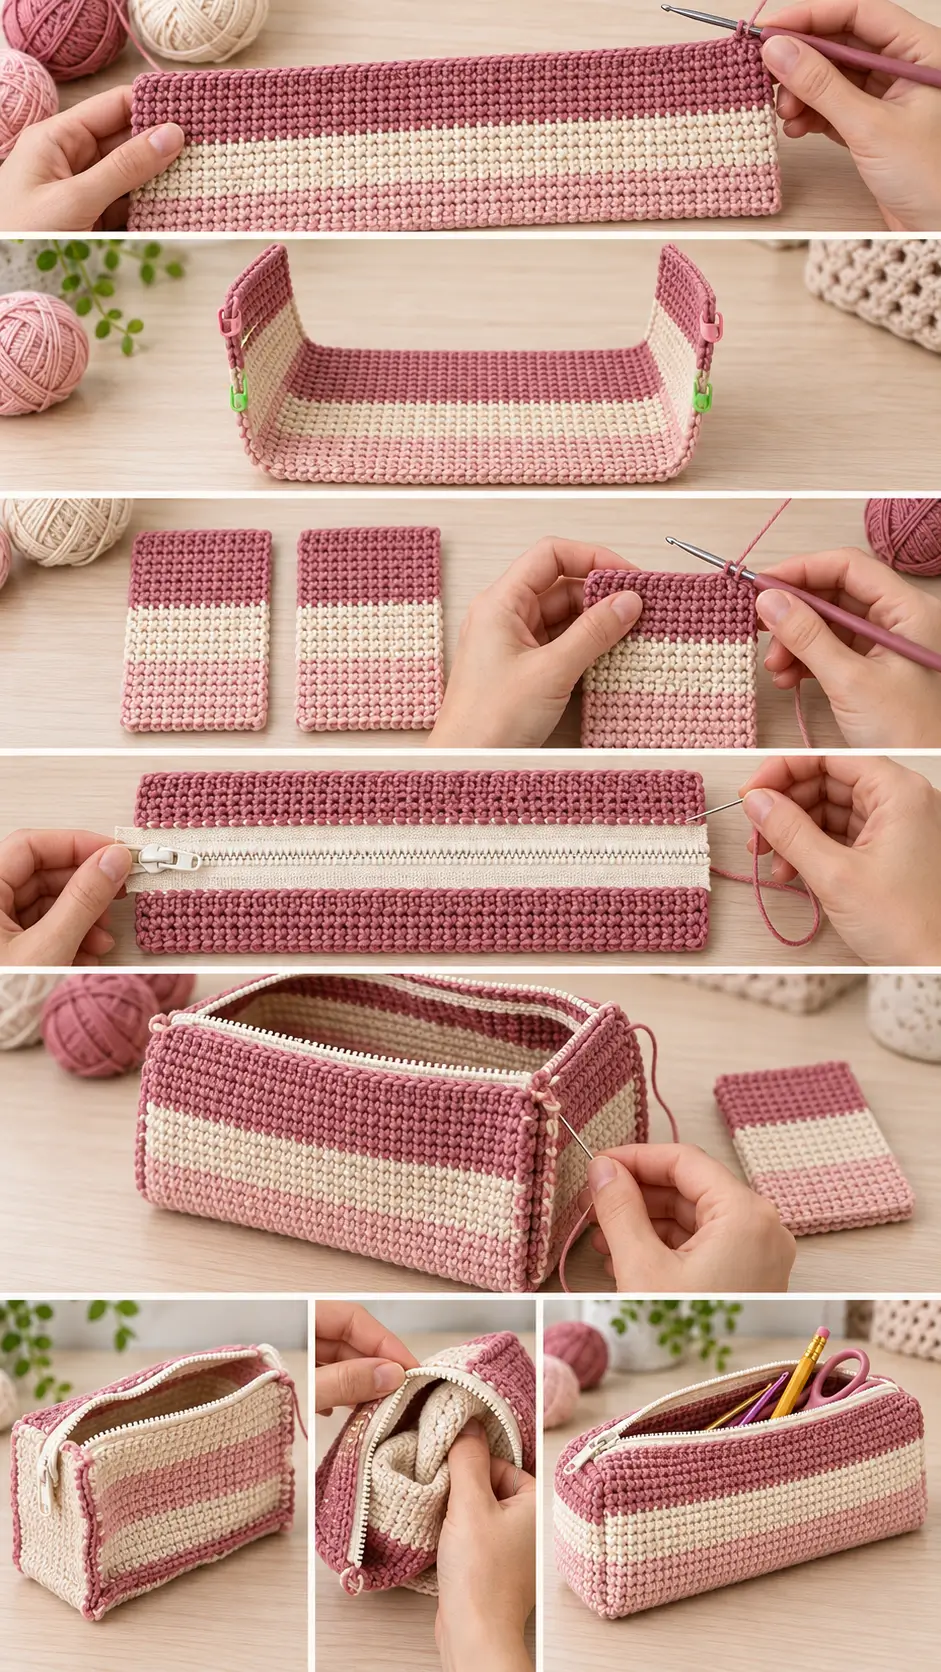
PART 1 — MAIN BODY
The main body forms:
front → bottom → back
as one continuous rectangle.
Using Color A:
Ch 45.
Row 1
Sc in second ch from hook.
Sc in every chain across.
44 sc.
Ch 1, turn.
Rows 2–4
Sc in every stitch across.
44 sc.
At the end of Row 4, change to Color B.
Rows 5–8
With Color B:
Sc across.
44 sc.
Change to Color C at the end of Row 8.
Rows 9–12
With Color C:
Sc across.
44 sc.
Change to Color A.
Rows 13–16
With Color A:
Sc across.
44 sc.
Change to Color B.
Rows 17–20
With Color B:
Sc across.
44 sc.
You have completed the:
Front panel.
Place stitch markers at both ends of Row 20.
These markers indicate the first fold line.
PART 2 — BOTTOM OF THE CASE
Continue directly from the front panel.
The bottom is slightly deeper than the height of each zipper band so the finished case has a roomy rectangular shape.
Rows 21–24
Color A.
Sc across.
44 sc.
Rows 25–28
Color C.
Sc across.
44 sc.
Rows 29–32
Color B.
Sc across.
44 sc.
Rows 33–36
Color A.
Sc across.
44 sc.
Rows 37–38
Color C.
Sc across.
44 sc.
The bottom section contains:
18 rows.
Place another stitch marker at each end of Row 38.
This marks the second fold line.
PART 3 — BACK PANEL
The back should match the front in height.
Rows 39–42
Color B.
Sc across.
44 sc.
Rows 43–46
Color A.
Sc across.
44 sc.
Rows 47–50
Color C.
Sc across.
44 sc.
Rows 51–54
Color B.
Sc across.
44 sc.
Rows 55–58
Color A.
Sc across.
44 sc.
Fasten off.
You now have one long rectangular piece containing:
- 20-row front
- 18-row bottom
- 20-row back
Total:
58 rows.
Check the Main Piece
Lay the rectangle flat.
Fold at:
Row 20
and:
Row 38
The fabric should naturally form a U shape:
front wall → bottom → back wall
Do not sew anything yet.
PART 4 — SIDE GUSSETS
Make 2 identical pieces.
Each gusset fills one end of the pencil case.
Using Color A:
Ch 19.
Row 1
Sc in second ch from hook and across.
18 sc.
Ch 1, turn.
Rows 2–20
Sc in every stitch across.
18 sc.
You can make the gussets solid-colored or repeat the stripe sequence from the main pouch.
Fasten off after Row 20.
Make a second identical gusset.
Gusset Measurements
Each side panel should measure approximately:
3 inches wide × 3¼ inches high
before assembly.
The:
- 18-stitch edge matches the bottom depth
- 20-row side edges match the front and back height
PART 5 — ZIPPER BANDS
The two zipper bands create the top of the pouch.
Make two identical pieces.
Using your preferred color:
Ch 45.
Row 1
Sc in second chain from hook and across.
44 sc.
Ch 1, turn.
Rows 2–9
Sc across.
44 sc.
Fasten off.
Make a second identical band.
Each strip should measure approximately:
8 inches long × 1½ inches wide
Together, the two strips form most of the 3-inch-deep top.
Check the Zipper Before Sewing
Place the zipper between the two crochet bands.
The zipper teeth should run straight between them.
The zipper opening should be approximately the same length as the:
44-stitch crochet edge.
A small difference is fine.
Do not stretch the crochet to fit a zipper that is substantially longer.
PART 6 — ATTACH THE ZIPPER
Lay the first crochet band flat with its right side facing upward.
Place the zipper along one long edge.
Position the zipper so:
- teeth remain completely exposed
- crochet does not interfere with the slider
- approximately the same amount of zipper tape shows along the entire length
Clip or pin in place.
Sewing the First Side
Thread a sewing needle with strong matching thread.
Beginning near one zipper stop:
Sew the zipper tape securely to the crochet band using small backstitches or whipstitches.
Catch the crochet fabric without pulling it out of shape.
Continue to the other end.
Secure the thread.
Second Zipper Band
Place the second band along the opposite side of the zipper.
Make sure:
- both crochet bands begin at the same position
- both end at the same position
- the zipper remains centered
- the bands are not twisted
Sew the second band in place.
Test the Zipper
Before continuing:
Open and close the zipper several times.
It should move freely without catching the crochet.
If the slider catches:
Move the crochet edge slightly farther away from the zipper teeth before assembly.
Optional Yarn-Sewn Zipper Method
If you prefer the handmade appearance of visible yarn stitching, you can sew the zipper tape with matching cotton yarn.
Mark evenly spaced points approximately:
¼ inch apart
along the zipper tape.
If the tape is soft enough, use a sharp needle.
If necessary, carefully make small holes with an awl before sewing.
Do not punch holes too close to the zipper teeth or outer edge because this can weaken the tape.
PART 7 — ATTACH THE ZIPPER TOP TO THE BODY
Your zipper and two bands now form one rectangular top panel.
Place the long outer edge of one zipper band against the top edge of the front panel.
Both edges should contain:
44 stitches.
With right sides facing each other, whipstitch the edges together through corresponding stitches.
Work:
1 joining stitch per stitch
across.
Secure the yarn.
Attach the Back
Repeat with the remaining zipper band and the top edge of the back panel.
Again:
44 sts matched to 44 sts.
When finished, the pouch should begin to resemble a rectangular tube with open ends.
Check the Orientation
Before sewing the sides, make sure:
- zipper faces outward
- stripe pattern is correctly oriented
- front and back are not twisted
- zipper opens normally
This is much easier to correct now than after the gussets are installed.
PART 8 — ATTACH THE FIRST SIDE GUSSET
Keep the pouch wrong side out.
Take one 18 × 20 gusset.
Position it at one open end.
Match one 20-row gusset edge to the 20-row side of the front panel.
Pin or clip.
Seam 1 — Front
Whipstitch through corresponding edge stitches from top to bottom.
Keep the seam firm but not tight enough to gather the crochet.
Seam 2 — Bottom
Turn the corner.
Match the gusset’s:
18-stitch bottom edge
to the 18-row side edge of the bottom panel.
Sew across.
Seam 3 — Back
Turn the next corner.
Sew the second 20-row edge of the gusset to the side of the back panel.
PART 9 — CLOSE THE TOP OF THE GUSSET
The final 18-stitch edge of the gusset meets the short end of the zipper-top section.
Arrange the edge so:
- approximately half sits against the end of the front zipper band
- the zipper end remains centered
- the other half sits against the back zipper band
Ease the stitches evenly across the top.
Sew securely.
Pay extra attention around the zipper end.
That area experiences more stress during use.
PART 10 — SECOND SIDE
Repeat the exact assembly on the opposite end using the second gusset.
Before completing the final seam:
OPEN THE ZIPPER.
This is important.
Once the pouch is fully sewn, the open zipper is what allows you to turn everything right side out.
TURN THE CASE RIGHT SIDE OUT
Reach through the open zipper.
Gently pull the pouch through.
Push out:
- four bottom corners
- four upper corners
- zipper ends
Use your fingers rather than a sharp object.
Shape the case into a rectangular box.
Finished Structure
Your case should now have:
- flat rectangular front
- flat rectangular back
- approximately 3-inch bottom depth
- matching side gussets
- centered zipper
- slightly rounded crochet corners
- firm rectangular shape
Optional Topstitching
For a more structured zipper edge, work a line of surface slip stitches along the crochet immediately beside each zipper band.
This can make the top look slightly more polished.
Do not work so tightly that the zipper edge puckers.
Optional Fabric Lining
A lining is especially useful if you plan to store:
- pens
- makeup
- small crochet hooks
- tapestry needles
- scissors
- stitch markers
Simple Lining Pieces
Cut:
2 rectangles
Approximately 8½ × 3¾ inches
for front and back.
1 rectangle
Approximately 8½ × 3½ inches
for bottom.
2 rectangles
Approximately 3½ × 3¾ inches
for sides.
Add approximately:
¼-inch seam allowance
around each piece.
Because crochet stretches, measure your actual finished pouch before cutting fabric.
Assemble the Lining
Sew:
- front to bottom
- back to opposite bottom edge
- side panels into each open end
Leave the lining wrong side out.
Insert it inside the finished crochet pouch.
Fold the raw upper edge inward.
Hand-sew the lining to the inside of the zipper tape.
Do not sew through the zipper teeth.
Optional Pencil-Safe Lining
If using the case for sharpened pencils, pens, or small scissors, a lining is strongly recommended.
The fabric prevents pointed objects from pushing through the crochet stitches.
How to Make the Case Wider
The zipper determines the length.
For a different zipper, make a gauge swatch first.
Count how many sc you need to match the length of the zipper opening.
For example, if your gauge is:
5½ stitches per inch
and your zipper is:
10 inches
calculate:
10 × 5.5 = 55 stitches
Start with approximately:
56 chains
to produce 55 sc.
Check the crochet directly against the zipper before continuing.
How to Make the Case Deeper
The depth comes from:
- bottom rows
- side gusset width
- zipper-band width
For a deeper pouch, increase all three proportionally.
For example, for approximately:
4 inches deep
make the bottom section about:
22 stitches/rows wide
and make each zipper band approximately:
2 inches wide.
The side gussets should also be about 4 inches across.
How to Make the Case Taller
The height comes from:
- front-panel rows
- back-panel rows
- gusset height
Increase these together.
For example:
If you add 6 rows to the front, also add:
- 6 rows to the back
- 6 rows to each side gusset
Do not alter the bottom simply because you increased the height.
Small Crochet Hook Case
For a slim crochet-hook pouch, try approximately:
8″ long × 2½” high × 2″ deep
Use the same construction but:
- reduce front/back rows
- reduce bottom depth
- reduce gusset width
- make narrower zipper bands
It is ideal for carrying a few favorite hooks and stitch markers.
Makeup Bag Version
Use:
- 10–12-inch zipper
- deeper gussets
- slightly taller walls
- washable cotton yarn
- fabric lining
A lining is especially useful for cosmetics because it can be cleaned separately and prevents small items from catching in stitches.
Travel Pouch Version
Make the case approximately:
12 × 6 × 4 inches
and use it for:
- charging cables
- travel crochet tools
- toiletries
- small craft supplies
A heavier cotton or cotton-acrylic yarn will give the larger version better structure.
Pencil Case Version
The written 8-inch case comfortably holds standard:
- pens
- pencils
- erasers
- small ruler
- highlighters
For longer art pencils, use a:
9- or 10-inch zipper
and adjust the 44-stitch width to match.
Stripe Ideas
Soft Romantic
- dusty rose
- cream
- blush
Retro
- mustard
- rust
- cream
- olive
Coastal
- navy
- pale blue
- white
Neutral
- oatmeal
- cream
- taupe
Scrap Yarn
Make every 3–4 rows a different color.
Because the entire case uses single crochet, this is an easy project for using small leftover cotton yarn balls.
Cleaner Color Changes
When changing colors:
Work the final sc until two loops remain on the hook.
Drop the old color.
Yarn over with the new color.
Pull through both loops.
Ch 1.
Turn.
The new color is now ready for the next row.
Weaving in Ends
For a pouch that will receive frequent use, do not simply crochet over short yarn tails and trim them immediately.
Use a yarn needle.
Weave each tail:
- horizontally through several stitches
- change direction
- weave through several more stitches
Then trim.
This gives the seams and stripes much better durability.
Why Is My Pouch Wider Than the Zipper?
Your stitch gauge is looser than expected.
Do not gather the crochet dramatically to force it onto the zipper.
Instead:
- remove a few foundation stitches
- use a smaller hook
- or choose a longer zipper
The zipper band should lie flat when attached.
Why Is the Zipper Wavy?
Usually the crochet was stretched while the zipper was sewn on.
Lay both pieces completely flat before pinning.
Do not pull the crochet lengthwise.
Sew from one end to the other while checking frequently that both layers remain relaxed.
Why Are My Sides Puckering?
Check whether the gusset dimensions match the body.
You need:
- gusset height = front/back height
- gusset depth = bottom depth
If one section has substantially more stitches than the other, the seam will gather.
Why Are My Corners Rounded?
Single crochet fabric naturally creates slightly softer corners than sewn canvas.
For sharper corners:
- use cotton yarn
- work at a firm gauge
- keep seams tight and even
- lightly block the individual pieces before assembly
You can also add a removable plastic canvas insert between the crochet and lining for extra structure.
Why Doesn’t My Case Stand Up?
The yarn may be too soft or your gauge too loose.
Try:
- cotton instead of soft acrylic
- smaller hook
- fabric lining
- interfacing behind the lining
For a pencil case, a little softness is completely fine.
Can I Crochet Directly Into the Zipper?
Yes, but it isn’t necessary.
Some crocheters pre-punch evenly spaced holes in the zipper tape and crochet directly through them.
For this pattern, sewing the zipper to separate crochet bands is easier to control and makes replacing a damaged zipper much simpler.
Can I Use Worsted Yarn?
Yes.
Try a:
4–4.5 mm hook
and recalculate your stitch count to match the zipper.
Because each stitch will be larger, you’ll need fewer than 44 stitches for the same 8-inch zipper.
Can I Use a Smaller Hook?
Yes.
A slightly smaller hook creates a denser pouch.
That can be useful for:
- pens
- crochet notions
- makeup
- small accessories
Just make sure the fabric is still flexible enough to sew comfortably.
Useful Crochet Project for Beginners
This project is particularly good for practicing:
- foundation chains
- single crochet
- straight edges
- color changes
- counting rows
- simple seaming
- zipper installation
- basic shaping through separate panels
And unlike a practice swatch, the finished piece becomes something you can actually use.
Final Thoughts
A zipper pouch doesn’t require complicated crochet shaping.
For this construction, remember the five pieces:
front + bottom + back
2 side gussets
2 zipper bands
Once those pieces fit one another, assembly becomes straightforward.
The zipper establishes the length, the gussets establish the depth, and the number of front and back rows determines the height.
That also means the same pattern can become a slim pencil case, crochet-hook pouch, makeup bag, travel organizer, or larger notions case simply by changing a few measurements.



