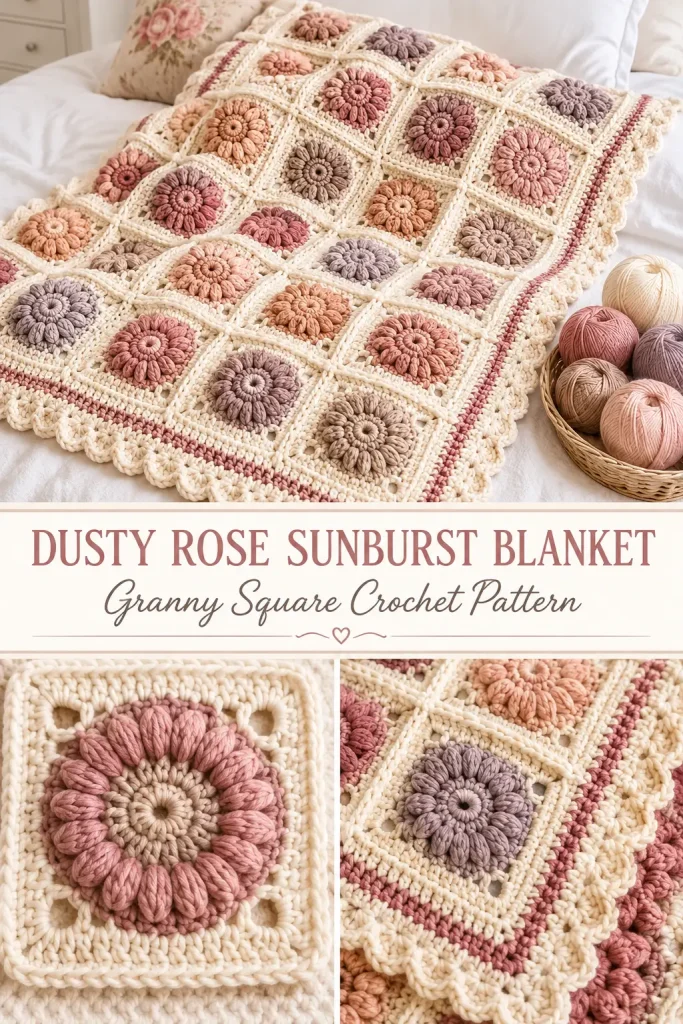
This dusty rose sunburst granny square blanket is soft, cozy, and beautifully textured. It has a warm vintage look with cream square frames, raised circular flower centers, and gentle muted colors like blush, mauve, peach, taupe, and dusty rose.
The design is made from individual crochet squares joined together with a soft raised cream seam. Each square has a round sunburst-style flower center, then it is shaped into a square with a creamy background. The finished blanket looks elegant, handmade, and perfect for a bedroom throw, baby blanket, nursery blanket, or cottage-style crochet decor.
Description
This crochet blanket is built from square motifs with a circular floral center. The center uses soft muted rings of color, while the square body is worked in warm cream yarn. The motifs are joined into a grid with visible raised cream seams, then finished with a simple border that includes cream rounds, a dusty rose accent stripe, and a soft scalloped edge. The finished blanket is textured, plush, and full of calm romantic colors.
Materials
- DK or light worsted yarn in warm cream
- DK or light worsted yarn in dusty rose
- DK or light worsted yarn in blush pink
- DK or light worsted yarn in soft peach
- DK or light worsted yarn in mauve gray
- DK or light worsted yarn in taupe or beige
- 4.0 mm or 4.5 mm crochet hook
- Yarn needle
- Scissors
- Stitch markers
- Measuring tape
- Blocking mat and pins, optional
Abbreviations
- MR = magic ring
- ch = chain
- sl st = slip stitch
- sc = single crochet
- hdc = half double crochet
- dc = double crochet
- tr = treble crochet
- puff = puff stitch
- st = stitch
- sts = stitches
- sp = space
- rep = repeat
Pattern Notes
- This pattern uses US crochet terms.
- Each motif is worked from the center outward.
- The colored center is worked first, then cream yarn is used to turn the round center into a square.
- Use different center color combinations for a soft patchwork look.
- The cream joining creates the raised grid effect seen in the blanket.
- Block each square before joining for the neatest finish.
- You can make the blanket any size by changing the number of squares.
Finished Size
One square: about 5 to 6 inches, depending on yarn and tension.
Suggested layouts:
- Baby blanket: 5 squares x 6 squares
- Lap blanket: 6 squares x 8 squares
- Throw blanket: 8 squares x 10 squares
Special Stitch: Puff Stitch
Yarn over, insert hook into the indicated stitch or space, yarn over and pull up a loop. Repeat 3 more times in the same place.
Yarn over and pull through all loops on the hook.
Ch 1 to close.
This creates one soft raised puff.
Step-by-Step Instructions
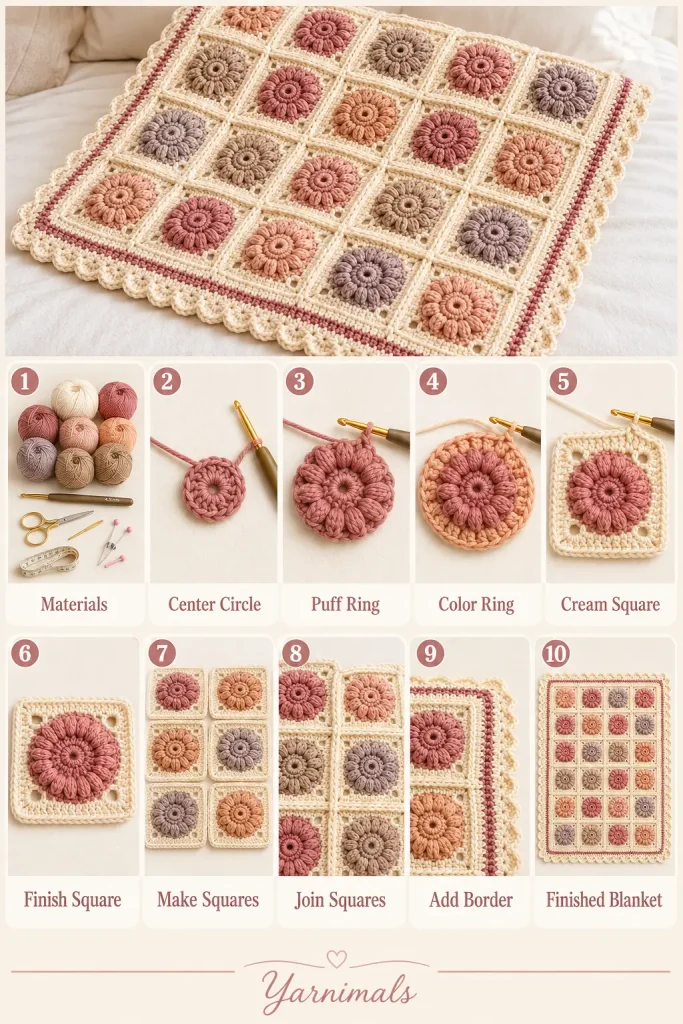
Sunburst Flower Square Motif
Make as many squares as needed for your blanket.
Use 2 or 3 muted colors for the flower center, then use cream for the square frame.
Round 1: Center Circle
With your first center color, make a MR.
Ch 2.
Work 12 dc into the ring.
Pull the ring closed.
Join with sl st to the first dc.
Fasten off.
12 dc
Good center colors: taupe, mauve gray, dusty rose, or peach.
Round 2: Puff Ring
Join your second center color in any stitch.
Ch 1.
Work 1 puff in the same stitch.
Ch 1.
Work 1 puff in the next stitch, ch 1.
Repeat around until you have 12 puff stitches.
Join with sl st to the first puff.
Fasten off.
12 puffs
Round 3: Outer Color Ring
Join your third center color in any ch-1 space between puffs.
Ch 3. This counts as the first dc.
Work 2 dc in the same space.
Ch 1.
In each ch-1 space around, work 3 dc, ch 1.
Join with sl st to the top of the beginning ch 3.
Fasten off.
12 groups of 3 dc
This creates the round floral sunburst center.
Round 4: Begin Cream Square
Join cream yarn in any ch-1 space between 3-dc groups.
Ch 4. This counts as the first tr.
Work 2 tr, ch 2, 3 tr in the same space.
This makes the first corner.
Ch 1.
Work 3 dc in the next ch-1 space.
Ch 1.
Work 3 dc in the next ch-1 space.
Ch 1.
In the next ch-1 space, work 3 tr, ch 2, 3 tr.
This makes the next corner.
Repeat this pattern around:
Ch 1, 3 dc in next space, ch 1, 3 dc in next space, ch 1, corner in next space.
Join with sl st to the top of the beginning ch 4.
You should now have 4 corners and a square shape.
Round 5: Build the Cream Frame
Sl st into the next corner ch-2 space.
Ch 3. This counts as the first dc.
Work 2 dc, ch 2, 3 dc in the same corner.
Ch 1.
Work 3 dc in each ch-1 space across the side, with ch 1 between each group.
In each corner ch-2 space, work 3 dc, ch 2, 3 dc.
Continue around.
Join with sl st to the top of the beginning ch 3.
Round 6: Solid Cream Edge
Ch 1.
Sc in each dc and each ch-1 space around.
In each corner ch-2 space, work 3 sc.
Join with sl st to the first sc.
Fasten off and weave in ends.
This gives each square a clean edge for joining.
Color Combination Ideas
Make each square slightly different, while keeping the cream frame the same.
Try these center combinations:
- Taupe center, blush puff ring, dusty rose outer ring
- Dusty rose center, peach puff ring, mauve gray outer ring
- Peach center, dusty rose puff ring, taupe outer ring
- Mauve gray center, blush puff ring, dusty rose outer ring
- Beige center, peach puff ring, soft mauve outer ring
Keep the colors muted and soft so the blanket has the same vintage look as the image.
Make More Squares
Make enough squares for your chosen blanket size.
Lay all squares on a flat surface before joining.
Mix the colors so the dusty rose, peach, mauve, and taupe centers are balanced across the blanket.
Avoid placing too many identical squares next to each other.
Joining the Squares
The image has a raised cream grid between the motifs, so a visible crochet join works beautifully.
Raised Single Crochet Join
Place two squares wrong sides together.
Join cream yarn in the corner.
Insert hook through both squares.
Work sc evenly across the side, going through both layers.
Repeat to join squares into long strips.
Then join the strips together in the same way.
This creates a raised cream seam on the front of the blanket.
Alternative Flat Join
For a softer join, place two squares side by side with right sides facing up.
Use a yarn needle and cream yarn.
Sew through the inner loops along the edges.
Pull gently so the seam closes without puckering.
Blanket Border
After all squares are joined, add the border around the full blanket.
Border Round 1: Cream Foundation
Join cream yarn in any corner.
Ch 1.
Sc evenly around the blanket.
Work 3 sc in each corner.
Join with sl st to the first sc.
Border Round 2: Cream Texture Round
Ch 2.
Hdc in each stitch around.
Work 3 hdc in each corner.
Join with sl st.
Border Round 3: Dusty Rose Accent
Join dusty rose yarn in any corner.
Ch 1.
Sc in each stitch around.
Work 3 sc in each corner.
Join with sl st.
Fasten off dusty rose.
Border Round 4: Cream Outer Round
Join cream yarn.
Ch 2.
Hdc in each stitch around.
Work 3 hdc in each corner.
Join with sl st.
Border Round 5: Soft Scalloped Edge
Ch 1.
Skip 1 stitch.
Work 5 dc in the next stitch.
Skip 1 stitch.
Sl st in the next stitch.
Repeat around.
At the corners, adjust spacing slightly so the scallops sit flat.
Fasten off and weave in ends.
Finishing
Weave in all loose yarn tails.
Lay the blanket flat.
Gently shape the corners and seams.
Block the blanket lightly if needed, especially around the border.
Do not over-stretch the motif centers. The puff texture should stay soft and raised.
Tips & Variations
Use warm cream instead of bright white for the soft vintage look.
Use muted pink, mauve, peach, beige, and taupe for a romantic cottage palette.
Use cotton yarn for a firmer blanket with crisp stitch definition.
Use acrylic or acrylic-blend yarn for a softer, warmer throw.
For a baby blanket, choose soft washable yarn.
For a larger throw, make more squares and keep the same border.
If your squares curl, block them before joining.
If your joined seams feel bulky, use a flat sewn join instead of the raised sc join.
FAQ
Is this blanket beginner-friendly?
It is best for confident beginners. The square uses basic stitches, puff stitches, color changes, and simple joining.
Can I make the blanket in one color?
Yes. You can make the whole blanket in cream for a textured heirloom look, but the soft colored centers give the design its vintage floral style.
How many squares do I need?
It depends on your desired size. Make one square first, measure it, then decide how many squares you need for your blanket width and length.
Can I use this motif for other projects?
Yes. This square works well for cushion covers, table runners, bags, baby blankets, and decorative throws.
Conclusion
This dusty rose sunburst granny square blanket is a beautiful project for anyone who loves soft color, raised texture, and cozy handmade style. The cream square frames, muted floral centers, raised joins, and scalloped border create a blanket that feels elegant and timeless.
Make a small baby blanket or keep adding squares for a full throw in your favorite vintage-inspired colors.




The instructions and the pictures are not the same. Some of the motifs have different count puff stitches. Worked one up according to pattern. Looks nothing like picture.
Agree- the pattern states – 12 puff stitches around- the #6 picture shows 17 puff stitches. Seems like two different patterns mixed together. I’ve tried several different attempts to get it to look like #6, but no luck. Not sure how she got the big circle on the corners either.
Hello Velora, I have downloaded your pattern for your beautiful Dusty Rose Sunburst Blanket. I have made a few squares. I was disappointed to find that the pattern given, does not create the same pattern that your pictures show. The pattern I downloaded here has huge gaps between the 3dc ch 1 in rounds 4 and 5 compared to what your design pictures show. Even round 1 in your pictures looks like sc`s rather than dc.
Can you maybe exlplain what I might be doing wrong. Thank you from Alice
This is MOST DEFINITLEY NOT using the same stitches as the photos of the finished piece.
Is this AI?