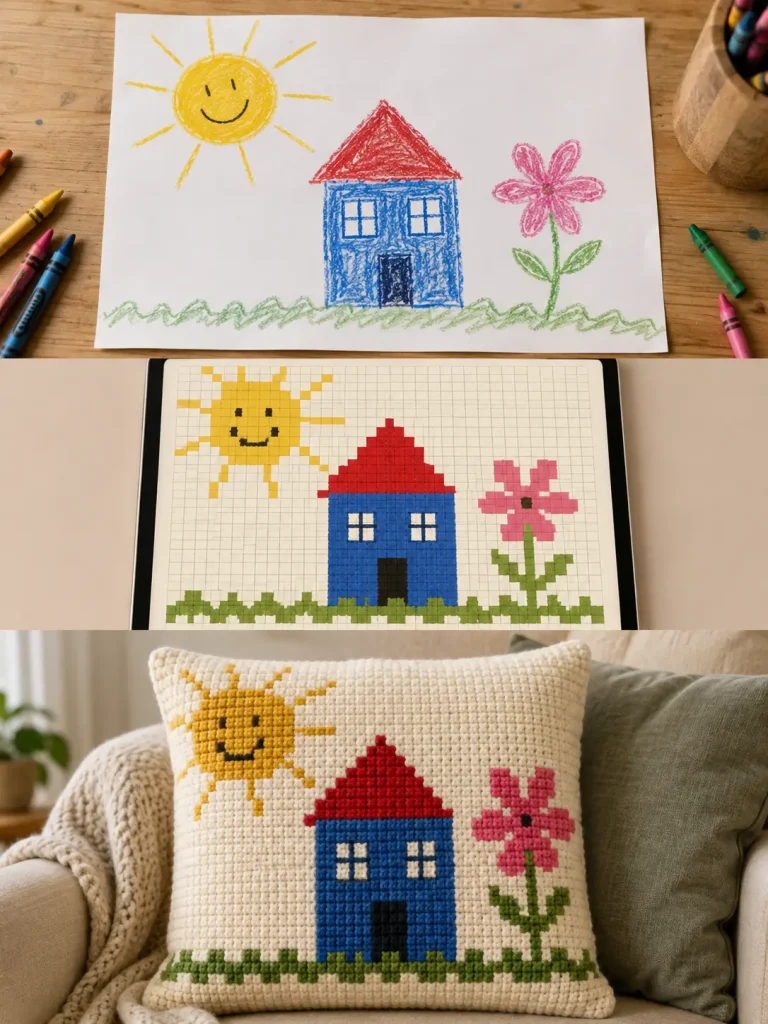
There is something especially sweet about a child’s drawing. The crooked little flowers, giant smiling suns, funny animals, uneven hearts, and wonderfully impossible houses are exactly what make them special.
And instead of putting one more drawing in a box, I love the idea of turning that artwork into something you can actually use and keep.
A crochet pillow made from a child’s drawing does exactly that.
The best part is that the drawing does not need to be perfect. In fact, simple shapes, bold outlines, and slightly wonky proportions can make the finished crochet version even more charming.
The basic process is:
drawing → simplified image → crochet graph → crocheted panel → finished pillow
If you have never made your own crochet graph before, don’t worry. You do not have to draw every square by hand. A crochet graph maker can help turn an image into a grid, and you can clean up the design before you start crocheting.
Here is how to do it properly.
What You’ll Need
For this project, gather:
- A child’s original drawing
- Phone or camera for photographing the drawing
- Crochet graph maker or grid-design tool
- Worsted-weight or DK yarn in your chosen colors
- Crochet hook appropriate for your yarn and desired fabric
- Scissors
- Yarn needle
- Stitch markers
- Pillow insert
- Matching yarn for the pillow back
- Optional locking stitch markers for keeping track of graph sections
You do not need dozens of yarn colors.
For a first picture-to-crochet project, a design with around 3 to 6 main colors is much easier to manage than artwork containing every color in the crayon box.
Step 1: Choose the Right Drawing
Not every drawing needs to become a highly detailed crochet portrait.
The easiest artwork to convert has:
- Large shapes
- Strong color areas
- Clear outlines
- Limited tiny details
- Good contrast between neighboring colors
Think of drawings such as:
- a smiling sun
- a flower
- a rainbow
- a simple house
- a funny monster
- a heart
- a butterfly
- a cat or dog
- a child’s self-portrait
- a simple family drawing
The goal is not to correct the artwork.
If the flower has one giant petal, leave it giant.
If the house leans slightly, let it lean.
If the smile is crooked, keep the crooked smile.
Those little imperfections are what make the finished pillow recognizable as the child’s artwork rather than a generic crochet design.
One thing I would avoid
If you plan to publish, distribute, or sell the resulting design, start with genuinely original artwork rather than a child’s drawing copied from a branded cartoon or licensed character.
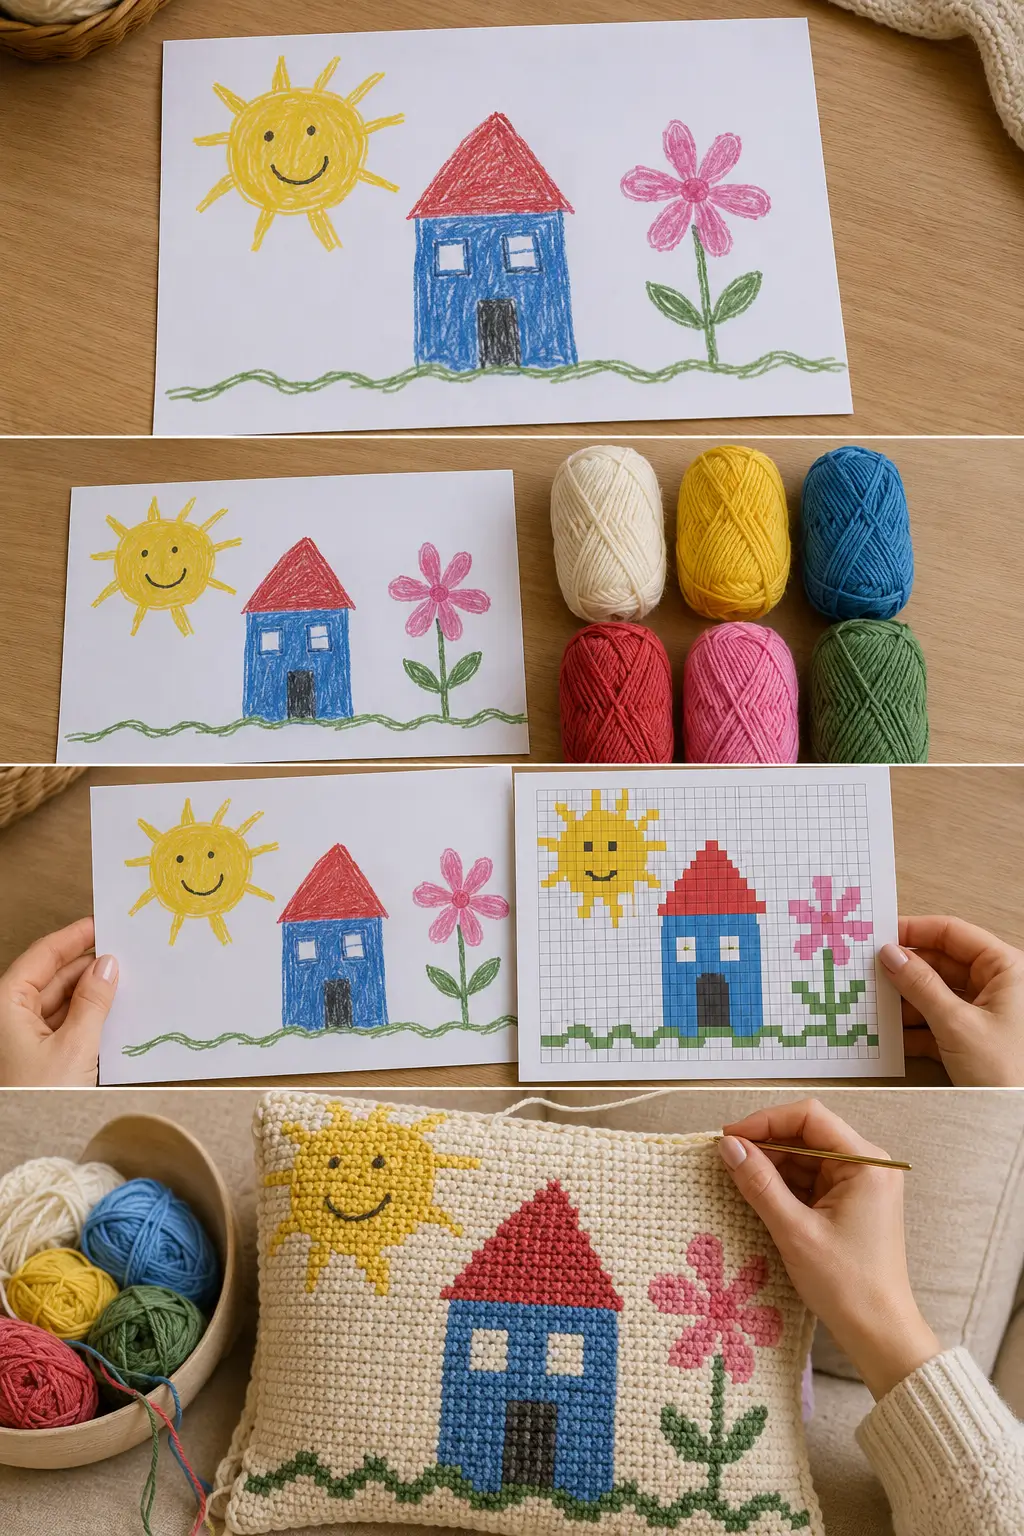
Step 2: Photograph or Scan the Drawing
Place the picture on a flat surface in bright, even light.
Photograph it as straight from above as possible so the image is not distorted.
Try to avoid:
- heavy shadows
- wrinkled paper
- angled photographs
- clutter around the drawing
- glare from laminated artwork
Crop the photograph so that only the artwork you want to crochet remains.
You can also scan the drawing if you have access to a scanner.
Do not worry about making it look professionally illustrated. You mainly want a clear image that the graph-making tool can interpret.
Step 3: Simplify the Colors Before Making the Crochet Graph
This step can save a surprising amount of frustration later.
A photographed drawing may contain dozens of slightly different shades because of lighting, paper texture, crayon marks, pencil pressure, and shadows.
Crochet does not need to reproduce every one of those shades.
Instead, decide which yarn colors will represent the main parts of the drawing.
For example, a picture might become:
- cream background
- yellow sun
- blue sky
- green grass
- pink flower
- dark brown or black outlines
That gives you six manageable colors rather than 30 nearly identical digital shades.
If two colors are so similar that you can barely distinguish them from a few feet away, consider combining them into one yarn color.
Remember: you are translating a drawing into crochet, not printing a photograph with yarn.
Step 4: Crochet a Gauge Swatch BEFORE Creating the Final Graph
This is one of the most important parts of the project.
It is tempting to upload the drawing, choose a random grid such as 50 × 50, and start crocheting.
Don’t.
Crochet stitches are not automatically perfect squares. Your stitch width and row height depend on:
- yarn
- hook
- stitch
- tension
- crocheter
If you ignore that difference, a perfectly proportioned graph can turn into a tall, skinny picture or a short, stretched picture once crocheted.
Make a reasonably sized swatch using the same:
- yarn
- hook
- stitch
- tension
that you intend to use for the pillow.
For straightforward tapestry-style colorwork, single crochet in US terminology is an easy place to start.
Wash or block the swatch the same way you expect to treat the finished pillow, then let it dry before measuring if the yarn is likely to change noticeably after washing.
Measure several inches across the center rather than measuring a single stitch.
Record:
stitches per inch
and
rows per inch
For example, if 20 stitches measure 4 inches:
20 ÷ 4 = 5 stitches per inch
If 18 rows measure 4 inches:
18 ÷ 4 = 4.5 rows per inch
Use your own measurements rather than copying those example numbers.
Step 5: Decide How Large the Crochet Pillow Will Be
Choose your pillow insert before finalizing the graph.
Common square pillow inserts include sizes such as:
- 12 × 12 inches
- 14 × 14 inches
- 16 × 16 inches
- 18 × 18 inches
- 20 × 20 inches
A 16-inch pillow is a comfortable size for many graphic designs because it gives the artwork enough room without creating an enormous chart.
Now use your gauge to estimate how many stitches and rows your panel needs.
Width
desired width in inches × stitches per inch = approximate stitch count
Height
desired height in inches × rows per inch = approximate row count
If your gauge is 5 stitches per inch and you want a 16-inch-wide panel:
16 × 5 = 80 stitches
Again, that is only an example.
Your actual stitch and row counts must come from your own gauge.
The finished panel should be compared with the actual insert as you work, because yarn and stitch fabric can behave differently even when the math is correct.
Step 6: Turn the Drawing Into a Crochet Graph
Now comes the fun part.
Use a crochet graph maker that allows you to create colorwork from a picture.
Upload the cropped image and enter the approximate number of stitches and rows calculated from your gauge.
A tool that allows gauge or stitch proportions to be adjusted is particularly useful because it can compensate for the difference between stitch width and row height.
Once the image appears on the grid, don’t immediately accept the automatic version.
Treat it as a starting point.
Step 7: Clean Up the Graph
Automatic picture conversion usually benefits from a little editing.
Zoom in and look for isolated squares of color.
Ask yourself:
Does this one tiny square actually help the drawing?
If not, remove it.
Simplify jagged edges where necessary and make important shapes easier to recognize.
For example, if the original drawing contains a yellow sun surrounded by orange crayon marks, you may decide to make the entire crochet sun yellow rather than changing yarn every few stitches for tiny orange specks.
The cleaner the graph, the easier the pillow will be to crochet.
But don’t over-clean it
There is a difference between removing unnecessary digital noise and redesigning the child’s artwork.
Keep recognizable features such as:
- uneven petals
- funny facial expressions
- unusual proportions
- crooked windows
- mismatched eyes
- wobbly hearts
Those are often the best parts.
Step 8: Choose Yarn Colors That Actually Separate From One Another
Put your yarn choices next to each other before beginning.
Colors that appear clearly different on a computer screen can look surprisingly similar in yarn.
You want enough contrast that important shapes remain visible.
A simple trick is to photograph your selected yarn together and look at the photograph in grayscale.
If two important colors become almost indistinguishable, you may need more contrast between them.
You do not have to match the crayons perfectly.
The goal is to preserve the character of the drawing.
Step 9: Crochet the Picture Panel
Once your graph is ready, begin the front panel.
For a flat pillow front, work back and forth in rows unless your chosen technique calls for something different.
Each graph square usually represents one stitch when you are using a basic single-crochet colorwork graph.
Follow the chart one row at a time.
A removable stitch marker can help you mark every 10 or 20 stitches, especially on wider charts.
It also helps to mark each completed row on a printed graph or digital progress tracker.
How to Change Colors Cleanly
For a standard single-crochet color change, do not finish the entire last stitch with the old color and then attach the new one.
Instead:
- Insert your hook into the next stitch.
- Yarn over with the current color.
- Pull up a loop.
- You now have two loops on your hook.
- Use the new color for the final yarn-over.
- Pull the new color through both loops.
- Continue the next stitch with the new color.
That final loop becomes part of the next stitch, which creates a cleaner transition between the two color sections.
This color-change method is consistent with standard crochet colorwork guidance from the Craft Yarn Council.
Should You Carry the Yarn or Use Separate Bobbins?
It depends on the drawing.
Carry the unused yarn when:
- color changes are frequent
- the sections are relatively close together
- you are intentionally using tapestry crochet
In tapestry crochet, the unused yarn can be laid along the top of the previous row while the working stitches are crocheted over it. This encloses the unused strand inside the fabric rather than leaving long loose floats behind the work.
Use separate yarn sections or bobbins when:
- there are large blocks of color
- a color appears only on one part of the row
- carrying a contrasting color across the entire panel would show through
You can also combine techniques.
There is no rule saying every unused color must travel across the whole pillow.
A Useful Tip for Light Backgrounds
Dark yarn carried underneath very light stitches can sometimes peek through.
Before committing to an entire panel, make a small colorwork sample using the actual yarn combinations.
If the carried strand is too visible, use separate yarn sections for distant blocks of color instead of carrying the dark yarn all the way across.
Step 10: Check the Picture as You Work
Every few rows, place the crochet on a flat surface and step back.
Do not judge the picture only from six inches away.
Pixel-style crochet often looks much clearer from a little distance.
Check:
- overall proportions
- width
- height
- color placement
- whether the fabric is puckering
- whether carried yarn is too tight
If the sides begin pulling inward, your carried yarn may be too tight.
The unused yarn should travel comfortably through the work without drawing the fabric together.
Step 11: Make the Pillow Back
Once the picture panel is complete, make the back.
The simplest option is a plain crochet square or rectangle worked to approximately the same finished dimensions as the front.
Using one of the colors from the artwork can make the pillow look intentional and finished.
For example:
- cream front background → cream back
- colorful picture → use the strongest accent color on the back
- busy artwork → choose a simple neutral back
You do not need to repeat the graph on both sides.
Let the child’s drawing remain the feature.
Step 12: Block the Panels Before Assembly
Blocking can help:
- straighten the edges
- relax the stitches
- improve the overall shape
- make assembly easier
Use a blocking method appropriate for the yarn fiber you selected and follow the yarn manufacturer’s care instructions.
Do not aggressively stretch one panel larger than the other.
The goal is to even out the fabric, not force it into an unnatural size.
Step 13: Turn the Two Panels Into a Pillow
Place the front and back together.
You can join them using:
- slip stitch
- single crochet
- whip stitch
- mattress-style seaming
Choose whichever finish suits the look of the pillow.
Join three sides first.
Insert the pillow form.
Then close the final side.
If you want the cover to be removable and washable separately, another option is to make an envelope-style back instead of permanently closing all four sides.
What If the Drawing Has Black Outlines?
You have several options.
Option 1: Crochet the outline into the graph
This works best when the lines are thick enough to translate into whole stitches.
Option 2: Add surface crochet afterward
You can crochet the major color blocks first and add selected lines over the finished fabric.
Option 3: Embroider details afterward
Small eyes, mouths, stems, or other narrow details can sometimes be added more cleanly with yarn and a tapestry needle after the main panel is complete.
Do not force every pencil line into the graph.
Some details are simply too narrow to translate nicely into a single-crochet grid.
What If the Graph Looks Too Pixelated?
That is normal to a point.
Every graph has limited resolution.
Increasing the stitch count gives you more squares with which to represent curves and small details, but it also:
- increases the finished size
- increases the amount of crocheting
- creates more color changes
Instead of automatically making a giant graph, first simplify the artwork.
Often a cleaner 60-stitch-wide image looks better than a messy 120-stitch-wide version full of unnecessary color changes.
What I Would Do Differently for a First Attempt
If this is your first custom picture-to-crochet project, resist the urge to choose the most complicated drawing in the stack.
Start with one containing:
- one main subject
- a simple background
- large areas of color
- fewer than about six important colors
- very little tiny linework
Once you understand how your stitches translate the graph, more detailed pictures become much easier.
The Most Important Part: Don’t Make It Too Perfect
This project is not supposed to look like a professionally designed cartoon.
That misses the point.
If a five-year-old drew a cat with one triangular ear and one round ear, the finished crochet cat should probably have one triangular ear and one round ear.
That is what turns the pillow into a keepsake.
The graph maker is there to help translate the drawing into stitches—not to erase its personality.
Crochet Graph Makers Can Make This Much Easier
You can create a graph manually with graph paper, but digital crochet design tools make picture-based projects much easier to plan.
For example, Stitch Fiddle currently includes crochet colorwork chart options, can start a chart from a picture, and provides controls for chart size and gauge/proportions.
Whichever crochet graph maker you choose, look for features that let you:
- import an image
- choose the number of stitches and rows
- reduce or edit colors
- manually clean individual squares
- account for stitch proportions or gauge
- save or print the finished chart
The automatic conversion is useful, but the best results usually come from combining the tool with a little human editing.
Other Things You Can Make From a Child’s Drawing
Once you understand this technique, you are definitely not limited to pillows.
The same basic idea can become:
- a tapestry crochet tote bag
- framed crochet wall art
- a blanket square
- a small wall hanging
- a keepsake baby blanket panel
- a zippered pouch
- a sweater pocket
- a personalized crochet gift
You can even make several separate drawings into individual squares and eventually join them into one family art blanket.
That would be an incredible long-term keepsake.
Frequently Asked Questions
Can I turn any picture into a crochet graph?
Technically, many pictures can be converted into grids, but not every image will make a practical crochet project.
Simple pictures with strong shapes and limited colors are much easier to translate successfully than detailed photographs.
What crochet stitch is best for a picture pillow?
Single crochet is a practical choice for many colorwork pillows because it creates relatively compact stitches and works well with graph-based designs.
Other crochet colorwork techniques can work too, but your graph must be planned around the actual stitch and gauge you use.
Does one graph square always equal one crochet stitch?
In many basic single-crochet colorwork charts, one square represents one stitch.
However, that does not mean the finished stitches are physically square.
This is why checking both stitch gauge and row gauge before building the final graph is so important.
How many colors should I use?
There is no required number.
For a first project, keeping the design to a handful of clearly different colors makes the graph easier to read and dramatically reduces yarn management.
Add more colors only when they make an important visual difference.
Do I need a special crochet graph maker?
No.
You can draw a chart manually on graph paper or use general pixel-grid software.
However, a tool designed for crochet is useful because some allow you to work with stitch counts, rows, colorwork, and gauge rather than treating every project like ordinary square pixel art.
Can I use this idea for a gift?
Absolutely.
A pillow based on an original drawing could make a beautiful keepsake for:
- parents
- grandparents
- the child who created the artwork
- birthdays
- Mother’s Day
- Father’s Day
- Christmas
- a child leaving preschool or elementary school
- a grown child whose parents saved their childhood artwork
Imagine finding a drawing your child made years ago and quietly turning it into a crochet pillow.
That is the kind of handmade gift that has a story attached to it.
Final Thoughts
Turning a child’s drawing into crochet sounds complicated when you first see the finished pillow.
But the process becomes much easier when you break it into smaller decisions:
Choose a simple drawing.
Simplify the colors.
Make a gauge swatch.
Build the graph around your actual gauge.
Clean up unnecessary pixels.
Crochet the picture one row at a time.
Turn the finished panel into a pillow.
And most importantly, preserve the funny little details that made the original drawing special.
A perfectly symmetrical crochet flower might be beautiful.
But the flower with seven uneven petals that looks exactly like the one your child drew?
That is the one you will want to keep.



