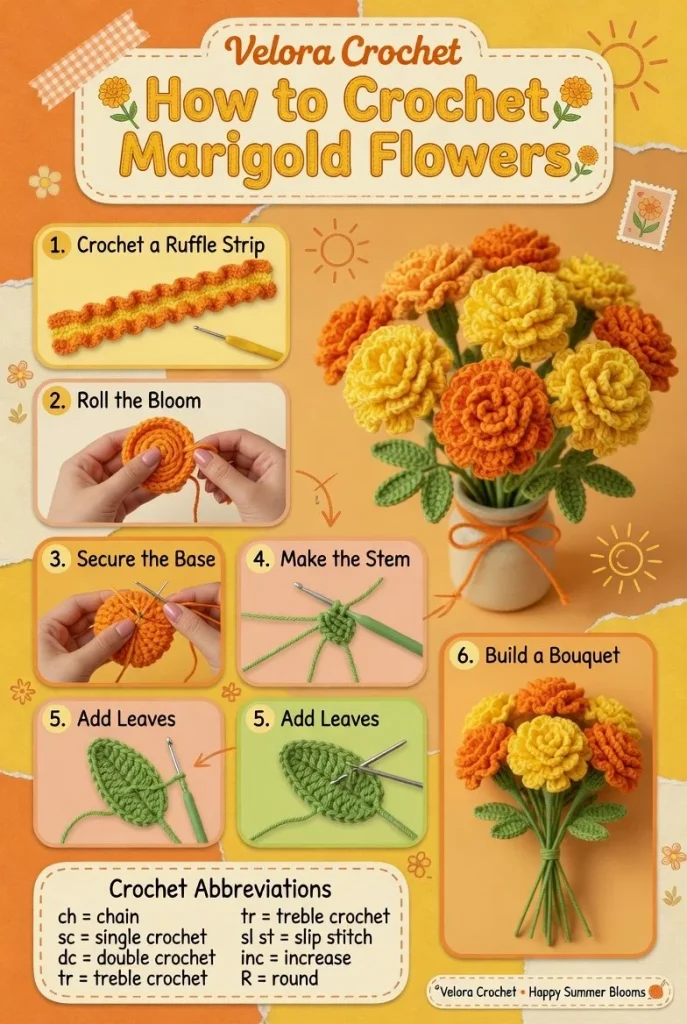
Creating vibrant crochet marigold flowers is a delightful way to add a splash of color to your home or gift them to a friend. These flowers, with their ruffled blooms in shades of orange, yellow, and golden tones, complemented by green stems and leaves, can bring a cheerful touch to any setting. In this project, you’ll learn how to construct the ruffle strips, roll or layer them, add the base, attach the stems, and finally create a charming bouquet.
Materials
- Yarn in orange, yellow, and shades of gold for the blooms
- Green yarn for the stems and leaves
- Crochet hook appropriate for your yarn weight
- Scissors
- Yarn needle for weaving in ends
Abbreviations
- MR: magic ring
- ch: chain
- sc: single crochet
- hdc: half double crochet
- dc: double crochet
- inc: increase
- dec: decrease
- sl st: slip stitch
Instructions
Ruffle Strips
- Making the Ruffle Strips: Start with a magic ring. Chain 3 (this counts as your first double crochet).
- Building the Ruffle: In the ring, work 11 double crochets, making a total of 12 stitches. Pull the ring tight and join with a slip stitch to the top of the initial chain. This creates the center of your ruffle.
- Adding Layers: For the next round, chain 3, then make 2 double crochets in each stitch around, resulting in a total of 24 stitches. Join with a slip stitch again.
You can make several ruffle strips in varying hues to create depth in your flower. I love mixing shades for a more dynamic look!
Assembling the Flower
- Rolling or Layering: Take each ruffle strip and either roll it starting from the outer edge towards the center or layer them atop one another to increase fullness.
- Securing: Use a needle to weave in the ends as you roll or layer, ensuring everything is held together tightly.
Adding the Base
- Creating the Base: In a new color (green for the leaves), chain 10. Turn and single crochet in the second chain from the hook and in each chain across, turning at the end.
- Attaching to the Flower: Once complete, you can sew this base to the bottom of your flower for stability.
Attaching Stems
- Making the Stems: Using green yarn, chain 30 or desired length. Work single crochets into each chain, adjusting the stiffness according to your preference.
- Joining: Attach the stems to the base of your flowers by sewing them securely.
Creating a Small Bouquet
- Arranging Flowers: Once your flowers are finished, arrange them however you like! You can create a small bouquet with several blooms.
- Finishing Touch: Tie the stems together with a piece of yarn or a ribbon for a polished look.
Tips for the Best Result
- Keeping a firm tension while crocheting will help maintain the shape of your flowers.
- Experiment with color combinations; blending shades can make your marigolds even more eye-catching.
- If you’re a fan of DIY crochet projects, consider making a matching vase or holder to showcase your flowers beautifully.
These marigold flowers can be a wonderful addition to your crochet repertoire, perfect as handmade gifts or to brighten your home. If you’re looking for similar projects, check out this blue gingham crochet market bag pattern for more crochet inspiration!



