Introduction
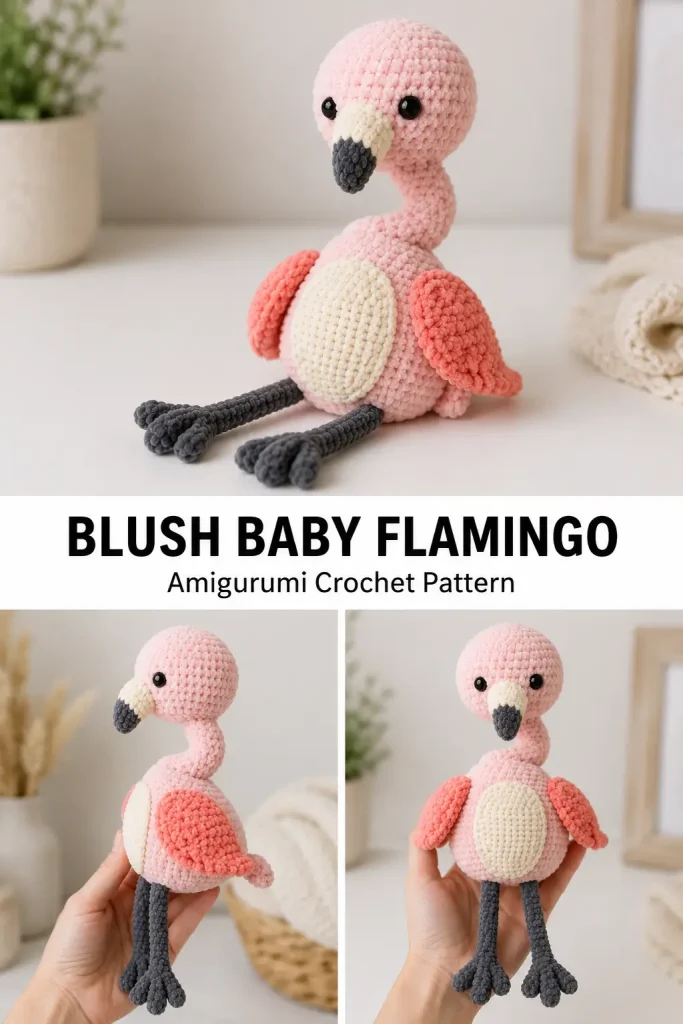
There is something so gentle and cheerful about a handmade flamingo. With its soft pink body, sweet rounded head, tiny beak, and long little legs, this blush baby flamingo feels like a tiny tropical friend made for cozy shelves, nursery corners, and handmade gift baskets.
This original flamingo-inspired amigurumi pattern is designed with a cute plush style rather than a realistic bird shape. It has a chubby body, a rounded head, a softly curved neck, little wings, dangling legs, and a sweet baby-bird expression.
If you enjoy soft animal crochet patterns, this easy crochet pattern is a lovely beginner crochet project to try. The shapes are simple, the pieces are small, and the finished plush crochet toy has a charming handmade look that feels playful, warm, and unique.
Description
This blush baby flamingo amigurumi is a soft, chubby crochet bird made with plush or chenille yarn. The main body is worked in a gentle blush pink shade, while the wings use a slightly deeper coral pink for a pretty layered look. A small cream belly patch adds softness to the front, and the beak is made with cream and charcoal gray for that classic flamingo detail.
The finished flamingo has a round pear-shaped body, a small rounded head, a narrow neck, short side wings, long dangling legs, and a tiny tail tuft. Its glossy black eyes and small beak give it a sweet, curious expression without making the design complicated.
This amigurumi flamingo makes a beautiful handmade gift, tropical nursery decoration, baby shower present, desk plush, shelf sitter, or cute addition to a handmade bird collection. You can make it in soft pastels for a baby-friendly look or brighter pinks for a fun summer crochet project.
Materials
- Plush or chenille yarn in blush pink for the head, neck, and body
- Plush or chenille yarn in coral pink for the wings
- Small amount of cream yarn for the belly patch and beak base
- Small amount of charcoal gray yarn for the beak tip and legs
- Small amount of black embroidery yarn for facial details
- 5 mm crochet hook, or a hook size suitable for your yarn
- 10 mm to 12 mm black safety eyes
- Polyester fiberfill stuffing
- Yarn needle
- Stitch marker
- Scissors
- Sewing pins for assembly
Abbreviations
- MR: magic ring
- ch: chain
- sc: single crochet
- inc: increase, 2 sc in the same stitch
- dec: decrease, single crochet 2 stitches together
- sl st: slip stitch
- st: stitch
- sts: stitches
- FO: fasten off
Pattern Notes
Work in continuous rounds unless stated otherwise.
Use a stitch marker to mark the first stitch of each round.
Stuff the head and body firmly, but stuff the neck lightly so it can curve gently.
The head and neck are worked as one piece.
The body, wings, beak, belly patch, legs, and tail are made separately and sewn on.
For a baby-safe version, embroider the eyes instead of using safety eyes.
Step-by-Step Instructions
Head
Use blush pink yarn.
R1: 6 sc in MR. (6)
R2: inc around. (12)
R3: (sc 1, inc) repeat around. (18)
R4: (sc 2, inc) repeat around. (24)
R5–R7: sc around. (24)
Insert safety eyes between R5 and R6, about 6 stitches apart.
R8: (sc 2, dec) repeat around. (18)
R9: (sc 1, dec) repeat around. (12)
Do not fasten off. Continue directly into the neck.
Stuff the head firmly before the neck becomes too narrow.
Neck
Continue with blush pink yarn.
R10–R17: sc around. (12)
R18: (sc 3, inc) repeat around. (15)
R19: sc around. (15)
FO, leaving a long tail for sewing.
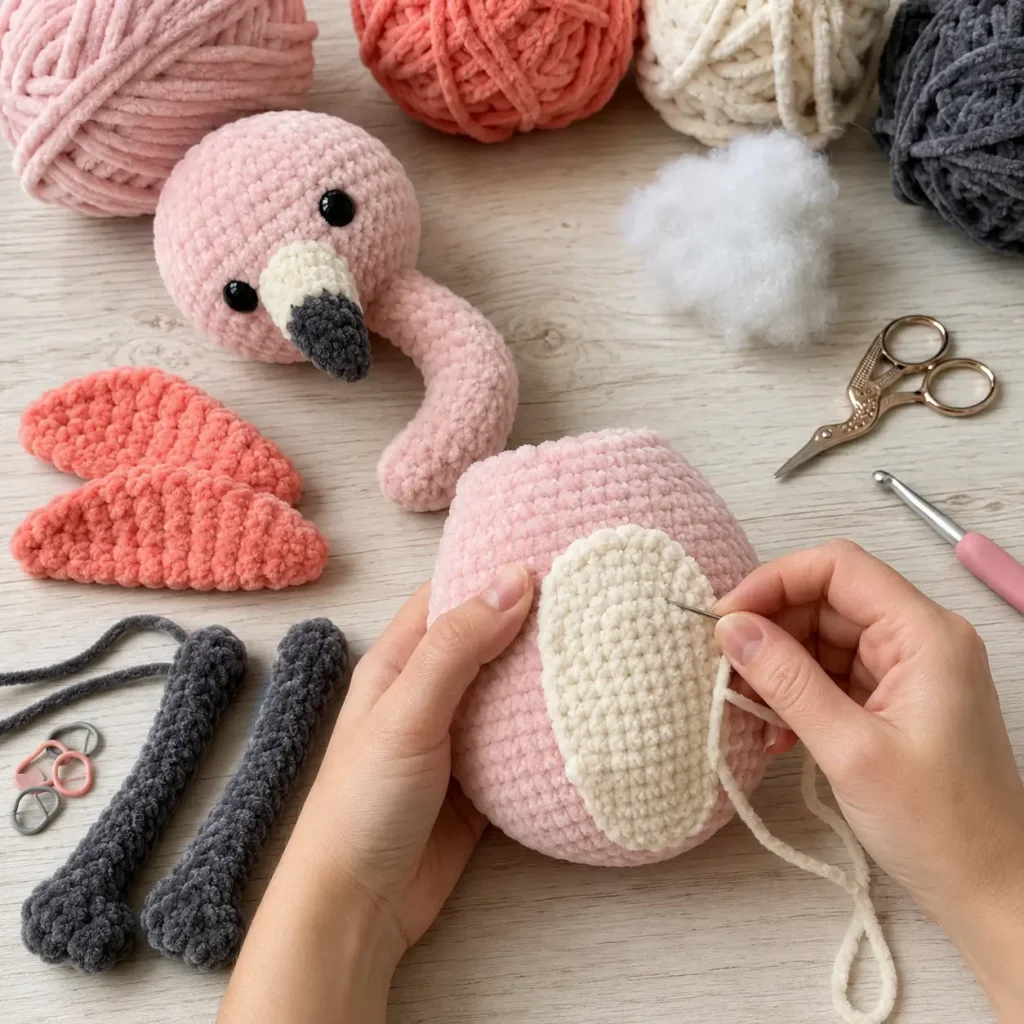
Stuff the neck lightly. Do not overstuff it. The neck should stay soft enough to curve slightly when attached to the body.
Body
Use blush pink yarn.
R1: 6 sc in MR. (6)
R2: inc around. (12)
R3: (sc 1, inc) repeat around. (18)
R4: (sc 2, inc) repeat around. (24)
R5: (sc 3, inc) repeat around. (30)
R6–R10: sc around. (30)
R11: (sc 3, dec) repeat around. (24)
R12: sc around. (24)
R13: (sc 2, dec) repeat around. (18)
Begin stuffing the body firmly.
R14: (sc 1, dec) repeat around. (12)
Finish stuffing.
R15: dec around. (6)
FO, close the opening, and weave in the end.
The body should look rounded and slightly pear-shaped, with the wider part at the bottom.
Arms
This flamingo pattern does not include arms. The side wings create the small arm-like shape of the bird.
Wings
Make 2 using coral pink yarn.
R1: 6 sc in MR. (6)
R2: (sc 1, inc) repeat around. (9)
R3: (sc 2, inc) repeat around. (12)
R4–R5: sc around. (12)
Do not stuff.
Flatten the wing and sc through both layers to close. (6)
FO, leaving a long tail for sewing.
Optional feather texture: Before fastening off, you may work 3 small scallops across the lower edge by making: sl st, ch 2, sl st in the next stitch. Repeat 3 times.
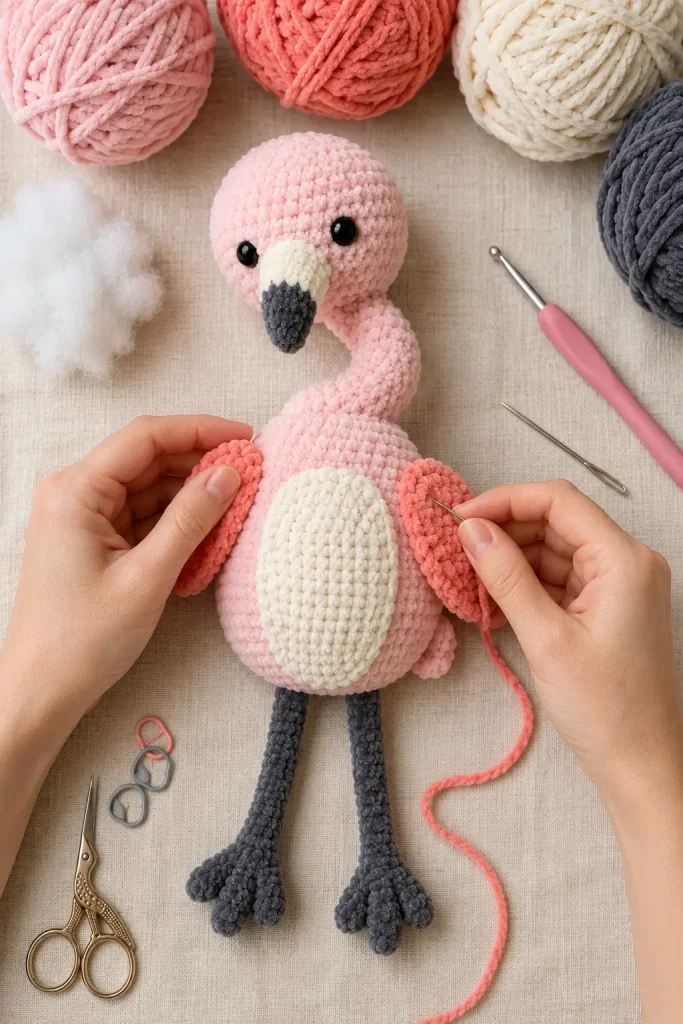
Sew one wing to each side of the body, angled slightly downward.
Legs
Make 2 using charcoal gray yarn.
Ch 13.
Starting in the 2nd ch from the hook, sl st in each of the next 11 chains.
At the end of the leg, make the first toe:
Ch 4, sl st in the 2nd ch from the hook, sl st in the next 2 chains, then sl st back into the base of the foot.
Make the second toe:
Ch 4, sl st in the 2nd ch from the hook, sl st in the next 2 chains, then sl st back into the base of the foot.
FO, leaving a long tail for sewing.
Repeat for the second leg.
The legs should be long and thin, with two tiny toes at the end. Sew them to the lower front of the body so they dangle sweetly.
Ears
This flamingo pattern does not include ears.
Tail
Use blush pink or coral pink yarn.
Ch 4, sl st back down the chain.
Ch 5, sl st back down the chain.
Ch 4, sl st back down the chain.
FO, leaving a long tail for sewing.
This creates a tiny three-feather tail tuft. Sew it to the back lower part of the body.
Beak
Start with cream yarn.
R1: Ch 5.
R2: Starting in the 2nd ch from the hook, sc 3, 3 sc in the last ch. Continue along the other side of the chain, sc 2, inc in the last stitch. (10)
R3: sc around. (10)
Switch to charcoal gray yarn.
R4: sc around. (10)
Flatten the beak and sc through both layers to close. (5)
FO, leaving a long tail for sewing.
Sew the beak to the lower front of the head, centered between the eyes. Shape the gray tip gently with your fingers so it points slightly downward.
Belly Patch
Use cream yarn.
R1: Ch 6.
R2: Starting in the 2nd ch from the hook, sc 4, 3 sc in the last ch. Continue along the other side of the chain, sc 3, inc in the last stitch. (12)
R3: inc, sc 3, inc 3, sc 3, inc 2. (18)
FO, leaving a long tail for sewing.
Sew the belly patch to the front center of the body before attaching the neck, or pin it first and sew after the body pieces are assembled.
Face
The safety eyes are placed during the head section.
After sewing the beak in place, use black embroidery yarn to add a tiny curved smile under the beak if desired.
For a sweeter baby flamingo look, add small blush stitches beside the eyes using soft pink yarn.
Keep the face simple. The round head, glossy eyes, and tiny beak already give the flamingo plenty of personality.
Assembly
Pin all pieces before sewing.
Sew the neck to the top front of the body. Angle it slightly forward so the flamingo looks soft and curious.
Sew the head and neck securely with several rounds of stitches around the base of the neck.
Attach the cream belly patch to the front of the body if you have not already done so.
Sew one coral wing to each side of the body. Place the wings slightly below the neck and angle them downward.
Sew the legs to the lower front of the body. Space them evenly so they hang naturally.
Attach the tiny tail tuft to the back lower body.
Sew the beak to the face, centered between the eyes.
Check that all pieces are secure.
Weave in all yarn tails.
Gently shape the head, neck, body, and wings with your hands.
Tips & Variations
For the softest plush crochet toy, use chenille or velvet yarn. This gives the flamingo a cuddly texture and makes the finished bird feel extra cozy.
If you want a smaller flamingo, use cotton or acrylic yarn with a smaller hook. The same pattern will create a firmer mini amigurumi bird.
For a tropical look, use bright pink for the body and hot coral for the wings.
For a nursery-style flamingo, use blush pink, cream, and soft peach.
For a fancy version, add a tiny crochet flower beside the head or a small bow at the neck.
If your flamingo’s neck feels too floppy, add a little more stuffing at the base and sew it firmly to the body.
When sewing the legs, keep them slightly forward so the flamingo can sit nicely on a shelf.
Use embroidered eyes instead of safety eyes if making this for a baby or toddler.
FAQ
Is this flamingo amigurumi pattern beginner-friendly?
Yes. This is a beginner-friendly crochet pattern for anyone who knows how to work in rounds, increase, decrease, stuff amigurumi, and sew pieces together.
What yarn works best for this plush flamingo?
Plush chenille yarn works best for a soft and cuddly finish. Cotton yarn is better if you want a smaller, firmer flamingo with clearer stitch definition.
Can I make this flamingo bigger?
Yes. Use thicker yarn and a larger hook. You may also need larger safety eyes so the face stays balanced.
Can I make this pattern without safety eyes?
Yes. Embroider the eyes with black yarn for a baby-safe version.
How do I make the neck stand nicely?
Stuff the neck lightly, then add a little extra stuffing at the base before sewing it to the body. Sew firmly around the neck base so it stays supported.
Conclusion
This blush baby flamingo amigurumi is a sweet and unique crochet bird pattern with a soft body, rounded head, gentle neck, coral wings, long dangling legs, and tiny handmade details. It is cheerful, cozy, and full of personality without being too complicated.
Make it as a handmade gift, tropical nursery decoration, plush crochet toy, or cute addition to your amigurumi collection. Save this easy crochet pattern for your next relaxing yarn session and enjoy creating a little flamingo friend with a soft handmade charm.



