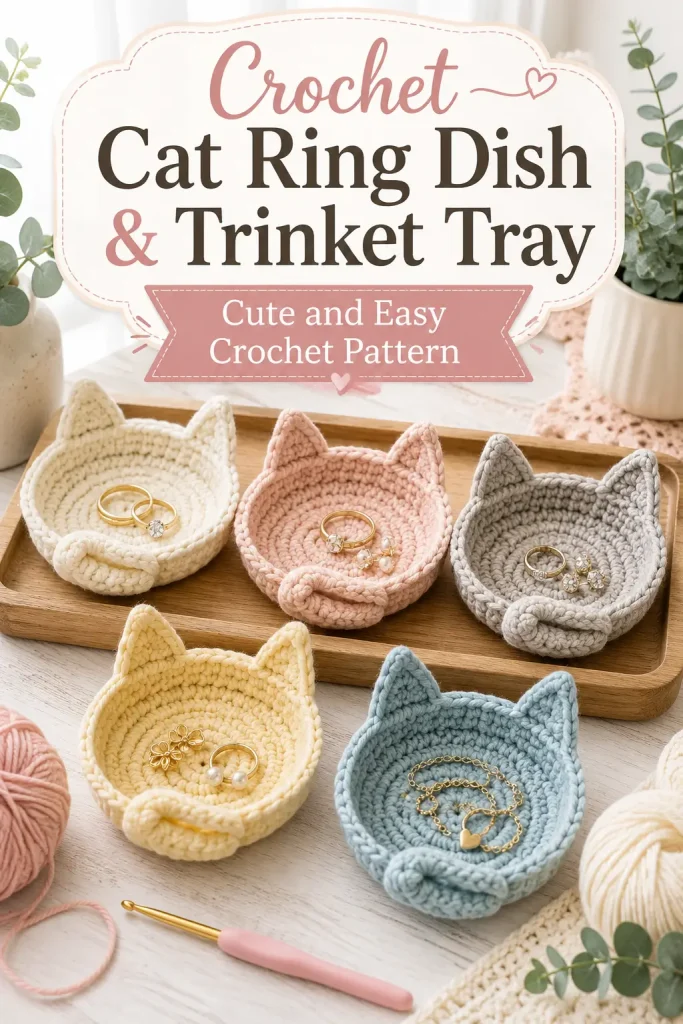
This crochet cat ring dish is a sweet little handmade tray for rings, earrings, stitch markers, keys, coins, tiny hair clips, or bedside trinkets. It has a shallow round dish shape, two pointed cat ears, and a small curved tail-style handle that gives it the cutest cat-inspired finish.
It is practical, quick to make, and perfect for gifting. Make it in soft neutrals like cream, gray, beige, and oatmeal, or create playful pastel versions in pink, yellow, blue, or variegated cotton yarn.
Description
This crochet trinket tray is worked from the center outward into a flat round base, then built upward into a low bowl-style wall. Two pointed crochet cat ears are added to the back rim, and a small curved handle or tail loop is attached near the front. The finished piece looks like a tiny cat-shaped basket or ring dish, with a sturdy textured base and raised sides to keep small items safely inside.
Materials
- Worsted weight cotton yarn or cotton-blend yarn
- 4.0 mm crochet hook
- Yarn needle
- Scissors
- Stitch marker
- Optional: fabric stiffener or diluted glue for a firmer tray
- Optional: blocking pins
Abbreviations
- MR = magic ring
- ch = chain
- sl st = slip stitch
- sc = single crochet
- hdc = half double crochet
- dc = double crochet
- inc = increase
- dec = decrease
- st = stitch
- sts = stitches
- BLO = back loop only
- FLO = front loop only
Pattern Notes
- This pattern uses US crochet terms.
- The tray is worked in continuous rounds unless stated otherwise.
- Use cotton yarn for the best structure.
- Keep your tension firm so the dish holds its shape.
- The base is worked flat first, then the side wall is built upward.
- The ears are worked directly onto the back rim.
- The small handle is attached to the front and can be used as a decorative cat tail or ring holder.
- Finished size is approximately 4–5 inches wide, depending on yarn and tension.
Step-by-Step Instructions
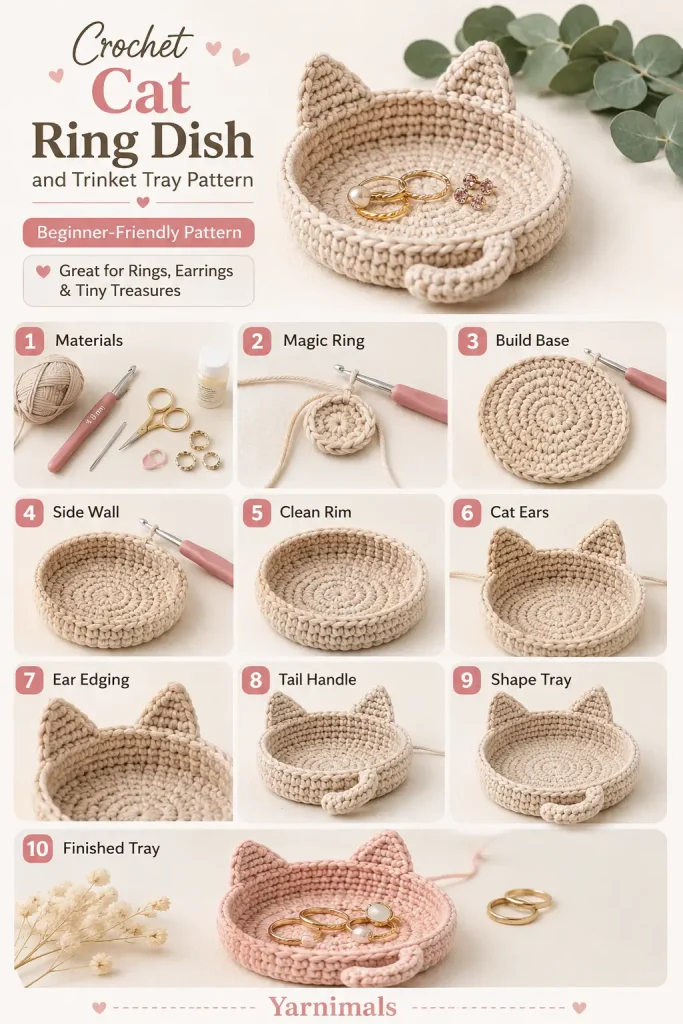
Cat Dish Base
Use your main tray color.
Round 1
Make a MR.
Work 6 sc into the ring.
Pull the ring closed.
6 sts
Round 2
Inc in each st around.
12 sts
Round 3
Sc in next st, inc in next st.
Rep around.
18 sts
Round 4
Sc in next 2 sts, inc in next st.
Rep around.
24 sts
Round 5
Sc in next 3 sts, inc in next st.
Rep around.
30 sts
Round 6
Sc in next 4 sts, inc in next st.
Rep around.
36 sts
Round 7
Sc in next 5 sts, inc in next st.
Rep around.
42 sts
Round 8
Sc in next 6 sts, inc in next st.
Rep around.
48 sts
The base should now be a flat circle.
Build the Side Wall
Round 9
Working in BLO, sc in each st around.
48 sts
This round helps the side wall turn upward.
Round 10
Sc in each st around.
48 sts
Round 11
Sc in each st around.
48 sts
Round 12
Sc in each st around.
48 sts
For a taller tray, add 1 or 2 more plain sc rounds.
Rim Round
Sl st in each st around.
Join neatly and fasten off.
Weave in the end.
This creates a clean top edge.
Mark the Ear Placement
Lay the tray flat.
Choose one side as the back of the cat dish.
Place a stitch marker where the left ear will begin.
Count about 10–12 stitches across the back rim and place another marker for the right ear.
Leave a small space between the two ears so they look balanced.
First Cat Ear
Join yarn at the first marker on the back rim.
Row 1
Ch 1.
Sc in the same st.
Sc in next 6 sts along the rim.
Ch 1, turn.
7 sc
Row 2
Dec over first 2 sts.
Sc in next 3 sts.
Dec over last 2 sts.
Ch 1, turn.
5 sts
Row 3
Dec over first 2 sts.
Sc in next st.
Dec over last 2 sts.
Ch 1, turn.
3 sts
Row 4
Sc3tog or work one decrease across the 3 sts to form the point.
Fasten off.
This creates one pointed cat ear.
Second Cat Ear
Join yarn at the second marker.
Repeat the same ear instructions:
Row 1: 7 sc
Row 2: 5 sts
Row 3: 3 sts
Row 4: point
Fasten off and weave in the ends.
Ear Edging
Join yarn at the base of one ear.
Sc evenly up the side of the ear.
Work 2 sc at the pointed tip.
Sc evenly down the other side.
Sl st along the tray rim until you reach the second ear.
Sc evenly around the second ear the same way.
Sl st into the rim and fasten off.
This makes the ears look thicker and cleaner.
Front Tail Handle
The small raised loop can be used as a decorative tail handle or a ring holder.
Choose the front center of the tray, opposite the ears.
Join yarn to the inside front rim.
Handle Row 1
Ch 14.
Attach the chain to the tray about 5–6 stitches away from the starting point with a sl st.
This creates an arch.
Handle Row 2
Turn.
Work 18–20 sc around the chain arch, covering the chain fully.
Sl st into the starting point.
Fasten off, leaving a tail.
Use the tail to sew the base of the handle firmly to the tray on both sides.
The handle should stand up softly like a little cat tail.
Optional Stronger Handle
For a thicker handle, repeat one more row of sc over the handle:
Join yarn at one handle base.
Sc across the handle arch.
Sl st into the opposite base.
Fasten off and weave in ends.
Optional Paw Detail
If you want a cute front detail, make a tiny paw pad applique.
With a contrast color, make a MR.
Work 6 sc into the ring.
Join and fasten off.
Sew this small circle to the front outside wall of the tray.
For tiny toe dots, embroider 3 small stitches above it.
Keep this detail optional, because the image style is simple and clean.
Finishing
Weave in all loose ends.
Shape the round base with your fingers.
Pinch the ears gently so they stand upright.
Pull the handle into a smooth arch.
If your tray feels too soft, brush it lightly with fabric stiffener or diluted glue, shape it over a small bowl, and let it dry completely.
Do not over-stiffen if you still want the tray to feel soft and handmade.
Tips & Variations
Use cotton yarn for a sturdy ring dish.
Use a smaller hook than the yarn label suggests for a firmer tray.
Try cream, oatmeal, gray, beige, or white for a neutral cat dish set.
Use pink, yellow, pastel blue, or multicolor yarn for a playful gift version.
Make a set of 3 in different colors for jewelry storage, desk decor, or craft fair items.
For a larger tray, continue increasing the base to 54 or 60 stitches before building the side wall.
For a deeper tray, add more side wall rounds before making the rim.
Add a small embroidered nose and whiskers if you want a cat face, or leave it plain for a modern minimalist look.
FAQ
Is this crochet cat ring dish beginner-friendly?
Yes. This is a good beginner-friendly crochet home decor project if you know how to work in the round, single crochet, increase, decrease, and sew small details.
What yarn is best for a crochet trinket tray?
Cotton yarn is best because it holds shape better than soft acrylic. A cotton-blend yarn also works well.
Can I make the tray bigger?
Yes. Add more increase rounds to the base before starting the side wall. Then add more side rounds if you want a deeper basket.
How do I make the tray stand firm?
Use tight tension, cotton yarn, and a smaller hook. You can also add fabric stiffener after finishing.
Conclusion
This crochet cat ring dish and trinket tray is a quick, cute, and useful handmade project. The round tray shape, tiny cat ears, and curved tail handle make it perfect for jewelry, keys, stitch markers, or little keepsakes.
Make one in a soft neutral color for a simple handmade look, or create a whole set in cheerful colors for gifts, markets, or cozy desk decor.




I am having a hard time making the tail