Introduction
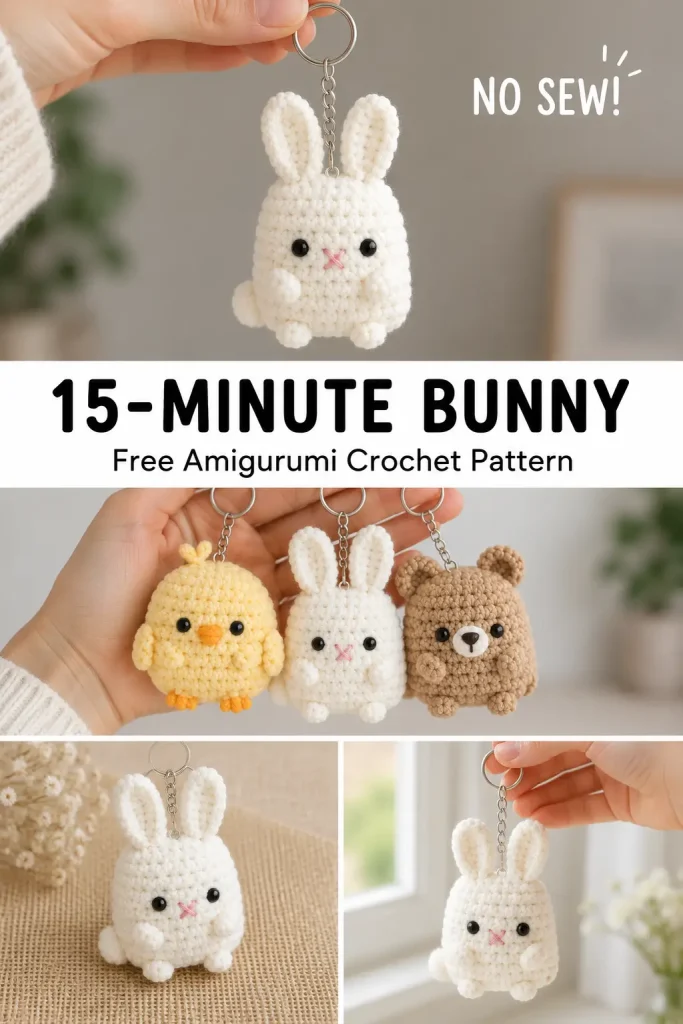
A tiny crochet bunny is one of those sweet little projects that feels almost impossible to make just one of. It is soft, quick, charming, and small enough to turn into a keychain, bag charm, Easter basket surprise, or pocket-sized plush friend.
This original no-sew bunny amigurumi pattern is designed for fast, cozy crocheting. The body is simple and rounded, the ears are worked directly into the top, and the tiny arms, feet, and tail are added with easy built-in stitches so you can skip the long sewing process.
If you love quick amigurumi projects, this easy crochet pattern is a lovely choice for beginners who want something cute and satisfying. It uses basic stitches, works up beautifully with plush yarn, and creates a soft little bunny full of handmade personality.
Description
This no-sew pocket bunny is a small plush crochet toy with a rounded rectangle body, two soft upright ears, tiny side paws, little feet, a small fluffy tail, and a simple embroidered face. The finished design is intentionally chubby and minimal, giving it a cute kawaii-style look that works perfectly as a keychain or mini gift.
The bunny looks especially sweet in white or cream chenille yarn, with glossy black eyes and a tiny pink embroidered nose. You can also make it in pastel colors like baby pink, lavender, pale yellow, mint, or soft blue for a playful spring collection.
Because the design is small and simple, it is perfect for craft fairs, Easter gifts, classroom favors, stocking stuffers, backpack charms, desk buddies, and handmade keychains. It is also a great beginner crochet project if you want to practice shaping a tiny amigurumi without sewing lots of separate pieces.
Materials
- Super bulky chenille yarn in white or cream
- Small amount of pink yarn or embroidery thread for the nose
- Small amount of black yarn for optional mouth embroidery
- 5 mm crochet hook
- 8 mm safety eyes
- Polyester fiberfill stuffing
- Stitch marker
- Yarn needle
- Scissors
- Optional keychain ring and small metal chain
Finished Size
Using super bulky chenille yarn and a 5 mm crochet hook, the finished bunny measures approximately 3 to 4 inches tall, depending on your tension and yarn thickness.
Abbreviations
- MR: magic ring
- ch: chain
- sc: single crochet
- inc: increase, 2 sc in the same stitch
- dec: decrease, single crochet 2 stitches together
- sl st: slip stitch
- hdc: half double crochet
- st: stitch
- sts: stitches
- FO: fasten off
Pattern Notes
Work in continuous rounds unless stated otherwise.
Use a stitch marker to mark the first stitch of every round.
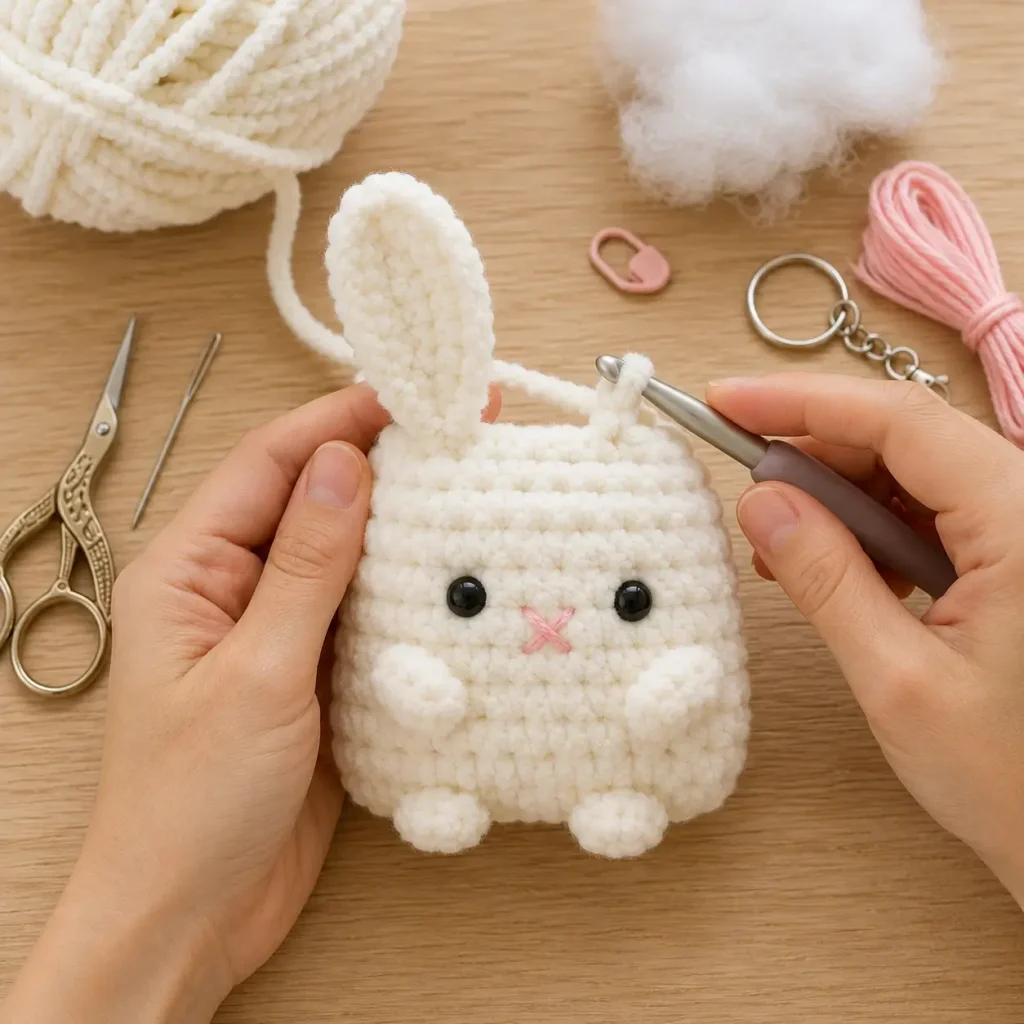
This is a no-sew style bunny. The ears, arms, feet, and tail are worked directly onto the body.
Stuff the bunny firmly enough to hold its shape, but do not overstuff. Plush yarn can stretch if too much stuffing is added.
Insert the safety eyes before the body is closed.
For a baby-safe version, embroider the eyes instead of using plastic safety eyes and skip the keychain hardware.
Step-by-Step Instructions
Head
This pattern does not include a separate head. The bunny is made as one rounded body shape with the face placed near the upper front.
Body
Use white or cream yarn.
Round 1: Make a magic ring and crochet 6 sc into the ring. (6)
Round 2: inc around. (12)
Round 3: (sc 1, inc) repeat around. (18)
Round 4: (sc 2, inc) repeat around. (24)
Round 5: sc around. (24)
Round 6: sc around. (24)
Round 7: sc around. (24)
Round 8: sc around. (24)
Place safety eyes between Rounds 5 and 6, about 5 stitches apart.
Round 9: sc around. (24)
Round 10: (sc 2, dec) repeat around. (18)
Begin stuffing the body. Add stuffing slowly and shape the bunny into a soft rounded square.
Round 11: (sc 1, dec) repeat around. (12)
Add more stuffing if needed.
Do not close yet. Continue to the feet round.
Arms
The arms are worked directly into the sides of the bunny using small bobble-style stitches.
Round 12: sc 2, make first arm in next stitch, sc 5, make second arm in next stitch, sc 4.
To make each arm: in the same stitch, work 3 hdc, remove hook from loop, insert hook into the first hdc of the group, pull the active loop through, then continue the round.
This creates two tiny rounded side paws.
Legs
The feet are worked into the lower front of the bunny before closing.
Round 13: sc 1, make first foot in next stitch, sc 2, make second foot in next stitch, sc 7. (12)
To make each foot: in the same stitch, work 3 hdc, remove hook from loop, insert hook into the first hdc of the group, pull the active loop through, then continue the round.
The two feet should sit near the lower front of the bunny. If they shift slightly, gently shape them into place with your fingers.
Ears
The ears are worked directly onto the top of the bunny after the body is mostly shaped.
After completing Round 13, do not fasten off.
Flatten the top slightly and find the front center of the bunny. The ears should sit on the upper left and upper right of the head area.
First ear: ch 6. Starting in the 2nd ch from hook, sc 2, hdc 2, sl st in last ch. Sl st into the next stitch on the body to anchor.
Sc 2 across the top of the body.
Second ear: ch 6. Starting in the 2nd ch from hook, sc 2, hdc 2, sl st in last ch. Sl st into the next stitch on the body to anchor.
The ears should stand softly upright with a slight curve.
Tail
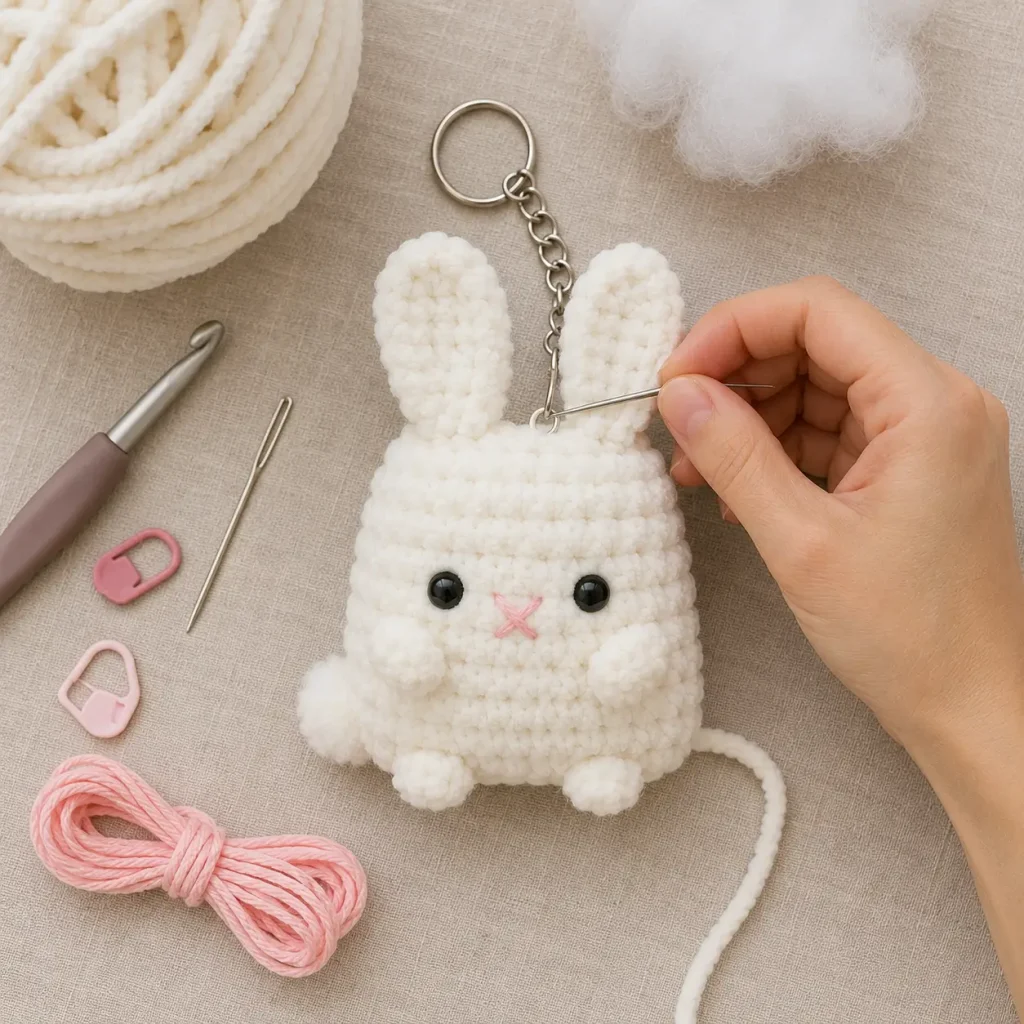
The tail is worked directly onto the back of the bunny.
Turn the bunny so the back is facing you.
Join white or cream yarn to the lower back center.
Ch 2, work 4 hdc into the same joining point, sl st into the same spot to close the tail puff.
FO and weave in the ends.
The tail should look like a tiny soft bump on the back.
Face
Use pink yarn or embroidery thread.
Embroider a tiny “X” nose between the eyes, slightly below the eye line.
To make the nose, stitch one diagonal line, then cross it with a second diagonal line.
Optional: Use black yarn to add a tiny short vertical stitch under the nose for a sweeter expression.
Keep the face simple so the bunny stays soft, clean, and cute.
Assembly
This is a no-sew bunny, so very little assembly is needed.
Check the stuffing and shape the bunny gently with your hands.
If the body opening is still slightly visible, use the yarn tail to weave through the remaining stitches and pull closed.
Weave in all yarn ends securely.
Shape the ears so they sit upright.
Adjust the arms and feet so they face forward.
Shape the tiny tail into a round puff.
If adding a keychain, sew the chain or jump ring securely to the top center between the ears. Stitch through the top several times so the keychain attachment is strong.
Tips & Variations
Use super bulky chenille yarn for the softest and fastest bunny. It creates a plush texture and helps the project work up quickly.
For a smaller keychain bunny, use worsted-weight cotton yarn with a smaller hook. The same pattern will create a firmer mini version.
For a spring set, make bunnies in cream, blush pink, lavender, pastel yellow, mint, and baby blue.
For a cozy winter bunny, use ivory yarn and add a tiny crochet scarf.
If the ears feel too floppy, use a slightly smaller hook or crochet the chains more tightly.
Do not overstuff the bunny. A soft rounded shape looks cuter than a stiff square body.
If making these for children, embroider the eyes instead of using safety eyes.
For craft fairs, make several bunnies in different colors and attach keychains to some while leaving others as mini plush toys.
FAQ
Is this bunny crochet pattern beginner-friendly?
Yes. This is a beginner-friendly amigurumi pattern if you know how to work in rounds, increase, decrease, chain, and make basic stitches.
Is this really a no-sew bunny?
Yes. The ears, arms, feet, and tail are worked directly onto the body. You only need to weave in ends and optionally attach keychain hardware.
How long does this bunny take to make?
With plush yarn, many crocheters can finish one bunny in about 15 to 30 minutes once they understand the pattern.
What yarn gives the softest result?
Super bulky chenille yarn gives the softest plush crochet toy. Cotton yarn creates a smaller and firmer bunny.
Can I make this bunny without safety eyes?
Yes. Embroidered eyes are a great option, especially for baby-safe toys or gifts for young children.
Conclusion
This 15-minute no-sew pocket bunny is a sweet, quick, and satisfying crochet project for anyone who loves tiny amigurumi animals. With its soft body, upright ears, little paws, tiny feet, fluffy tail, and simple embroidered face, it has all the charm of a handmade plush in a small keychain-friendly size.
Make one as a gift, create a pastel bunny collection, add it to an Easter basket, or turn it into a cute bag charm. This easy crochet pattern is perfect for cozy crafting, last-minute gifts, and cheerful handmade keepsakes.




I followed these instructions precisely, but my rabbit looks nothing like yours.
Sorry but i think there is something wrong somewhere!