Introduction
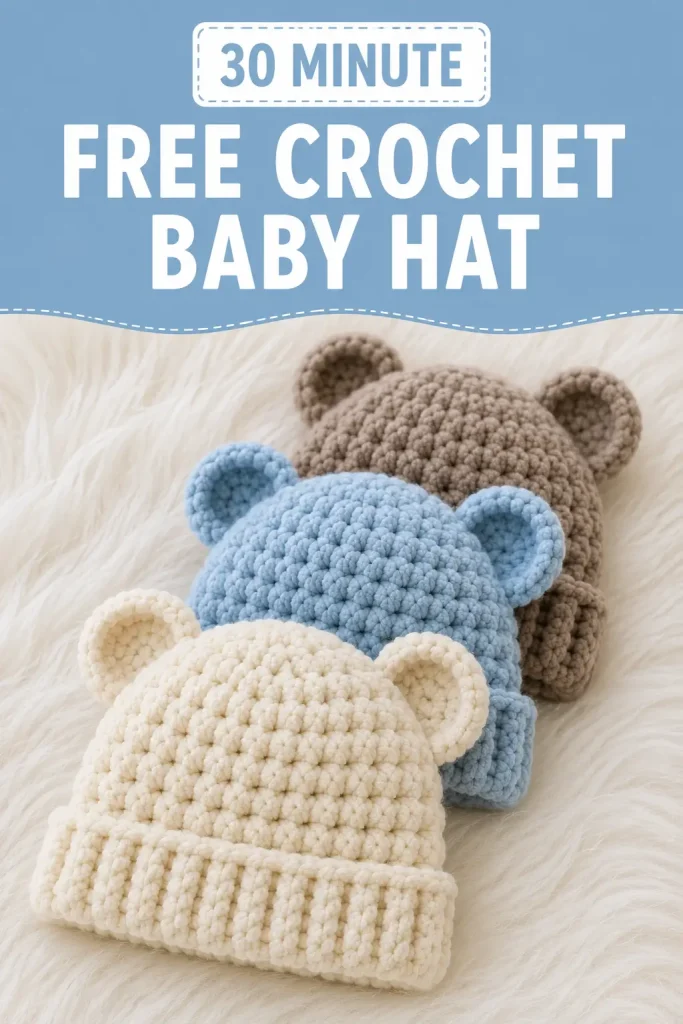
There is nothing sweeter than a tiny handmade hat made with soft, squishy yarn. This crochet baby hat pattern is cozy, quick, and full of charm, making it a lovely project for baby shower gifts, newborn photo props, hospital donations, or a last-minute handmade present.
The simple teddy bear ears give this easy crochet baby hat the cutest little finish without making the pattern complicated. It works up quickly with super bulky yarn, so you can make one in about 20 to 30 minutes once you get comfortable with the pattern.
This beginner crochet project is also a wonderful way to use leftover blanket yarn. Choose soft neutrals, baby blues, creamy whites, pastel greens, or warm beige shades to create a set of adorable teddy hats in different sizes.
Description
This crochet baby hat is soft, chunky, and beautifully textured thanks to super bulky blanket yarn. The main hat has a simple rounded crown and a cozy fitted shape, while the folded ears add a sweet teddy bear style that looks adorable on babies.
The texture is plush and squishy, making the finished hat feel warm and gentle. The design works beautifully in cream, gray, blue, tan, vanilla, lemon-lime, or any soft baby-friendly color. Because the stitch pattern is simple, the yarn does most of the work and gives the hat its thick, fluffy look.
This easy crochet pattern includes four baby sizes: newborn, 0–3 months, 3–6 months, and 6–12 months. It is perfect for handmade baby gifts, winter accessories, baby photography, nursery keepsakes, or small market makes.
Materials
- Super bulky size 6 blanket yarn in your preferred color
- 10 mm crochet hook
- Tapestry needle for weaving in ends
- Stitch marker
- Scissors
Finished Sizes
| Size | Circumference | Height |
|---|---|---|
| Newborn | 13 inches | 5 inches |
| 0–3 Months | 14 inches | 5.5 inches |
| 3–6 Months | 15 inches | 6 inches |
| 6–12 Months | 17 inches | 6.5 inches |
Yardage
You will need approximately 30 to 45 yards, depending on the size you are making.
Abbreviations
- ch: chain
- sc: single crochet
- hdc: half double crochet
- BLO: back loop only
- sl st: slip stitch
- st: stitch
- sts: stitches
Gauge
To measure gauge, work the first 3 rounds of the newborn crochet hat.
The diameter of the circle after 3 rounds should measure approximately 4.5 inches.
Stitch Explanation
Back Loop Only
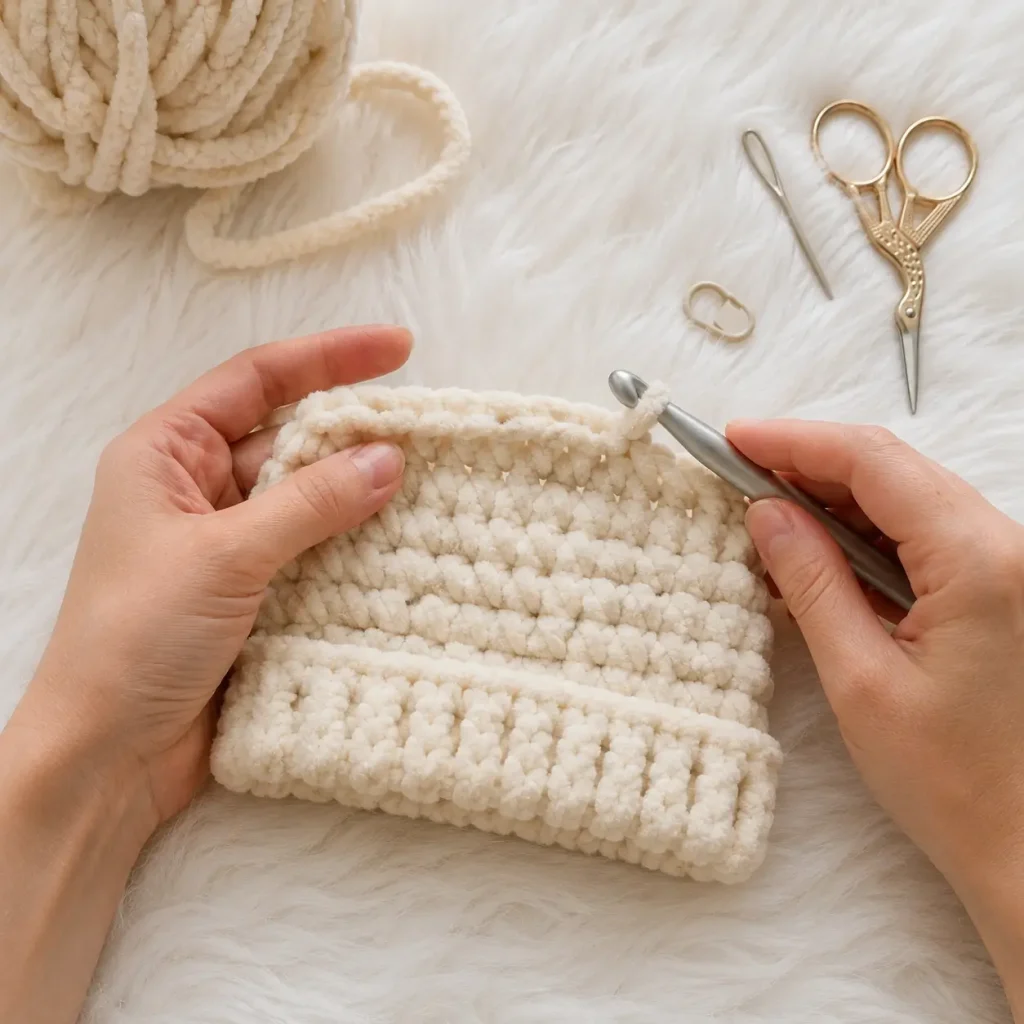
Working in the back loop only means inserting your hook under only the back loop of the stitch while leaving the front loop unworked. This creates a subtle ridge and gives the final round a neat, finished look.
Pattern Notes
Two options are included for Round 1: one with a magic ring and one without a magic ring. Choose whichever method feels easier for you.
If you begin with a magic ring, weave the starting tail very securely. Go back and forth at least three times so the center of the crown does not loosen later.
If you begin without a magic ring, you may need to use the beginning tail to close any small hole left at the crown before weaving in the rest of the tail.
The first 3 rounds are the same for all four sizes. After completing Round 3, continue with the size-specific instructions.
The hat is worked in a continuous spiral, so do not slip stitch or turn at the end of rounds unless the pattern tells you to.
Use a stitch marker to mark the first stitch of each round.
Step-by-Step Instructions
Head
This pattern does not include a separate head section. The main hat is worked from the crown down.
Body
The body of the hat is the main beanie section.
Common Rounds for All Sizes
Round 1 with Magic Ring
Make a magic ring and work 8 sc into it. Close the ring. Do not sl st and do not turn. (8 sc)
Round 1 without Magic Ring
Ch 3, 2 sc into 2nd ch from hook, 4 sc into next ch. You will now be working below the foundation chain. Work 2 sc into the next free loop of the foundation chain. Do not sl st and do not turn. (8 sc)
Round 2
2 sc in next st, which is the first st of Round 1. Place a marker in the first st you just made. Work 2 sc in next 7 sts until you end in the stitch right before the marked one. Do not sl st and do not turn. (16 sc)
Round 3
1 sc in next marked st. Move the marker up into the first st you just made. Work 2 sc in next st. Then repeat: 1 sc in next st, 2 sc in next st until you end in the stitch right before the marked one. Do not sl st and do not turn. (24 sc)
Newborn Crochet Hat
Round 4
1 sc in next marked st. Move the marker up into the stitch you just made. Work 1 sc in each st across until you end in the stitch right before the marked one. Do not sl st and do not turn. (24 sc)
Repeat Round 4 three more times, or until your hat is approximately 4.5 inches tall.
Do not fasten off yet.
Fold your hat flat. It may lay flatter in one direction than another, so adjust the fold until the sides line up neatly. This will make it easier to place the ears evenly.
Once the hat is folded, your marker may not be on the side fold. Remove the marker and continue working sc sts until you reach the side of the hat. This may take one or more stitches depending on how the hat is folded.
Last Round
Sl st to the BLO of the next st on the side fold. Ch 1. Work 1 sc in BLO of the same st as ch 1. Work 1 sc in the BLO of each st across to the end. Sl st to the first sc. Fasten off. (24 sc)
0–3 Months Crochet Baby Hat
Round 4
1 sc in next marked st. Move the marker up into the stitch you just made. Work 2 sc in next st, 1 sc in next 11 sts, 2 sc in next st, then 1 sc in each st across until you end in the stitch right before the marked one. Do not sl st and do not turn. (26 sc)
Round 5
1 sc in marked st. Move the marker up into the stitch you just made. Work 1 sc in each st across until you end in the stitch right before the marked one. Do not sl st and do not turn. (26 sc)
Repeat Round 5 three more times, or until your hat is approximately 5 inches tall.
Do not fasten off yet.
Fold your hat flat. Adjust the fold until the hat lays neatly and the sides line up for ear placement.
Once the hat is folded, your marker may not be on the side fold. Remove the marker and continue working sc sts until you reach the side of the hat. This may take one or more stitches depending on your fold.
Last Round
Sl st to the BLO of the next st on the side fold. Ch 1. Work 1 sc in BLO of the same st as ch 1. Work 1 sc in the BLO of each st across to the end. Sl st to the first sc. Fasten off. (26 sc)
3–6 Months Crochet Baby Hat
Round 4
1 sc in next marked st. Move the marker up into the stitch you just made. Work 2 sc in next st. Then repeat: 1 sc in next 5 sts, 2 sc in next st a total of 3 times. Work 1 sc in last 4 sts. Do not sl st and do not turn. (28 sc)
Round 5
1 sc in marked st. Move the marker up into the stitch you just made. Work 1 sc in each st across until you end in the stitch right before the marked one. Do not sl st and do not turn. (28 sc)
Repeat Round 5 four more times, or until your hat is approximately 5.5 inches tall.
Do not fasten off yet.
Fold your hat flat. Adjust the fold until it lays smoothly and evenly. This makes it easier to attach the teddy ears in the right position.
Once the hat is folded, your marker may not be on the side fold. Remove the marker and continue working sc sts until you reach the side of the hat.
Last Round
Sl st to the BLO of the next st on the side fold. Ch 1. Work 1 sc in BLO of the same st as ch 1. Work 1 sc in the BLO of each st across to the end. Sl st to the first sc. Fasten off. (28 sc)
6–12 Months Crochet Baby Hat
Round 4
1 sc in next marked st. Move the marker up into the stitch you just made. Work 1 sc in next st, 2 sc in next st. Then repeat: 1 sc in next 2 sts, 2 sc in next st until you end in the stitch right before the marked one. Do not sl st and do not turn. (32 sc)
Round 5
1 sc in marked st. Move the marker up into the stitch you just made. Work 1 sc in each st across until you end in the stitch right before the marked one. Do not sl st and do not turn. (32 sc)
Repeat Round 5 five more times, or until your hat is approximately 6 inches tall.
Do not fasten off yet.
Fold your hat flat. Adjust the fold until the sides line up neatly so the ears can be attached evenly.
Once the hat is folded, your marker may not be on the side fold. Remove the marker and continue working sc sts until you reach the side of the hat.
Last Round
Sl st to the BLO of the next st on the side fold. Ch 1. Work 1 sc in BLO of the same st as ch 1. Work 1 sc in the BLO of each st across to the end. Sl st to the first sc. Fasten off. (32 sc)
Arms
This pattern does not include arms.
Legs
This pattern does not include legs.
Ears
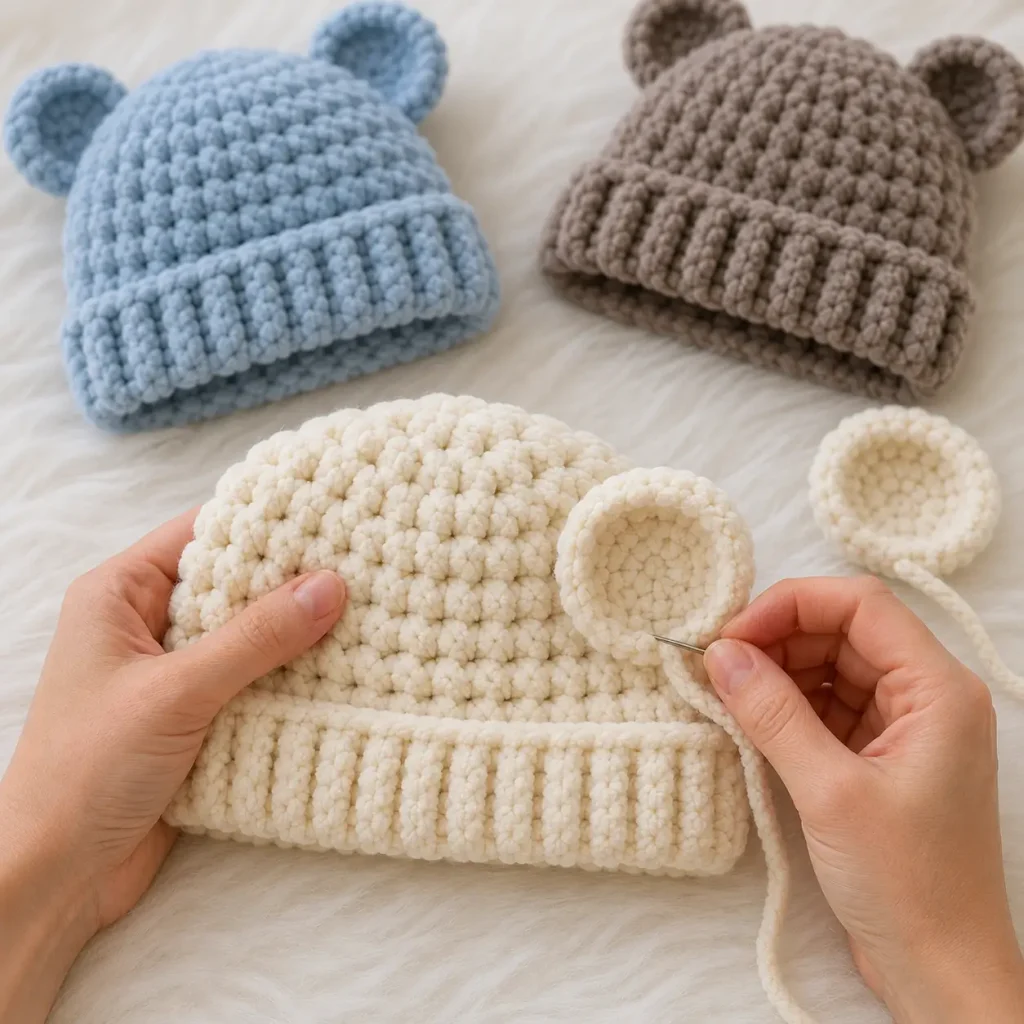
The ears are made separately and sewn onto the sides of the hat.
Ears for Newborn, 0–3 Months, and 3–6 Months
Make 2.
Row 1
Ch 3, 2 sc in 2nd ch from hook, 2 sc in next ch, turn. (4 sc)
Row 2
Ch 1, 2 sc in same st as ch 1, 2 sc in remaining 3 sts. Fasten off with a 15-inch tail for sewing. (8 sc)
Ears for 6–12 Months
Make 2.
Row 1
Ch 3, 2 sc in 2nd ch from hook, 2 sc in next ch, turn. (4 sc)
Row 2
Ch 1, 2 sc in same st as ch 1, 2 hdc in next 2 sts, 2 sc in last st. Fasten off with a 15-inch tail for sewing.
Tail
This pattern does not include a tail.
Face
This baby teddy beanie does not include facial embroidery. The teddy bear look comes from the soft shape of the hat and the rounded ears.
Assembly
Thread the long tail left on each ear onto your tapestry needle.
Run the needle in and out through the straight base of the ear.
Pull gently to cinch the base. The tighter you pull, the smaller and more rounded the ear will look.
Repeat with the second ear.
Place both ears along the side folds of the hat and adjust until you like their position.
Sew each ear securely along the fold of the hat on either side.
Weave in all remaining tails.
Check the crown tail carefully, especially if you started with a magic ring. Make sure it is woven in securely.
Tips & Variations
Use super bulky blanket yarn for the softest, squishiest finish. This gives the hat its thick texture and helps it work up quickly.
For a classic teddy bear look, try warm beige, cream, tan, or soft brown.
For a modern baby gift, use soft gray, dusty blue, vanilla, sage green, or pale yellow.
Use leftover blanket yarn to make a matching set in multiple sizes. These hats are quick enough to make several in one day.
When sewing the ears, pin them first. Small changes in placement can make the hat look more playful, sleepy, or teddy-like.
If the ears look too flat, cinch the base a little tighter before sewing.
If the hat feels too short, add one extra plain round before the final BLO edging round.
If the hat feels too loose or too tall, check your gauge and adjust your hook size if needed.
For hospital donations, choose soft washable yarn and avoid buttons, appliques, or small decorations.
FAQ
Is this crochet baby hat beginner-friendly?
Yes. This is an easy crochet pattern that uses basic stitches, simple shaping, and a small amount of sewing for the ears.
How long does it take to crochet this baby hat?
Most crocheters can make one hat in about 20 to 30 minutes once they are familiar with the pattern.
What yarn works best for this teddy baby hat?
A super bulky size 6 blanket yarn works best because it creates a soft, plush, squishy texture and helps the hat work up quickly.
Can I use a different yarn?
Yes, but choose another super bulky yarn with a similar gauge. If your yarn is thinner or thicker, the finished size may change.
Can I make this hat without ears?
Yes. Simply skip the ear section and finish the beanie after the final BLO round for a simple chunky baby hat.
How do I make the ears look round?
After crocheting each ear, run the yarn tail through the straight base and pull to cinch. This creates the rounded bowl-like teddy bear shape.
Conclusion
This 30-minute crochet baby hat pattern is simple, soft, and full of handmade charm. The chunky texture makes it cozy and quick, while the tiny teddy bear ears add the sweetest finishing touch.
Whether you are making newborn photo props, baby shower gifts, hospital donation hats, or a full set of cozy baby beanies in different colors, this beginner crochet project is a lovely pattern to keep nearby.
Save this easy crochet baby hat pattern for your next quick yarn project and enjoy making soft little teddy hats that are as cute as they are practical.




How do I print hat pattern