Amigurumi Baby Bat Pumpkin Friend
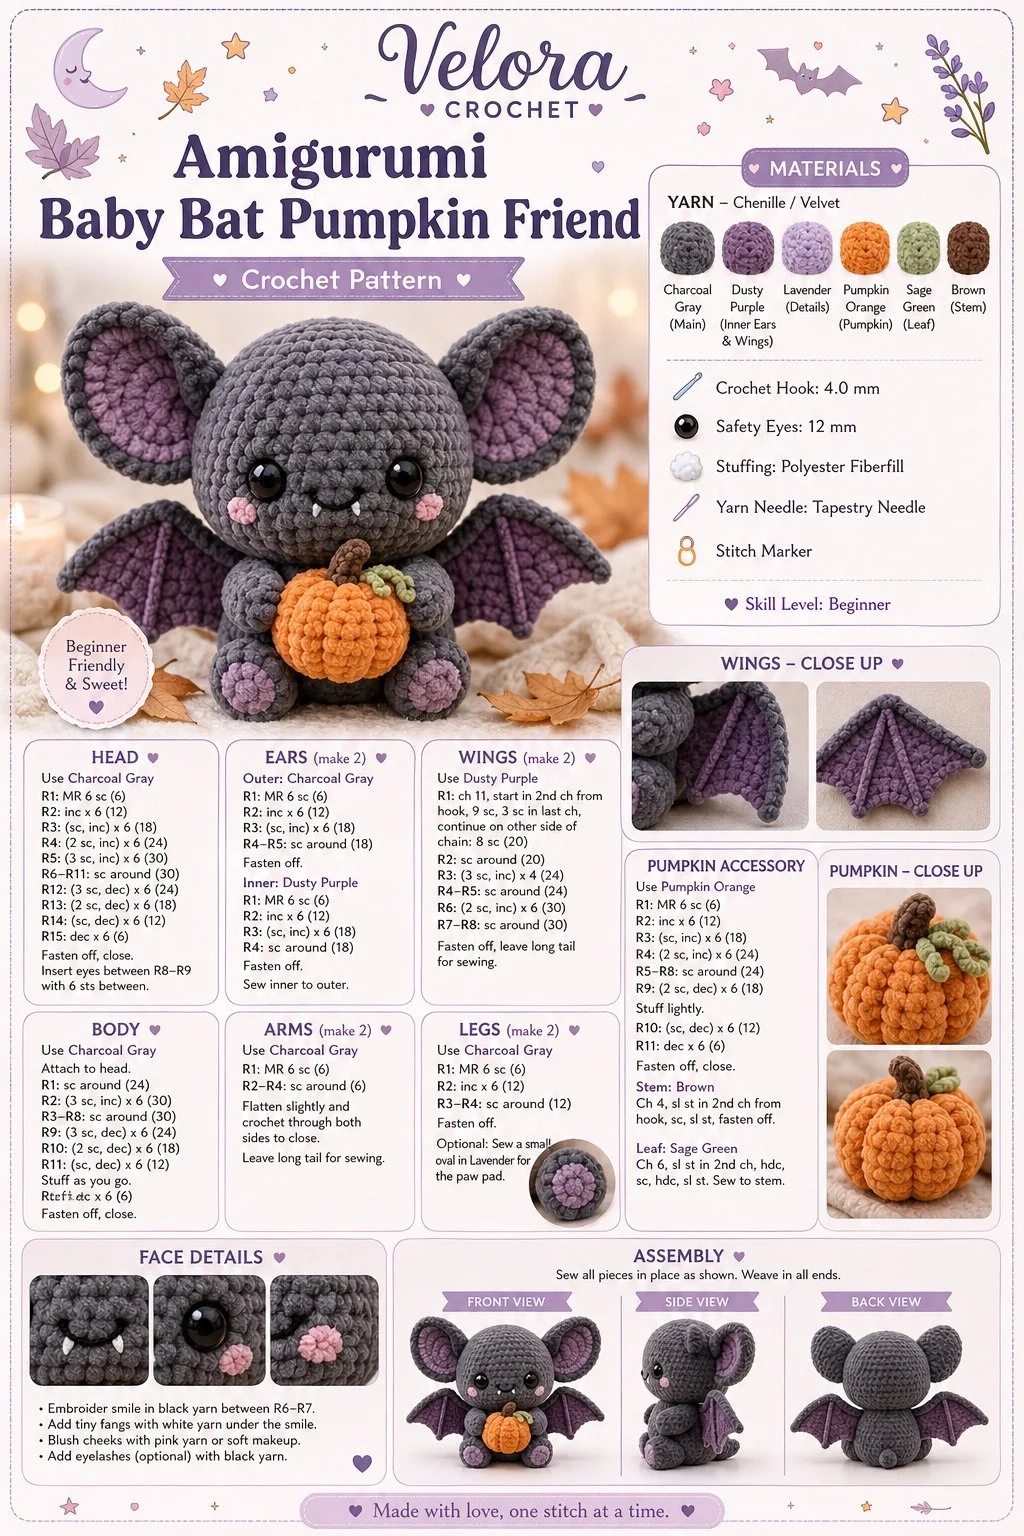
Crocheting a cute baby bat amigurumi paired with a tiny pumpkin is a delightful project, especially as Halloween approaches. This pattern is perfect for beginners looking to enhance their crafting skills while creating an adorable handmade toy that can double as a charming decoration or gift. So grab your yarn and hook, and let’s get started on this fun DIY crochet project!
Materials
- Worsted weight yarn in soft lavender, charcoal, or warm gray (choose colors that complement each other)
- Small amount of orange yarn for the pumpkin
- G (4.0 mm) crochet hook (or size needed to obtain gauge)
- Fiberfill stuffing
- Tapestry needle for sewing and weaving in ends
- Safety eyes or embroidery thread for eyes (optional for a personal touch)
- Stitch markers (very handy for beginners)
Abbreviations
- ch: chain
- sc: single crochet
- dc: double crochet
- inc: increase (two single crochets in one stitch)
- dec: decrease (crochet two stitches together)
- sl st: slip stitch
Pattern Instructions
Head
- Start with a magic ring and work 6 sc into the ring. (6)
- Inc in each stitch around. (12)
- Sc in the next stitch, inc in the next. Repeat around. (18)
- Sc in the next 2 stitches, inc in the next. Repeat around. (24)
- Work even for 4 rounds.
Body
- Sc in the next 3 stitches, inc in the next. Repeat around. (30)
- Work even for 5 rounds.
- Sc in the next 3 stitches, dec. Repeat around. (24)
- Sc in the next 2 stitches, dec. Repeat around. (18)
- Stuff the body firmly and continue to decrease.
- Sc in the next stitch, dec. Repeat around. (12)
- Dec around until closed.
Arms
- With your starting yarn, make a magic ring, 5 sc in the ring. (5)
- Work even for 3 rounds.
- Finish off leaving a long tail for sewing.
Legs
- Make 2 using the same method as the arms but only work for 2 rounds.
- Finish off and weave in the ends.
Ears / Details
- With a separate color, ch 5.
- Row 1: Starting in the second ch from hook, sc in the next 3 ch, 3 sc in the last ch. (7)
- Working on the opposite side of the chain, sc in the next 3 ch, 2 sc in the last ch. (13)
- Finish off, leaving a long tail for attaching.
Accessories
Mini Pumpkin
- With orange yarn, make a magic ring and work 6 sc in the ring. (6)
- Inc in each stitch around. (12)
- Work even for 2 rounds.
- Stuff lightly and finish by gathering the top and tying off.
Assembly & Finishing
- Attach the ears at the top of the head, slightly apart.
- Sew the arms to the sides of the body.
- Sew the legs at the bottom of the body.
- Attach safety eyes or embroider sleepy eyes using black thread.
- Position and sew the mini pumpkin next to the bat.
- Finish by weaving in any loose ends.
{image_template}
Tips for Best Results
- Tension Consistency: Keeping your tension even throughout your stitches helps maintain the shape of your bat. If your stitches feel tighter than usual, consider loosening your grip.
- Stuffing Tips: When filling your bat, use small amounts of fiberfill and work it into all corners to ensure it holds its shape nicely.
- Stitch Markers: Using stitch markers can be incredibly helpful, especially at the beginning of each round. They help keep your place and ensure you don’t accidentally lose track of your counts.
- Shaping Advice: For a more 3D look, play around with the placement of your arms and legs before securing them. This lets you find the most balanced position.
Conclusion
Creating this cute baby bat amigurumi with a mini pumpkin is not just an enjoyable way to hone your beginner crochet skills, but it also results in a delightful handmade toy that’s perfect for gifting or selling at local markets. Remember, you can always experiment with different colors and accessories to make each one unique. Happy crocheting!