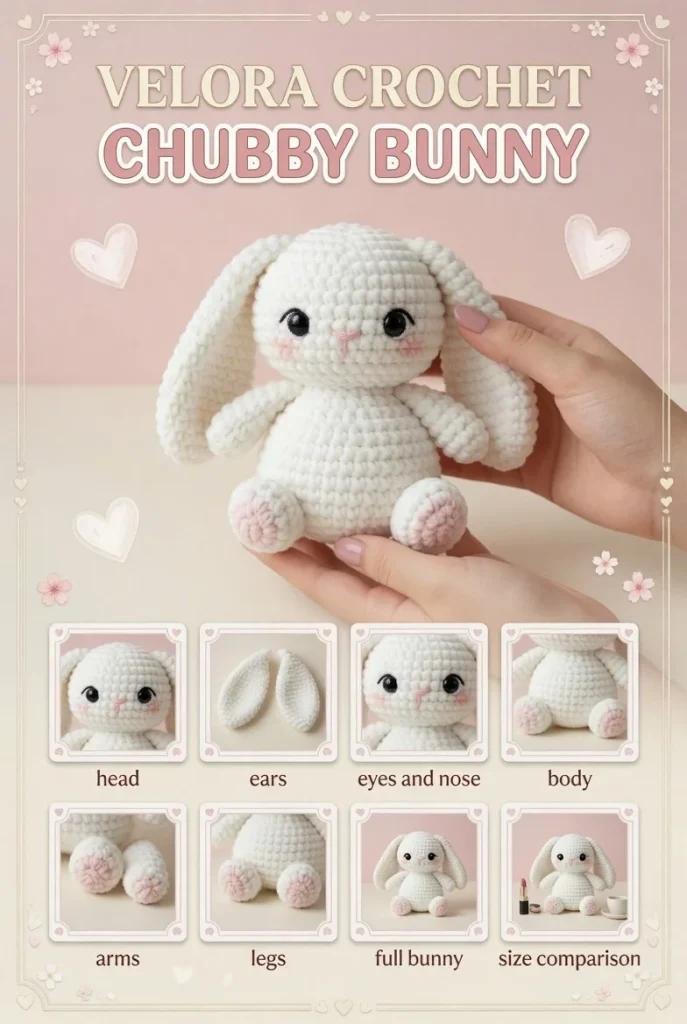
Create a delightful amigurumi bunny doll using this straightforward crochet pattern. Perfect for beginners, this mini crochet project employs plush, bulky chenille or velvet-style yarn in a lovely off-white hue. Add charming minimalist black safety eyes along with a pink embroidered nose and mouth, crafting an adorable companion that features a floppy head and customizable stuffing for both short or long limbs.
Materials
- Bulky chenille or velvet-style yarn in off-white
- Black safety eyes
- Pink embroidery thread
- Fiberfill stuffing
- Crochet hook (size appropriate for your yarn)
- Yarn needle
- Scissors
Abbreviations
- CH: Chain
- SC: Single crochet
- INC: Increase (2 SC in the same stitch)
- DEC: Decrease (single crochet two stitches together)
- ST: Stitch
- RND: Round
Pattern Instructions
Head
- Start with a magic ring.
- RND 1: 6 SC in the magic ring (6)
- RND 2: INC in each ST around (12)
- RND 3: 1 SC, INC repeat around (18)
- RND 4-6: SC in each ST around (18)
- RND 7: 1 SC, DEC repeat around (12)
- RND 8: DEC in each ST around (6)
- Fasten off and leave a long tail for sewing.
Body
- Start with a magic ring.
- RND 1: 6 SC in the magic ring (6)
- RND 2: INC in each ST around (12)
- RND 3: 1 SC, INC repeat around (18)
- RND 4-8: SC in each ST around (18)
- RND 9: 1 SC, DEC repeat around (12)
- RND 10: DEC in each ST around (6)
- Fasten off, leaving a long tail for sewing.
Arms
- Start with a magic ring.
- RND 1: 6 SC in the magic ring (6)
- RND 2: INC in each ST around (12)
- RND 3-4: SC in each ST around (12)
- RND 5: DEC in each ST around (6)
- Fasten off, leaving a long tail for sewing. Make two.
Legs
- Start with a magic ring.
- RND 1: 6 SC in the magic ring (6)
- RND 2: INC in each ST around (12)
- RND 3-6: SC in each ST around (12)
- RND 7: DEC in each ST around (6)
- Fasten off, leaving a long tail for sewing. Make two.
Ears / Details
- Start with a magic ring.
- RND 1: 6 SC in the magic ring (6)
- RND 2: INC in each ST around (12)
- RND 3: 1 SC, INC repeat around (18)
- RND 4: SC in each ST around (18)
- RND 5: DEC in each ST around (6)
- Fasten off, leaving a long tail for sewing. Make two.
Accessories
- For the bunny’s face, use pink embroidery thread to create a small nose and mouth, adding charm and personality.
Assembly & Finishing
- Stuff the head with fiberfill before attaching it to the body.
- Sew arms and legs in place securely.
- Attach ears to the head, positioning them for a floppy look.
- Add safety eyes to the head, ensuring they are well secured.
- Weave in all ends and ensure all components are firmly attached.
Tips for Best Results
- Choose a crochet hook size that complements your yarn for best results.
- Consider lightly stuffing each piece as you go for an even shape.
- Take your time when assembling to ensure all pieces align as desired.
- Use a stitch marker to keep track of your rounds, especially in larger sections.
- Experiment with color patterns for embellishing your bunny for unique creations.
Conclusion
Congratulations on creating your very own amigurumi bunny doll! This simple crochet pattern serves as a perfect project for beginners and can be customized to match your personal flair. Embrace your creativity and enjoy making this charming stuffed toy for yourself or as a lovely gift!



