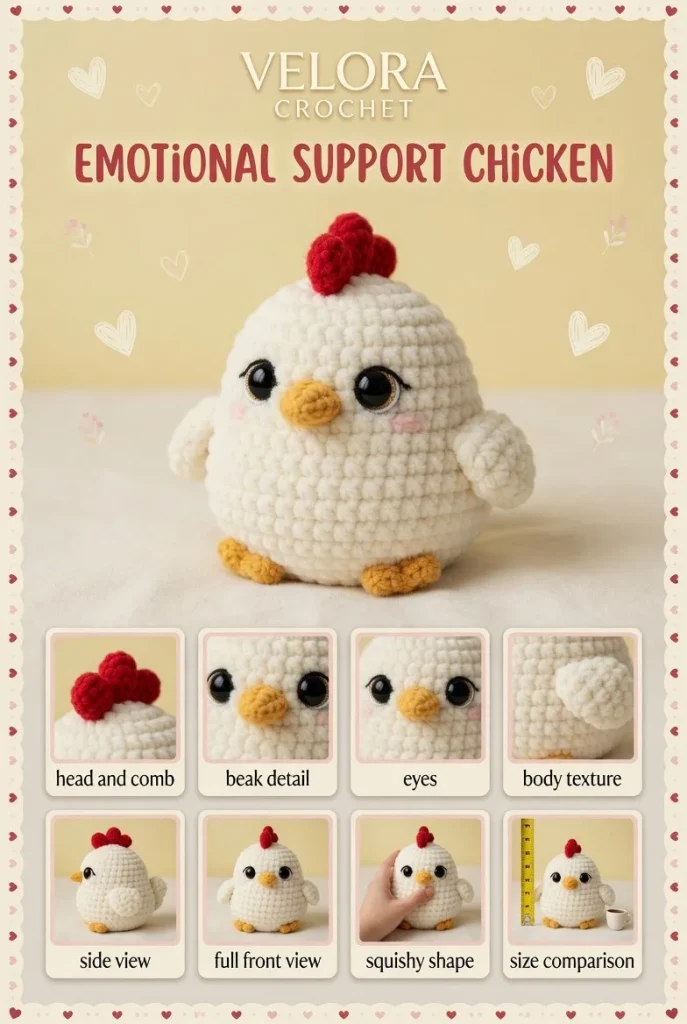
Create a delightful amigurumi emotional support chicken with this crochet pattern, perfect for beginners looking to make a mini crochet project. Utilizing plush bulky chenille or velvet-like yarn, this design features a charming puff stitch for a soft, squishy texture that’s both comforting and engaging. With a creamy white body, vibrant red comb, orange beak, and black safety eyes, this adorable chicken is sure to provide a little warmth and joy.
Materials
- Bulky chenille or velvet yarn in creamy white, red, orange, and black
- Crochet hook (recommended size for bulky yarn)
- Yarn needle for weaving ends
- Stitch marker
- Safety eyes (optional)
- Stuffing material (polyester fiberfill or similar)
Abbreviations
- ch: chain
- sc: single crochet
- st: stitch
- inc: increase (2 sc in same stitch)
- dec: decrease (single crochet 2 together)
Pattern Instructions
Head
- With creamy white yarn, make a magic ring and work 6 sc into the ring. (6)
- Round 1: Inc in each st around. (12)
- Round 2: *Sc in next st, inc in next st; repeat from * around. (18)
- Rounds 3-5: Sc in each st around. (18)
- Round 6: *Sc in next st, dec; repeat from * around. (12)
- Round 7: Dec in each st around. (6)
- Fasten off, leaving a long tail for sewing.
Body
- With creamy white yarn, make a magic ring and work 6 sc into the ring. (6)
- Round 1: Inc in each st around. (12)
- Round 2: *Sc in next st, inc; repeat from * around. (18)
- Round 3: *Sc in next 2 st, inc; repeat from * around. (24)
- Rounds 4-6: Sc in each st around. (24)
- Round 7: *Sc in next 2 st, dec; repeat from * around. (18)
- Round 8: *Sc in next st, dec; repeat from * around. (12)
- Stuff the body and continue with the next round.
- Round 9: Dec in each st around. (6)
- Fasten off, leaving a long tail for sewing.
Arms
- With creamy white yarn, make a magic ring and work 6 sc into the ring. (6)
- Rounds 1-2: Sc in each st around. (6)
- Fasten off and leave a tail for sewing.
Legs
- With creamy white yarn, make a magic ring and work 6 sc into the ring. (6)
- Rounds 1-2: Sc in each st around. (6)
- Fasten off and leave a tail for sewing.
Ears / Details
- With red yarn, ch 3 and work 2 sc in the second ch from hook and 1 sc in the last ch. Turn work around.
- Sc in next 2 st, fasten off; leave a long tail for sewing.
Accessories (if any)
- For the beak, with orange yarn, ch 4 and work 1 sc in the second ch from hook, 1 sc in the next ch, and then sl st in the last ch.
- Fasten off, leaving a long tail for sewing.
Assembly & Finishing
- Attach the head to the body using the yarn tail from the head.
- Sew the arms to the sides of the body.
- Attach the legs at the bottom of the body.
- Secure the ears atop the head.
- Position and sew the beak in the center of the head.
- Place and secure the safety eyes or embroider eyes if preferred.
Tips for Best Results
- Use a stitch marker to mark your rounds for easier counting.
- Make sure not to stuff the chicken too tightly; it should retain its squishy form.
- Feel free to customize colors to suit your style or preference.
- For an added touch, experiment with different yarn textures to create a unique look.
- Always check your tension while crocheting to maintain consistent stitch sizes.
Conclusion
With this crochet pattern, you’ll create an adorable amigurumi chicken that provides emotional support and comfort. Don’t hesitate to add your personal touch to make it uniquely yours. Happy crocheting!



