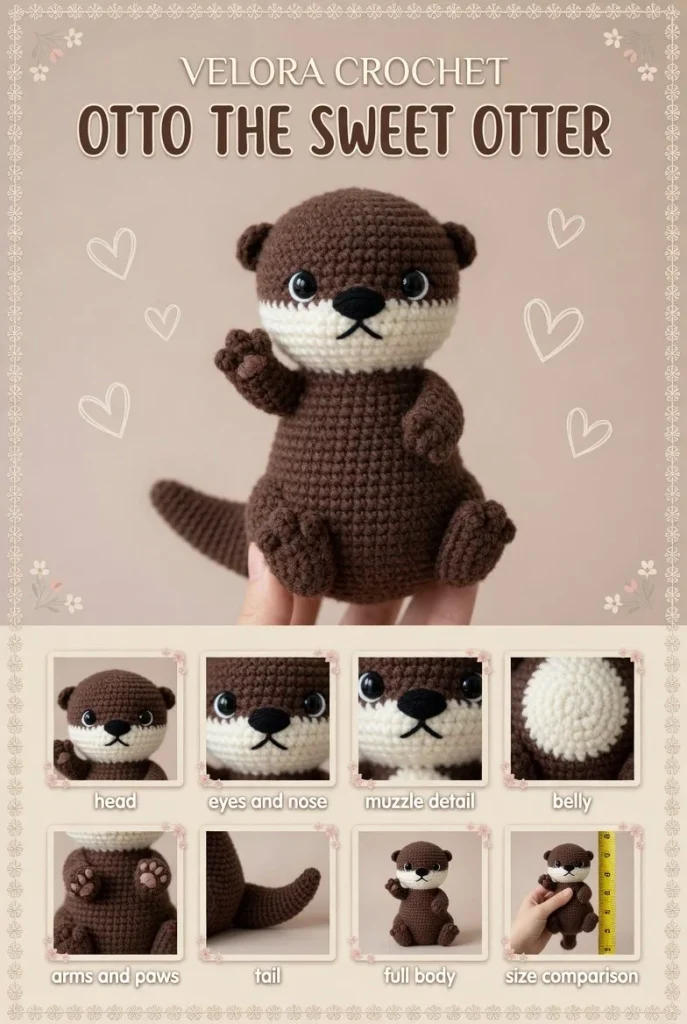
Crocheting a small amigurumi otter can be a delightful project, especially for those exploring the world of crochet. This pattern features a plush texture, perfect for creating a cuddly pocket-sized toy in warm brown and creamy beige hues. Designed with a rounded muzzle, oval-shaped belly, and embroidered facial features, this adorable creation is suitable for beginner to intermediate crocheters. Follow along to craft your own charming otter!
Materials
- 1 skein of plush chenille yarn in warm brown
- 1 skein of chenille yarn in creamy beige
- 3.5 mm crochet hook
- Fiberfill stuffing
- Yarn needle
- Scissors
- Safety eyes (10 mm or as desired)
- Black embroidery floss or thread for nose and mouth
Abbreviations
- Ch: Chain
- Sc: Single crochet
- Dc: Double crochet
- Sl st: Slip stitch
- Inc: Increase (2 sc in the same stitch)
- Dec: Decrease (sc 2 stitches together)
Pattern Instructions
Head
- With brown yarn, start with a magic ring.
- Round 1: 6 sc in the ring (6).
- Round 2: Inc in each stitch (12).
- Round 3: (Sc in next stitch, inc) repeat around (18).
- Round 4: (Sc in next 2 stitches, inc) repeat around (24).
- Rounds 5-10: Sc in each stitch (24).
- Round 11: (Sc in next 2 stitches, dec) repeat around (18).
- Round 12: (Sc in next stitch, dec) repeat around (12).
- Stuff the head lightly and sew on safety eyes and embroider the muzzle with thread.
- Round 13: Dec around (6). Fasten off and weave in ends.
Body
- With brown yarn, start with a magic ring.
- Round 1: 6 sc in the ring (6).
- Round 2: Inc in each stitch (12).
- Round 3: (Sc in next stitch, inc) repeat around (18).
- Round 4: (Sc in next 2 stitches, inc) repeat around (24).
- Rounds 5-8: Sc in each stitch (24).
- Round 9: (Sc in next 2 stitches, dec) repeat around (18).
- Round 10: (Sc in next stitch, dec) repeat around (12).
- Stuff the body and fasten off. Leave a long tail for sewing.
Arms
- With beige yarn, start with a magic ring.
- Round 1: 6 sc in the ring (6).
- Round 2: Inc in each stitch (12).
- Rounds 3-4: Sc in each stitch (12).
- Round 5: (Sc in next stitch, dec) repeat around (8).
- Stuff lightly, fasten off, and leave a long tail for sewing. Make 2.
Legs
- With beige yarn, start with a magic ring.
- Round 1: 6 sc in the ring (6).
- Round 2: Inc in each stitch (12).
- Rounds 3-4: Sc in each stitch (12).
- Round 5: (Sc in next stitch, dec) repeat around (8).
- Stuff lightly, fasten off, and leave a long tail for sewing. Make 2.
Ears / Details
- With beige yarn, start with a magic ring.
- Round 1: 6 sc in the ring (6).
- Round 2: Inc in each stitch (12).
- Round 3: Sc in each stitch (12).
- Fasten off and leave a long tail for sewing. Make 2.
Assembly & Finishing
- Attach the head to the body using the tail from the body.
- Sew the arms to the sides of the body.
- Attach the legs to the bottom of the body.
- Position and sew ears onto the top of the head.
- Add any additional details or facial features as desired.
Tips for Best Results
- Use a stitch marker to keep track of your rounds.
- Be sure to stuff each piece adequately to maintain shape but be careful not to overstuff.
- Consider blocking the amigurumi pieces lightly for a neater finish.
- Experiment with different yarn colors for a unique otter design.
Conclusion
Creating your own mini crochet otter is a wonderful project that can bring joy to both the maker and those who receive it. Whether you’re a beginner crochet enthusiast or looking to enhance your skills, this pattern provides clear instructions for crafting a delightful plush companion. Happy crocheting!



