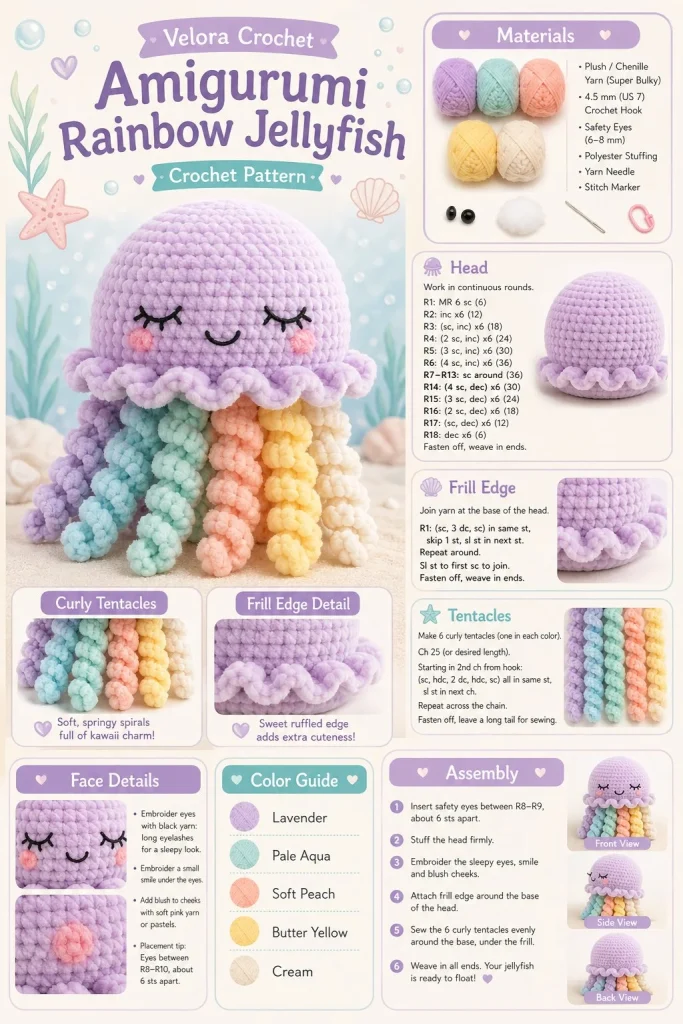
Creating your very own pastel rainbow jellyfish amigurumi can be a delightful crochet adventure that brings a splash of color and whimsy into your home. This cuddly little creature is perfect for beginners looking to expand their crochet skills and offers a satisfying project for experienced crocheters as well. Whether you’re crafting it for a child’s room, for fun, or as a unique market item, this jellyfish will charm anyone who sees it.
Materials
- Worsted weight yarn in various pastel colors (pink, blue, yellow, green, lavender)
- Crochet hook (4.0 mm or G hook recommended)
- Fiberfill stuffing or other chosen stuffing
- Yarn needle for weaving in ends
- Stitch marker (helps keep track of rounds)
- Safety eyes (optional, or can use embroidery)
- Embroidery thread for face details
Abbreviations
- Ch: chain
- Sc: single crochet
- Dc: double crochet
- Inc: increase (2 sc in the same stitch)
- Dec: decrease (sc 2 stitches together)
- Rnd: round
Pattern Instructions
Head
- Start with a magic ring (or 4 ch, join to form a ring).
- Rnd 1: 6 sc in the ring (6 stitches).
- Rnd 2: Inc in each stitch around (12 stitches).
- Rnd 3: Sc in next stitch, inc in next repeat around (18 stitches).
- Rnd 4: Sc in next 2 stitches, inc in next repeat around (24 stitches).
- Rnds 5-10: Sc in each stitch around (24 stitches).
- Rnd 11: Sc in next 2 stitches, dec repeat around (18 stitches).
- Rnd 12: Sc in next stitch, dec repeat around (12 stitches).
- Stuff head firmly before closing.
- Rnd 13: Dec around (6 stitches).
- Fasten off and weave in ends.
Body
- Attach yarn at the bottom of the head.
- Rnd 1: Ch 2 (counts as a dc), 3 dc in next stitch, skip next stitch, repeat to end (12 sets of 3 dc).
- Rnd 2: Sl st to join, ch 1 and sc evenly around (total stitches can vary based on previous round).
- Rnd 3: Sc in each stitch around (same number as previous).
- Repeat Rnd 3 until the body reaches your desired size, but stop after 8 rounds.
- Gently stuff the body before closing.
Arms
- For each tentacle, ch 12.
- Row 1: Starting from second ch from hook, sc across (11 stitches).
- Ch 1, turn. Repeat for a total of 4 rows.
- Fasten off, leaving a long tail for attaching.
- Make 8 tentacles, varying the colors to achieve a pastel rainbow look.
Face Embroidery
- Using embroidery thread, stitch sleepy eyes and soft blush cheeks onto the jellyfish head.
- For the eyes, you might prefer simple oval shapes in a darker color or use safety eyes for a more traditional look.
- Place the cheeks slightly below the eyes for a sweet expression.
Assembly & Finishing
- Attach the tentacles evenly around the base of the jellyfish body; make sure they’re spaced out gently for a delightful wavy effect.
- Weave in all loose ends on the tentacles and body.
- For a finishing touch, give your jellyfish a light blocking to enhance its shape if needed.
{image_template}
Tips for Best Results
- Keep your tension consistent for even stitches throughout the jellyfish. If your stitches are too tight, the body may not have the cozy round shape we’re aiming for.
- When stuffing the head and body, use small amounts to achieve a smooth shape, avoiding lumps.
- Use a stitch marker to keep track of your rounds, especially as the head grows larger.
- For the arms, consider adding a slight twist while crocheting to create a more playful curly look.
- Don’t hesitate to experiment with different pastel combinations—each jellyfish can be as unique as the ocean!
Conclusion
I hope this pastel rainbow jellyfish amigurumi turns out to be a fun and fulfilling project for you! Whether you’re gifting it or keeping it as part of your decor, this little handmade toy will surely bring smiles. Feel free to mix colors or even enhance your jellyfish design with accessories to personalize it more. Enjoy every stitch, and happy crocheting!



