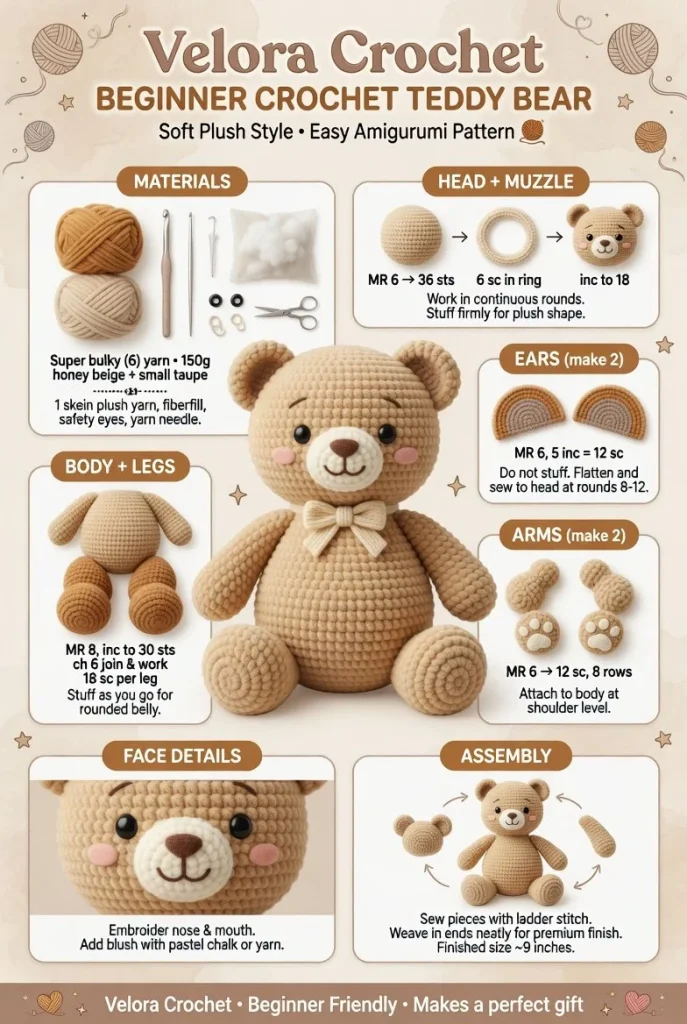
Creating a handmade crochet teddy bear can be such a heartwarming project, especially when you aim for that cozy, friendly expression. This beginner-friendly crochet pattern will guide you through making a cute plush companion with round ears, a soft muzzle, tiny limbs, and a rounded belly. Perfect for gifting at baby showers or adding to your cozy crochet collection, let’s dive into the delightful world of plush teddy bear making!
Materials
- Worsted weight yarn in beige and brown
- Crochet hook size 4.0 mm (G)
- Stitch marker
- Fiberfill stuffing
- Safety eyes (9 mm)
- Tapestry needle
- Scissors
Abbreviations
- MR: magic ring
- ch: chain
- sc: single crochet
- inc: increase
- dec: decrease
- sl st: slip stitch
Instructions
Head
- Start with a magic ring.
- Round 1: 6 sc into the ring (6).
- Round 2: inc around (12).
- Round 3: sc in the next sc, inc repeat around (18).
- Round 4: sc in the next 2 sc, inc repeat around (24).
- Rounds 5-10: sc around (24).
- Round 11: sc in the next 2 sc, dec repeat around (18).
- Place safety eyes between rounds 8 and 9, about 5 stitches apart.
- Round 12: sc in the next sc, dec repeat around (12).
- Stuff the head firmly.
- Round 13: dec around (6).
- Fasten off and weave in the end.
Muzzle
- With brown yarn, start with a magic ring.
- Round 1: 6 sc into the ring (6).
- Round 2: inc around (12).
- Round 3: sc around (12).
- Stuff lightly, then attach to the center of the face. Sew securely.
Ears (make 2)
- Start with a magic ring.
- Round 1: 6 sc into the ring (6).
- Round 2: inc around (12).
- Rounds 3-4: sc around (12).
- Fasten off with a long tail for sewing. Attach to the top of the head.
Body
- Start with a magic ring.
- Round 1: 6 sc into the ring (6).
- Round 2: inc around (12).
- Round 3: sc in the next sc, inc repeat around (18).
- Round 4: sc in the next 2 sc, inc repeat around (24).
- Rounds 5-10: sc around (24).
- Round 11: sc in the next 2 sc, dec repeat around (18).
- Round 12: sc in the next sc, dec repeat around (12).
- Stuff the body firmly.
- Round 13: dec around (6).
- Fasten off and weave in the end.
Arms (make 2)
- Start with a magic ring.
- Round 1: 6 sc into the ring (6).
- Rounds 2-4: sc around (6).
- Fasten off with a long tail for sewing. Attach to the sides of the body.
Legs (make 2)
- Start with a magic ring.
- Round 1: 6 sc into the ring (6).
- Rounds 2-5: sc around (6).
- Fasten off, leaving a long tail for sewing. Attach to the bottom of the body.
Face Details
Sew on the muzzle, and use black thread or embroidery floss to add a smile or eyebrows, giving your teddy bear that extra personality!
Assembly and Finishing
- Assemble all parts together using the long tails.
- Ensure everything is secure and the limbs are symmetrical.
- Optionally, you can lightly block your pieces to smooth out any uneven edges.
Tips for the Best Result
- When stuffing your plush, try not to overstuff the head; a gentle touch helps keep it soft and cuddly.
- Use stitch markers to help keep track of your rounds, especially when you’re starting out.
- Check that all parts are evenly filled and attached for a professional look.
Creating this adorable teddy bear will not only give you a unique handcrafted toy but also the joy of making something special for a loved one. Whether you choose vibrant colors or soft pastels, this crochet project is bound to bring warmth and smiles. Each stitch tells a story, and before you know it, you’ll have a treasured plush to cherish.
If you’re inspired by this project and want to explore more, consider the baby bear crochet pattern for even more delightful creations! Happy crocheting!



