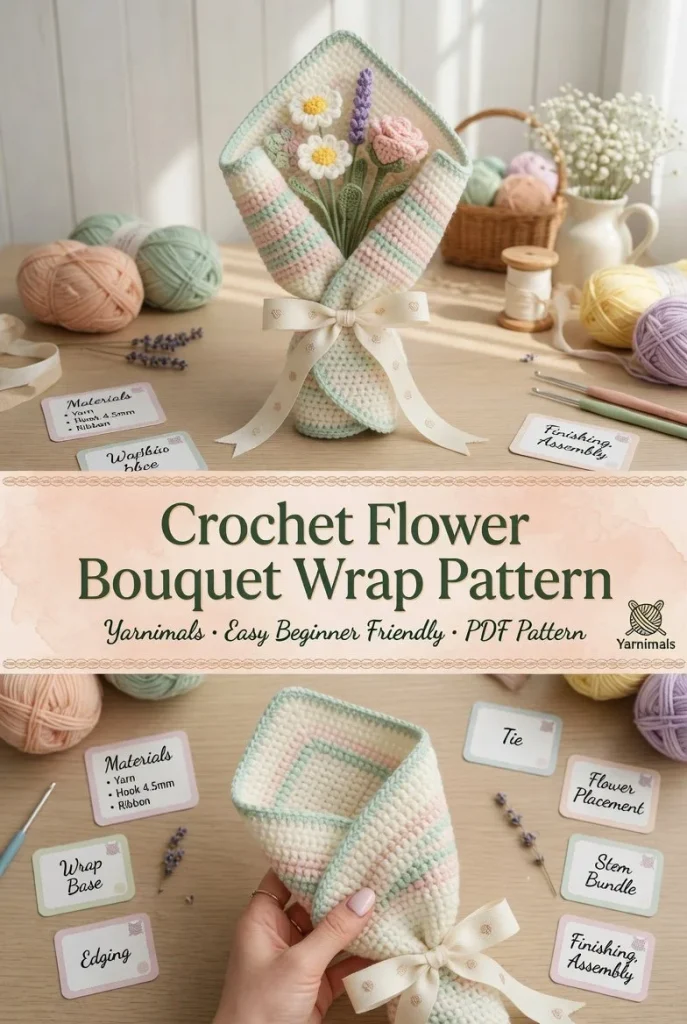
Creating a lovely crochet flower bouquet wrap is a perfect way to elevate your handmade arrangements. This elegant wrap not only beautifies your flowers but also makes them gift-ready. With its soft cone shape, neat edging, and charming ribbon tie, it offers both functionality and style. In this pattern, you’ll find detailed sections that guide you through crafting a stunning bouquet wrap, ensuring a polished finish that showcases your crochet flowers beautifully.
Materials
- Yarn of your choice (preferably a soft, flexible yarn)
- Crochet hook (size to match your yarn)
- Scissors
- Yarn needle
- Ribbon for tying
- Stitch markers (optional)
Abbreviations
- MR: magic ring
- ch: chain
- sc: single crochet
- hdc: half double crochet
- dc: double crochet
- inc: increase
- dec: decrease
- sl st: slip stitch
Wrap Base
To begin crafting your wrap, create a magic ring (MR). This will serve as the base of your wrap. Work your initial row of single crochet (sc) stitches into the ring until you achieve a snug fit. As you build out the base of the wrap, remember to keep your tension consistent to ensure a smooth finish. This will help your wrap maintain its shape as it holds the flower stems.
Edging
After completing the base, it’s time to add a lovely finishing touch with the edging. You can use a combination of single and double crochet stitches to create a textured edge. This feature not only enhances the visual appeal but also provides a sturdy finish that complements your crochet bouquet. Consider a decorative stitch for more flair, which can also be an opportunity to play with colors!
Tie
Next, for the ribbon tie, you should select a beautiful ribbon that matches or contrasts with your yarn. Cut a piece of ribbon long enough to wrap comfortably around the finished wrap. This tie will help secure your bouquet and add an extra touch of elegance. When choosing materials, opt for a ribbon that has a soft texture; it complements the coziness of the crochet piece beautifully.
Flower Placement
When it comes to placing your crochet flowers into the wrap, be mindful of the arrangement. Ensure the stems are evenly spaced for a balanced look. This is also a great time to experiment with different flower sizes and colors, creating a harmonious bouquet. If you have crafted some stunning crochet flowers, like the colorful ones from this crochet pattern, now is the time to showcase their beauty!
Stem Bundle
For the stem bundle, gather your crochet flower stems and arrange them together, so they fit snugly inside the wrap. Use your ribbon to tie the stems together at the base, ensuring they stay secure and in place within the wrap. This step not only helps maintain structure but also adds to the overall finished look of your bouquet.
Finishing
As you near completion, take a moment to check your work. Make any necessary adjustments to the ribbon or flowers, ensuring everything looks perfect. If you have any loose ends from the yarn, weave them in with your yarn needle to create a clean look.
Assembly
Finally, assemble your wrap by placing the flower stems neatly inside and tying the ribbon around the base. Feel free to adjust the tightness of the ribbon to achieve the desired fit and visual appeal. Once everything is in place, step back and admire your handmade creation, ready to bring joy to any recipient.
Creating a crochet flower bouquet wrap is not only a rewarding project but also a brilliant way to present your floral crochet pieces as meaningful gifts. By following this guide, you’ll craft a beautiful wrap that enhances your floral arrangements while showcasing your crochet skills.



