Beginner Sage Green Turtle Amigurumi Crochet Pattern
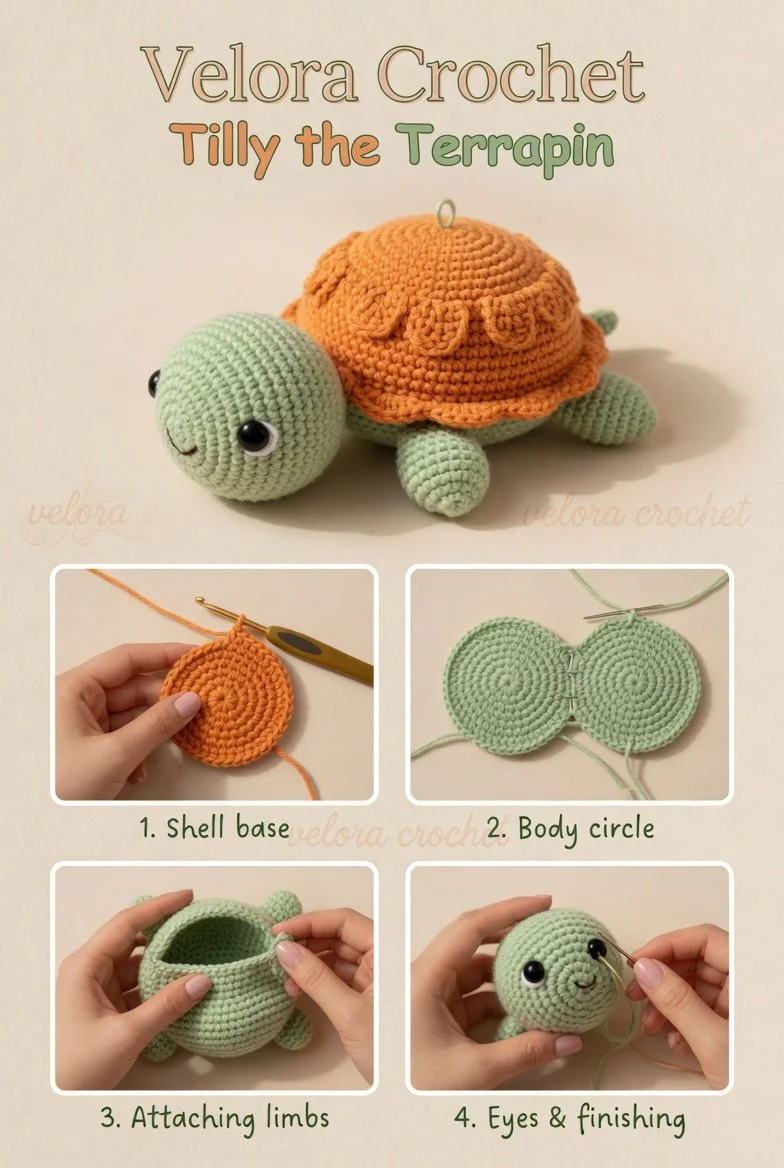
Create a charming handmade crochet turtle that brings a touch of whimsy to any playtime or decorative space. This friendly little plush toy features a soft sage green head, body, flippers, and tail, contrasted by a warm rusty orange rounded dome shell. Perfect for both beginners and experienced crocheters, this project is a delightful way to enhance your crochet skills while making a lovely gift or decoration.
Materials
- Worsted weight yarn in sage green and rusty orange
- Crochet hook (recommended size: G/4.0 mm)
- Black safety eyes (10 mm)
- Yarn needle
- Scissors
- Stitch marker (optional)
- Fiberfill stuffing
Abbreviations
- MR: magic ring
- ch: chain
- sc: single crochet
- inc: increase
- dec: decrease
- sl st: slip stitch
Head
- Start with sage green yarn.
- Round 1: Make 6 sc in a MR. (6)
- Round 2: Inc around. (12)
- Round 3: sc in next st, inc around. (18)
- Round 4: sc in next 2 sts, inc around. (24)
- Rounds 5-8: Sc in each st around.
- Round 9: sc in next 2 sts, dec around. (18)
- Round 10: sc in next st, dec around. (12)
- Stuff the head lightly and add safety eyes between rounds 8 and 9, about 6 stitches apart.
- Round 11: Dec around. (6)
- Fasten off and weave in ends.
Body
- Continue with sage green yarn.
- Round 1: Make 6 sc in a MR. (6)
- Round 2: Inc around. (12)
- Round 3: sc in next st, inc around. (18)
- Rounds 4-8: Sc in each st around.
- Round 9: sc in next 2 sts, dec around. (12)
- Round 10: sc in next st, dec around. (8)
- Stuff the body firmly before finishing.
- Round 11: Dec around. (4)
- Fasten off and leave a long tail for sewing.
Shell
- With rusty orange yarn.
- Round 1: Make 6 sc in a MR. (6)
- Round 2: Inc around. (12)
- Round 3: sc in next st, inc around. (18)
- Round 4: sc in next 2 sts, inc around. (24)
- Rounds 5-8: Sc in each st around.
- Round 9: sc in next 2 sts, dec around. (18)
- Round 10: sc in next st, dec around. (12)
- Fasten off, leaving a tail for attaching the shell to the body.
{image_template}
Flippers (Make 4)
- With sage green yarn.
- Row 1: Ch 5, sc in 2nd ch from hook, sc in next 2 chs, 3 sc in last ch; working on the other side of the chain, sc in next 2 chs, inc in last ch.
- Fasten off, leaving a long tail for sewing.
Tail
- With sage green yarn.
- Row 1: Ch 6, sc in 2nd ch from hook, sc in next 4 chs.
- Fasten off, leaving a long tail for sewing.
Face Details
- Using a yarn needle and contrasting yarn, stitch a simple smile on the face just below the safety eyes.
Assembly
- Sew the head to the body firmly, making sure it is centered.
- Attach the shell to the top of the body, securing it well.
- Sew the flippers to each side of the body and the tail to the back.
- Add any additional details or embellishments as desired.
Tips for the Best Result
- When sewing the parts together, take your time to ensure they are aligned properly; this will enhance the turtle’s cute appearance.
- Lightly stuff each piece, but be careful not to overstuff, especially for the head, to maintain a floppy and cute appearance.
- Using stitch markers can help keep your place while working in the round, particularly with increases and decreases.
Crocheting this sweet turtle is not only a fun way to practice your skills but also a wonderful opportunity to create a special handmade gift for someone you love. Experiment with different colors for a unique touch or make several turtles in various shades to create a delightful collection. Happy crocheting!