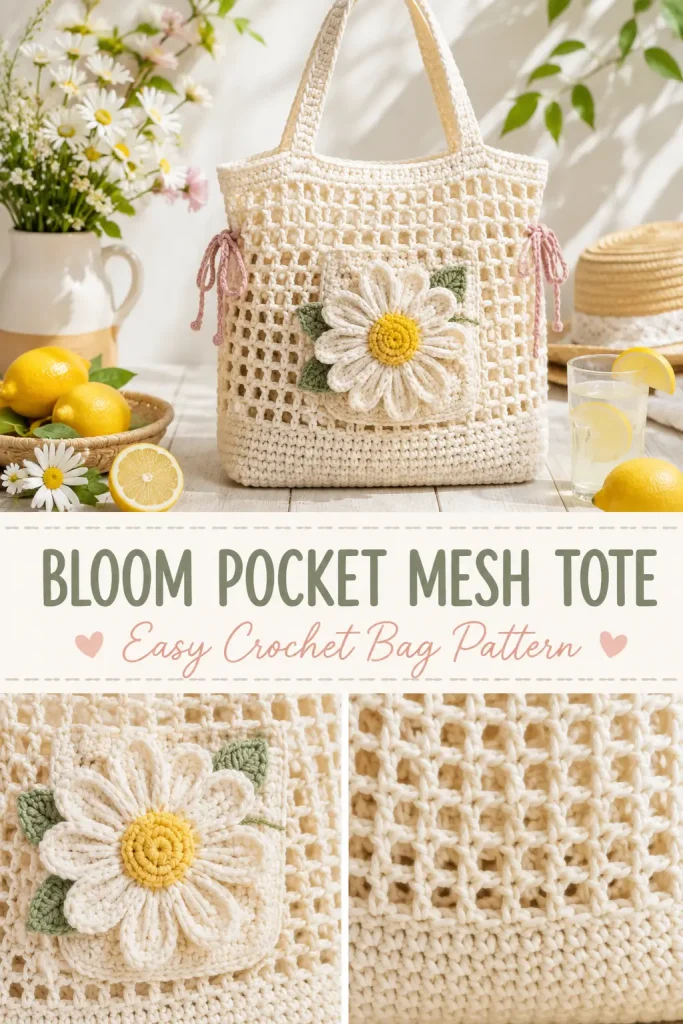
This bloom pocket mesh tote is a fresh, useful crochet bag with a soft handmade look. The main bag is worked in warm cream yarn with an open mesh body, a sturdy solid base, and a comfortable shoulder strap. The front has a large 3D daisy pocket with white petals, a golden yellow center, sage green leaves, and soft blush ties for a pretty feminine finish.
It is perfect for summer walks, market trips, books, yarn projects, sunglasses, small essentials, or as a handmade gift. The design feels light and airy, but the solid base and front pocket make it practical enough to use.
Description
This crochet tote has a rectangular solid base, a mesh body worked upward in the round, a firm top band, and a wide shoulder strap. A separate front pocket is crocheted in cream and sewn onto the bag, then decorated with a raised daisy flower and two sage green leaves. Soft blush crochet ties are added near the upper sides of the pocket for a gentle bow detail. The finished bag has a clean cottage-style look with useful storage and beautiful floral texture.
Materials
- Worsted weight cotton yarn in warm cream
- Worsted weight cotton yarn in white
- Worsted weight cotton yarn in golden yellow
- Worsted weight cotton yarn in sage green
- Worsted weight cotton yarn in soft blush pink
- 4.0 mm crochet hook
- Yarn needle
- Scissors
- Stitch markers
- Measuring tape
- Blocking pins, optional
Abbreviations
- ch = chain
- sl st = slip stitch
- sc = single crochet
- hdc = half double crochet
- dc = double crochet
- tr = treble crochet
- st = stitch
- sts = stitches
- sp = space
- sk = skip
- rep = repeat
- BLO = back loop only
Pattern Notes
- This pattern uses US crochet terms.
- Cotton yarn is recommended because it gives the tote better structure.
- The bag is worked from the base upward.
- The mesh body is worked in joined rounds.
- The front daisy pocket is made separately and sewn on.
- The daisy and leaves are also made separately and attached to the pocket.
- The blush ties are decorative and can be tied into small bows.
- The size can be adjusted by changing the base chain and the number of body rounds.
Finished Size
Approximate finished size:
- Bag width: 10–11 inches
- Bag height: 11–12 inches, not including strap
- Strap drop: 9–10 inches
- Front pocket: about 6 inches wide x 5 inches tall
Step-by-Step Instructions
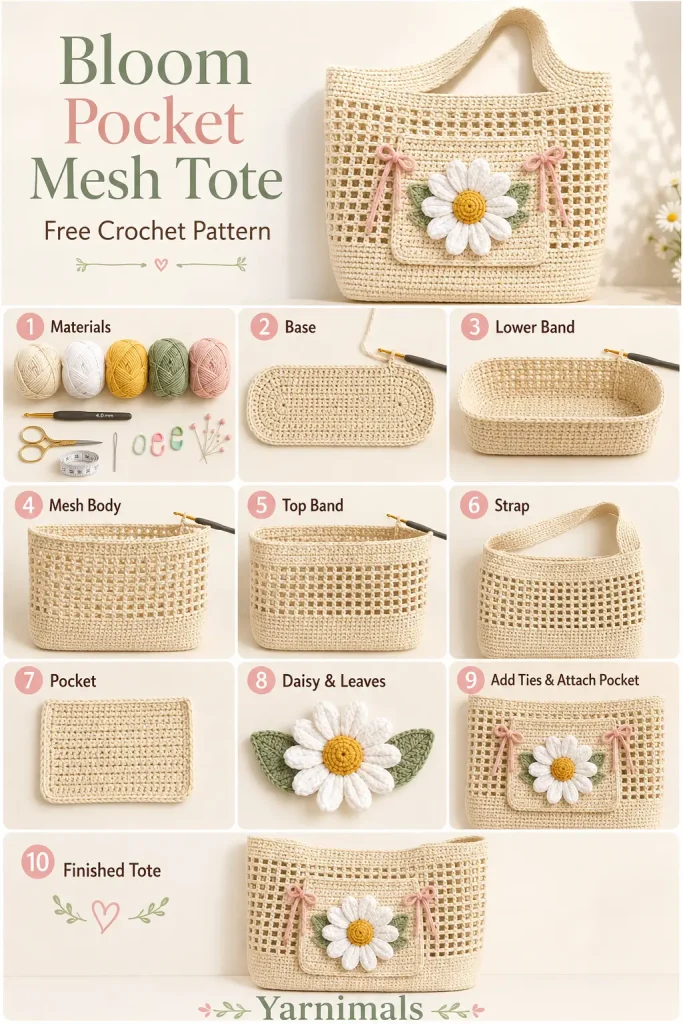
Bag Base
Use warm cream yarn.
Round 1
Ch 31.
Sc in the 2nd ch from hook.
Sc in next 28 ch.
Work 3 sc in the last ch.
Now work along the opposite side of the foundation chain.
Sc in next 28 ch.
Work 2 sc in the last ch.
Join with sl st to first sc.
62 sts
Round 2
Ch 1.
Work 2 sc in first st.
Sc in next 28 sts.
Work 2 sc in each of next 3 sts.
Sc in next 28 sts.
Work 2 sc in each of last 2 sts.
Join with sl st.
68 sts
Round 3
Ch 1.
Sc in each st around.
Join with sl st.
68 sts
Round 4
Ch 1.
Working in BLO, sc in each st around.
Join with sl st.
68 sts
This creates the turning ridge for the sides of the bag.
Solid Lower Band
Rounds 5–7
Ch 1.
Sc in each st around.
Join with sl st.
68 sts
This gives the bag a sturdy bottom before the mesh begins.
Mesh Body
Round 8
Ch 4. This counts as dc, ch 1.
Sk next st.
Dc in next st.
Ch 1, sk next st, dc in next st.
Rep from ch 1, sk next st, dc in next st around.
Join with sl st to the 3rd ch of the beginning ch 4.
Round 9
Sl st into the first ch-1 sp.
Ch 4. This counts as dc, ch 1.
Dc in next ch-1 sp.
Ch 1, dc in next ch-1 sp.
Rep from ch 1, dc in next ch-1 sp around.
Join with sl st to the 3rd ch of the beginning ch 4.
Rounds 10–24
Repeat Round 9.
You should have an open mesh body with neat, even spaces.
For a taller tote, add more mesh rounds.
For a shorter market bag, work fewer rounds.
Top Band
Round 25
Ch 1.
Sc in each dc and each ch-1 sp around.
Join with sl st to first sc.
Rounds 26–29
Ch 1.
Sc in each st around.
Join with sl st.
Fasten off and weave in ends.
This creates a strong top edge for the strap.
Shoulder Strap
Use warm cream yarn.
Join yarn to one side of the top band.
Row 1
Ch 8.
Sc in the 2nd ch from hook and in each ch across.
Sl st into the next stitch on the bag edge.
Turn.
7 sc
Row 2
Sc in BLO of each strap st across.
Ch 1, turn.
Continue Strap
Repeat Row 2 until the strap measures about 20–22 inches long, or your preferred shoulder length.
Do not fasten off yet.
Attach the end of the strap to the opposite side of the bag with sl sts or by sewing it securely with a yarn needle.
Make sure the strap is not twisted.
Fasten off and weave in ends.
Strengthen the Strap Edges
Join cream yarn at one base of the strap.
Sc evenly along one long edge of the strap.
Work 2 sc at the strap end.
Sc evenly along the other long edge.
Join with sl st and fasten off.
This makes the strap cleaner and stronger.
Front Pocket
Use warm cream yarn.
The pocket is worked flat.
Row 1
Ch 23.
Sc in the 2nd ch from hook and in each ch across.
Ch 1, turn.
22 sc
Row 2
Sc in each st across.
Ch 1, turn.
Rows 3–18
Repeat Row 2.
Do not fasten off yet.
Pocket Border
Ch 1.
Sc evenly around all 4 sides of the pocket.
Work 3 sc in each corner.
Join with sl st to first sc.
Fasten off, leaving a long tail for sewing.
Shape the Pocket
Lay the pocket flat.
Block it lightly if needed.
The pocket should be a neat rectangle with a firm border.
Daisy Flower
Make 1 large daisy.
Yellow Center
Use golden yellow yarn.
Make a magic ring.
Ch 1.
Work 8 sc into the ring.
Pull the ring closed.
Join with sl st to first sc.
Round 2
Ch 1.
Work 2 sc in each st around.
Join with sl st.
16 sc
Fasten off yellow.
White Petals
Join white yarn in any stitch.
Ch 2.
Work 4 dc in the same st.
Ch 2.
Sl st in the same st.
Sl st into the next st.
Rep around:
Ch 2, 4 dc in same st, ch 2, sl st in same st, sl st into next st.
Continue until you have 16 soft white petals.
Fasten off, leaving a long tail for sewing.
Gently shape the petals with your fingers.
Sage Leaves
Make 2 leaves.
Use sage green yarn.
Ch 10.
Sl st in the 2nd ch from hook.
Sc in next ch.
Hdc in next ch.
Dc in next 3 ch.
Hdc in next ch.
Sc in next ch.
Sl st in last ch.
Now work along the opposite side of the chain.
Sc in next st.
Hdc in next st.
Dc in next 3 sts.
Hdc in next st.
Sc in next st.
Sl st at the base of the leaf.
Fasten off, leaving a long tail for sewing.
Repeat for the second leaf.
Attach Daisy and Leaves to Pocket
Place the pocket right side up.
Position the daisy slightly above the center of the pocket.
Place one sage leaf on each side of the daisy, angled outward.
Pin the pieces in place.
Sew the leaves first using the green tails.
Sew the daisy over the base of the leaves using the white tail.
Stitch around the yellow center and the lower petal bases.
Leave the outer petal edges slightly raised for a 3D look.
Weave in ends on the back of the pocket.
Blush Side Ties
Make 2 blush ties.
Use soft blush pink yarn.
Ch 35.
Sl st in the 2nd ch from hook and in each ch across.
Fasten off.
Repeat for the second tie.
Attach one tie to each upper side of the pocket.
Tie each into a small bow or simple hanging tie.
Keep the ties short and neat so they do not overpower the daisy pocket.
Attach Pocket to Bag
Lay the tote flat with the front facing up.
Place the pocket in the center lower front of the bag, about 1 inch above the solid base.
Pin it in place.
Using the long cream pocket tail or a separate strand of cream yarn, sew along the left side, bottom edge, and right side of the pocket.
Do not sew the top edge closed.
Make small secure stitches through the pocket border and the bag mesh.
Because the bag body is open mesh, catch solid stitch points carefully so the pocket sits firmly.
Weave in ends.
Optional Pocket Reinforcement
If you plan to carry heavier small items in the pocket, sew an extra line of stitches across the bottom edge.
You can also line the inside of the pocket with a small piece of fabric, but this is optional.
Final Finishing
Weave in all loose yarn ends.
Check the strap attachment points.
Check that the pocket is firmly sewn on.
Shape the daisy petals and leaves.
Steam or block the bag lightly if needed.
Do not flatten the 3D daisy.
Tips & Variations
Use 100% cotton yarn for a strong summer tote.
Use cream for the main bag to keep the design soft and clean.
Try sage, blush, or pale yellow for the pocket if you want more color.
Make the daisy pocket larger by adding more rows to the pocket panel.
Make the tote wider by increasing the starting chain of the base.
For a beach bag style, add more mesh rounds and a longer strap.
For a child-size bag, start with a shorter base chain and work fewer body rounds.
Use the same flower pocket on a solid crochet tote, pillow cover, or small pouch.
FAQ
Is this crochet mesh tote beginner-friendly?
Yes, it is suitable for confident beginners. The bag uses simple stitches, but the pocket, flower, and assembly need careful finishing.
What yarn is best for this bag?
Cotton yarn is best because it gives the bag structure and helps the mesh hold its shape.
Can I make the tote bigger?
Yes. Start with a longer base chain and add more mesh rounds for height.
Is the front daisy pocket usable?
Yes. It can hold small items like lip balm, keys, tissues, stitch markers, or a small card. For heavier items, reinforce the pocket bottom.
Conclusion
This bloom pocket mesh tote is a beautiful mix of useful crochet and sweet floral detail. The cream mesh body keeps it light and practical, while the 3D daisy pocket, sage leaves, and blush ties make it feel special and handmade.
Make it for summer outings, market trips, yarn shopping, or as a thoughtful handmade gift in your favorite soft colors.




I appreciate the free pattern, but it’s so full of mistakes…….waste of my time. If I loved it, I’d have considered purchasing on Etsy. But NOPE!
I have just finished my tote bag it’s lovely.l am now trying to find your pillow cushion which came up on facebook which looks similar to the tote bag,hopefully you can help me kind regards Valerie