Blossom Cup Capybara Amigurumi Crochet Pattern
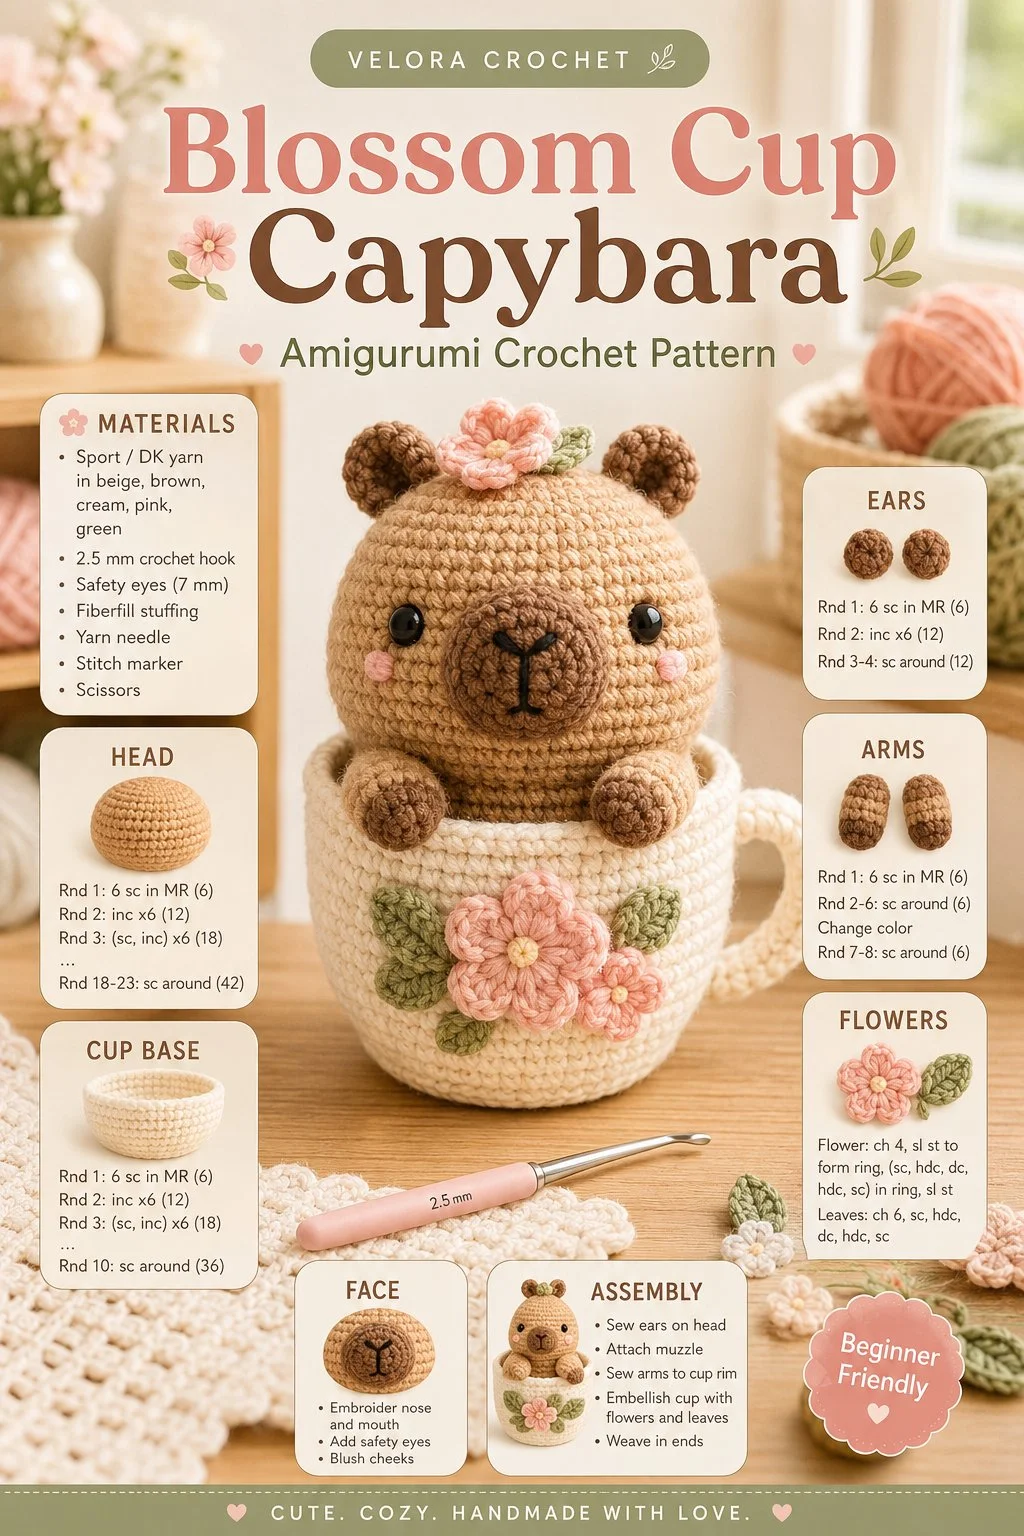
Crochet enthusiasts, get ready to fall in love with this delightful crochet project! In this tutorial, we’re diving into the whimsical world of a cute capybara nestled inside a charming blossom-themed crochet cup. Perfect for adding a touch of cozy charm to your collection, this project utilizes simple amigurumi shapes to create a finished piece that is both adorable and beginner-friendly. Let’s gather our materials and get started!
Materials
- Worsted weight yarn in light brown, cream, and pastel colors for the flowers
- 3.5 mm crochet hook
- Toy stuffing
- Yarn needle
- Stitch marker
- Scissors
- Safety eyes (optional)
Abbreviations
- MR: magic ring
- ch: chain
- sc: single crochet
- inc: increase
- dec: decrease
- sl st: slip stitch
Head
- Start with a MR in light brown.
- Round 1: 6 sc in MR (6).
- Round 2: inc in each st (12).
- Round 3: sc in the next st, inc repeat around (18).
- Round 4: sc in the next 2 sts, inc repeat around (24).
- Rounds 5-8: sc in each st (24).
- Round 9: sc in the next 2 sts, dec repeat around (18).
- Round 10: sc in the next st, dec repeat around (12).
- Stuff the head lightly before continuing.
- Round 11: dec around (6).
- Finish off and leave a tail for sewing.
Body
- With the same yarn, start with a MR.
- Round 1: 6 sc in MR (6).
- Round 2: inc in each st (12).
- Round 3: sc in the next st, inc repeat around (18).
- Rounds 4-6: sc in each st (18).
- Round 7: sc in the next st, dec repeat around (12).
- Round 8: dec around (6).
- Finish off and leave a tail for sewing.
Cup Base
- Choose pastel yarn for the cup.
- Start with a MR.
- Round 1: 6 sc in MR (6).
- Round 2: inc in each st (12).
- Round 3: sc in the next st, inc repeat around (18).
- Round 4: sc in the next 2 sts, inc repeat around (24).
- Round 5-6: sc in each st (24).
- Rounds 7-8: sc in the next 2 sts, dec repeat around (18), stuffing lightly if desired.
- Finish off without closing completely, leaving an opening for the capybara.
Ears (make 2)
- Start with light brown yarn.
- MR: 6 sc in MR (6).
- Round 1: inc in each st (12).
- Rounds 2-3: sc in each st (12).
- Finish off, leaving a long tail for sewing.
Arms (make 2)
- With light brown yarn, begin with a MR.
- Round 1: 6 sc in MR (6).
- Round 2: inc in each st (12).
- Round 3: sc in each st (12).
- Finish off, leaving a long tail for sewing.
Flower Details (make 5)
- Choose pastel colors.
- Start with a slip knot.
- Ch 4, then join to form a ring.
- Round 1: ch 2, dc in ring, ch 2, sl st to ring repeat around.
- Finish off and leave a tail for attaching.
Face Details
- Sew on safety eyes or create eyes using light brown yarn.
- For the muzzle, create a small oval with cream yarn and sew it onto the head.
- Use a yarn thread for the smile.
Assembly
- Attach the head to the body using the tails left for sewing.
- Position and sew the ears on top of the head.
- Attach the arms on either side of the body.
- Place the capybara into the cup base, adjusting to ensure it looks snug and cozy.
- Decorate the cup with the miniature flowers, sewing them around the rim for a delightful finishing touch.
Tips for the Best Result
- Be careful not to overstuff the capybara; a little stuffing goes a long way for ensuring a soft look.
- Use a stitch marker to keep track of your rounds, especially in the head and cup.
- When sewing the pieces together, try to keep everything symmetrical for a polished appearance.
In conclusion, this charming capybara in a blossom-themed cup makes for a lovely addition to your handmade crochet collection or perfect gift for a fellow crochet lover. Feel free to experiment with different colors or create variations of flowers to personalize your piece even more. Happy crocheting!