Introduction
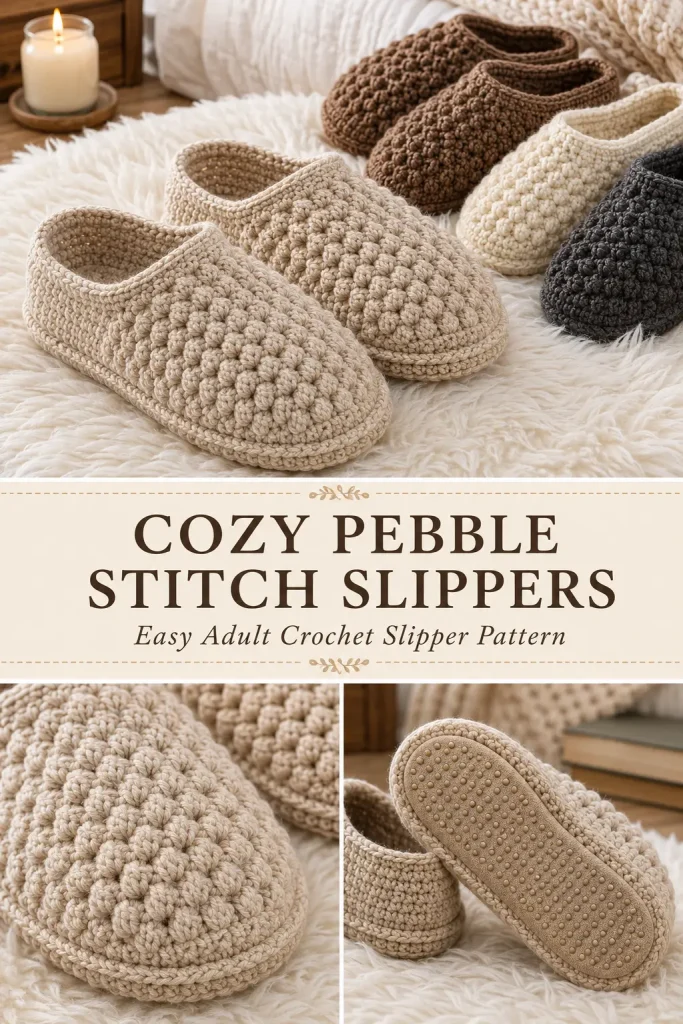
A pair of handmade crochet slippers is one of those cozy projects that feels useful from the very first stitch. They are soft, warm, practical, and perfect for relaxing at home, gifting, or making in a few favorite colors for the colder months.
The linked Sandra Slippers pattern appears to be available as a free written pattern with multiple adult sizes, so this version is written as a new original slipper design instead of copying the designer’s exact instructions. This pattern keeps the same general cozy adult slipper idea, but uses a different stitch texture, shaping method, and construction details. (Crochet Dreamz)
These Cozy Pebble Stitch Adult Crochet Slippers are designed with a rounded closed toe, textured upper, low open ankle, sturdy sole, and simple edging. They are beginner-friendly for crocheters who already know basic stitches and want a wearable project that feels polished.
Description
These adult crochet slippers have a soft closed-toe shape with a comfortable open-top foot opening. The toe and upper use a simple pebble-style texture made with single crochet and half double crochet, giving the slippers a cozy, nubby surface without complicated stitches.
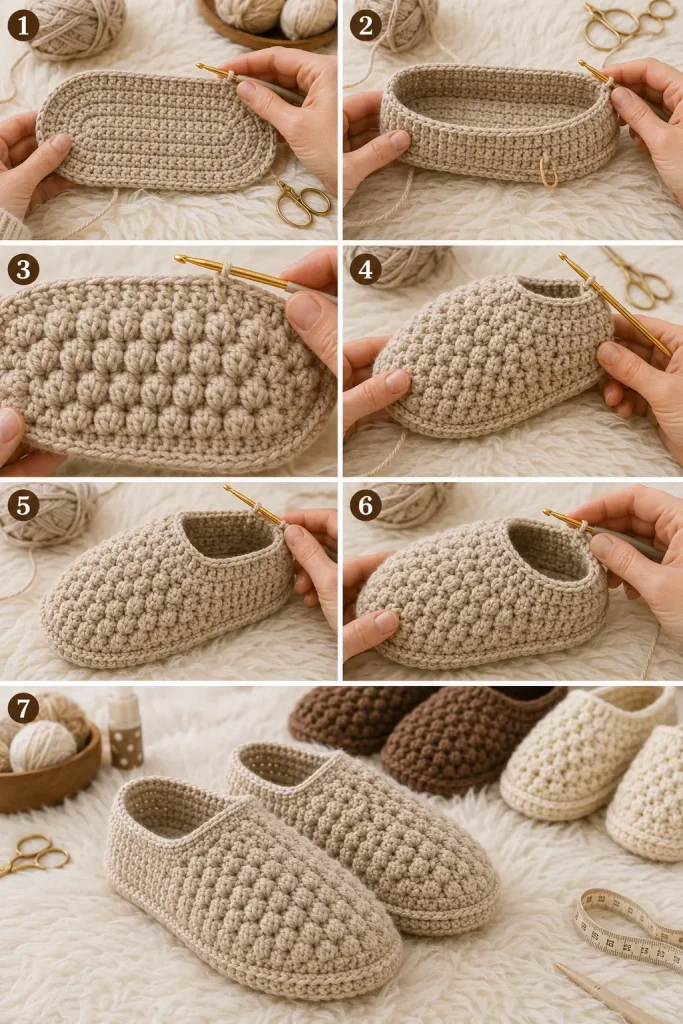
The sole is worked in an oval shape, then the sides are built upward. The toe is shaped in rounds, and the heel and foot opening are finished with neat edging so the slipper stays comfortable on the foot. The finished look is simple, rustic, and handmade.
Make them in oatmeal beige, warm brown, cream, charcoal, dusty rose, or soft gray for a cozy house slipper style. This easy crochet pattern is lovely for handmade gifts, winter lounging, spa baskets, and quick practical crochet projects.
Materials
- Worsted weight yarn in oatmeal beige, warm brown, or your chosen slipper color
- 4.5 mm crochet hook
- Yarn needle
- Stitch markers
- Scissors
- Measuring tape
- Optional: non-slip fabric paint or slipper grip dots for the bottom
Finished Size
This pattern is written for an average adult women’s size, approximately US 7–8.
Approximate finished measurements:
- Sole length: 9.25–9.5 inches
- Sole width: about 3.5 inches
- Toe height: about 2.25 inches
- Foot opening length: about 4 inches
Size can be adjusted by adding or removing rows in the sole and foot section.
Gauge
Using worsted weight yarn and a 4.5 mm hook:
- 15 single crochet stitches = 4 inches
- 16 rows = 4 inches
Gauge matters for slippers. If your sole is too small, use a larger hook. If it is too large, use a smaller hook.
Abbreviations
- ch: chain
- sc: single crochet
- hdc: half double crochet
- sl st: slip stitch
- inc: increase, 2 stitches in the same stitch
- dec: single crochet 2 stitches together
- BLO: back loop only
- st: stitch
- sts: stitches
- FO: fasten off
Pebble Stitch Texture
The pebble texture is made by alternating sc and hdc stitches.
When worked over several rounds, this creates a soft raised texture that looks cozy and slightly bumpy.
Pattern Notes
Make 2 slippers.
The sole is worked first in oval rounds.
The side wall is worked around the sole.
The toe and upper are shaped over the front of the slipper.
The heel remains low and open for an easy slip-on style.
The ch 1 at the beginning of rounds does not count as a stitch.
Join each round with a sl st unless stated otherwise.
Try the slipper on as you work, especially before finishing the foot opening.
Step-by-Step Instructions
Sole
Make 2 using oatmeal beige yarn and a 4.5 mm hook.
Round 1
Ch 22.
Sc in the 2nd ch from hook.
Sc in next 19 ch.
Work 3 sc in the last ch.
Now work along the opposite side of the foundation chain.
Sc in next 19 ch.
Work 2 sc in the last ch.
Join with sl st to first sc. (44)
Round 2
Ch 1.
Work 2 sc in first st.
Sc in next 19 sts.
Work 2 sc in each of next 3 sts.
Sc in next 19 sts.
Work 2 sc in each of last 2 sts.
Join with sl st. (50)
Round 3
Ch 1.
Sc in next st, 2 sc in next st.
Sc in next 19 sts.
Repeat 3 times: sc in next st, 2 sc in next st.
Sc in next 19 sts.
Repeat 2 times: sc in next st, 2 sc in next st.
Join with sl st. (56)
Round 4
Ch 1.
Sc in each st around.
Join with sl st. (56)
The sole should now be a firm oval shape.
Side Wall
Round 5
Ch 1.
Working in BLO, sc in each st around.
Join with sl st. (56)
Round 6
Ch 1.
Sc in each st around.
Join with sl st. (56)
Round 7
Ch 1.
Repeat around: sc in next st, hdc in next st.
Join with sl st. (56)
This starts the textured upper edge.
Toe and Upper Shaping
Place a stitch marker at the center front toe.
Count 18 stitches across the front of the slipper, with 9 stitches on each side of the center marker.
This front 18-stitch section will become the toe shaping area.
Round 8
Ch 1.
Work pebble stitch around the slipper:
Repeat around: sc in next st, hdc in next st.
Join with sl st. (56)
Round 9
Ch 1.
Sc in each st until you reach the marked front toe section.
Across the 18 front toe stitches, work:
Repeat 6 times: dec, sc in next st.
Continue sc around the rest of the slipper.
Join with sl st. (50)
Round 10
Ch 1.
Repeat around: sc in next st, hdc in next st.
Join with sl st. (50)
Round 11
Ch 1.
Sc in each st until you reach the front toe section.
Across the front toe section, work:
Repeat 5 times: dec, sc in next st.
Continue sc around the rest of the slipper.
Join with sl st. (45)
Round 12
Ch 1.
Repeat around: sc in next st, hdc in next st.
Join with sl st. (45)
Round 13
Ch 1.
Sc in each st until you reach the front center.
Work 3 decreases evenly across the front toe area.
Sc around the rest of the slipper.
Join with sl st. (42)
The toe should now look rounded and closed enough to cover the front of the foot.
Upper Foot Section
You will now build a little more height over the top of the foot while keeping the ankle opening open.
Place markers at both side edges of the foot opening.
Leave the back 16 stitches unworked for the heel opening.
You will work back and forth over the front 26 stitches.
Row 14
Ch 1.
Working across the front 26 stitches only, repeat: sc in next st, hdc in next st.
Turn. (26)
Row 15
Ch 1.
Repeat across: sc in next st, hdc in next st.
Turn. (26)
Row 16
Ch 1.
Repeat across: sc in next st, hdc in next st.
Turn. (26)
Row 17
Ch 1.
Sc in each st across.
FO and weave in end.
The slipper should now have a closed textured toe and an open slip-on heel.
Heel and Opening Edge
Join yarn at the center back of the slipper opening.
Round 1
Ch 1.
Sc evenly around the entire foot opening.
Work 1 sc into each stitch and about 1 sc into the side of each row.
Join with sl st to first sc.
Round 2
Ch 1.
Sc in each st around.
Join with sl st.
FO and weave in ends.
This creates a clean, comfortable opening edge.
Optional Front Ridge Detail
For a slightly more finished slipper look, add one surface slip stitch line around the lower side wall.
Join yarn near the side of the slipper where the sole meets the upper.
Sl st loosely around the slipper, following the line above the sole.
Join and FO.
Do not pull tightly, or the slipper may lose stretch.
Optional Non-Slip Sole
Turn the slippers upside down.
Apply small dots or short lines of non-slip fabric paint to the bottom sole.
Let dry completely according to the product instructions.
This is recommended if the slippers will be worn on tile, wood, or smooth floors.
Finishing
Weave in all ends securely.
Shape the toe and heel opening with your hands.
Try on both slippers and check that they match.
If the opening feels too loose, add one extra round of sc around the opening.
If the toe feels too tight, use a larger hook for the second slipper or reduce one decrease round.
Size Adjustments
Women’s Small, US 5–6
Ch 20 for the sole.
Work the same sole shaping.
Work 1 fewer upper row before edging.
Women’s Medium, US 7–8
Follow the pattern as written.
Women’s Large, US 9–10
Ch 24 for the sole.
Add one extra plain sc round after Round 4 of the sole.
Work 1 extra upper row before edging.
Women’s Extra Large, US 11–12
Ch 26 for the sole.
Add one extra plain sc round after Round 4.
Add 2 extra upper rows before edging.
Always measure sole length before continuing to the upper.
Tips & Variations
Use oatmeal beige for a soft neutral slipper.
Use warm brown for a cozy rustic style.
Use cream for a spa-inspired look.
Use charcoal or gray for an everyday modern slipper.
Use cotton-blend yarn for more structure.
Use acrylic or wool-blend yarn for warmer house slippers.
For a thicker slipper, hold two strands of lighter yarn together and check gauge.
For a softer slipper, use a slightly larger hook, but make sure the slipper still fits securely.
For gifting, make a matching set with a crochet washcloth or eye mask.
FAQ
Is this adult crochet slipper pattern beginner-friendly?
Yes. This pattern is good for confident beginners. It uses basic stitches, simple oval shaping, and easy texture repeats.
What yarn works best for crochet slippers?
Worsted weight acrylic, wool-blend, or cotton-blend yarn works well. Choose a yarn that feels soft but still holds its shape.
Can I resize the slippers?
Yes. Adjust the starting chain for the sole and add or remove upper rows to change the length and fit.
Do I need non-slip soles?
Non-slip soles are strongly recommended if the slippers will be worn on smooth floors. Fabric paint grip dots are an easy option.
Can I make these slippers for men?
Yes. Increase the starting chain length, work extra sole rounds if needed, and add more upper rows for a larger foot.
Conclusion
The Cozy Pebble Stitch Adult Crochet Slippers are simple, warm, and practical for everyday home comfort. The rounded toe, textured upper, sturdy sole, and open slip-on heel make them easy to wear and lovely to gift.
Make them in soft neutrals, warm browns, or your favorite cozy colors for a handmade pair of slippers that feels both useful and personal. This easy crochet pattern is a relaxing project and a perfect way to create something comfortable with your own hands.



