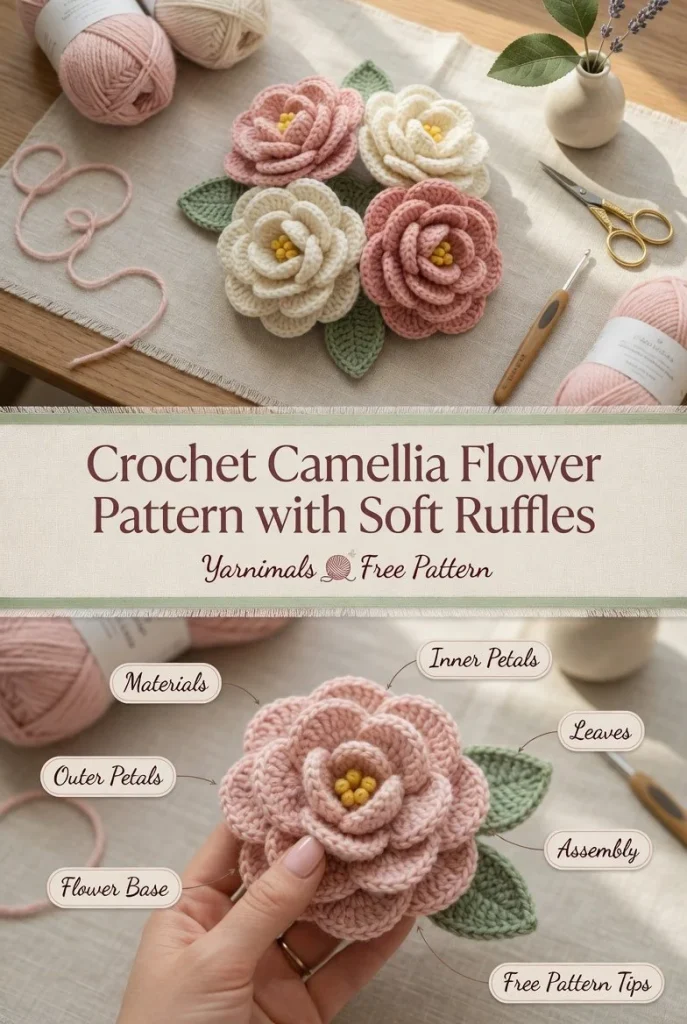
Creating a charming crochet camellia flower can bring a touch of elegance to any project. This crochet pattern features soft, rounded petals that layer together to form a full bloom, accompanied by a green flower base and optional leaves. It’s an enjoyable project for crocheters of all skill levels, allowing for graceful and textured results while keeping the design simple as the petal shapes repeat. If you’re looking for more crochet inspirations, consider exploring this baby alpaca crochet pattern for additional ideas.
Materials
- Worsted weight yarn in flower colors (e.g. pink, red)
- Worsted weight yarn in green for the base and leaves
- Crochet hook (size H/8 or 5 mm)
- Scissors
- Yarn needle for weaving in ends
Abbreviations
- MR: magic ring
- ch: chain
- sc: single crochet
- hdc: half double crochet
- dc: double crochet
- inc: increase
- dec: decrease
- sl st: slip stitch
Inner Petals
- Start with a magic ring.
- Round 1: Ch 2, 12 dc in the ring. Join with a sl st to the top of the first dc. (12)
- Round 2: Ch 2, 2 dc in each st around. Join. (24)
- Round 3: Ch 2, dc in next st, 2 dc in next st repeat around. Join. (36)
- Fasten off and weave in ends.
Outer Petals
- Repeat steps for inner petals but use a different color for a layered look.
- Round 1: Start with a magic ring, ch 2, 12 dc in the ring, join. (12).
- Round 2: Ch 2, 2 dc in each st around. Join. (24).
- Round 3: Ch 2, dc in next 2 sts, 2 dc in next st repeat around. Join. (36).
- Fasten off and weave in ends.
Flower Base
- With green yarn, start a magic ring.
- Round 1: Ch 1, 6 sc in the ring. Join. (6)
- Round 2: Ch 1, inc in each st around. Join. (12)
- Round 3: Ch 1, sc in next st, inc in next st repeat around. Join. (18)
- Round 4: Ch 1, sc in next 2 sts, inc in next st repeat around. Join. (24)
- Fasten off and leave a long tail for sewing.
Leaves
- With green yarn, ch 10.
- Row 1: Sc in 2nd ch from hook, hdc in next, dc in next 4, hdc in next, sc in last.
- Fasten off, leaving a long tail for sewing. Make 2 leaves.
Assembly
- Sew the inner petals to the base, layering them as desired.
- Attach the outer petals over the inner petals, adjusting until you achieve the desired fullness.
- Secure the leaves to the base, positioning them to your liking.
Tips for the Best Result
- Make sure to keep your tension consistent throughout to ensure that your petals look even and balanced.
- Consider blocking your petals gently to open them up and enhance their natural shape.
- When shaping the flower, don’t hesitate to adjust the petal placements for a more dynamic appearance.
Once assembled, your camellia flower will look stunning and handmade, perfect for bouquets, brooches, or decorative arrangements. Enjoy the process and the beauty of creating something unique!



