Introduction
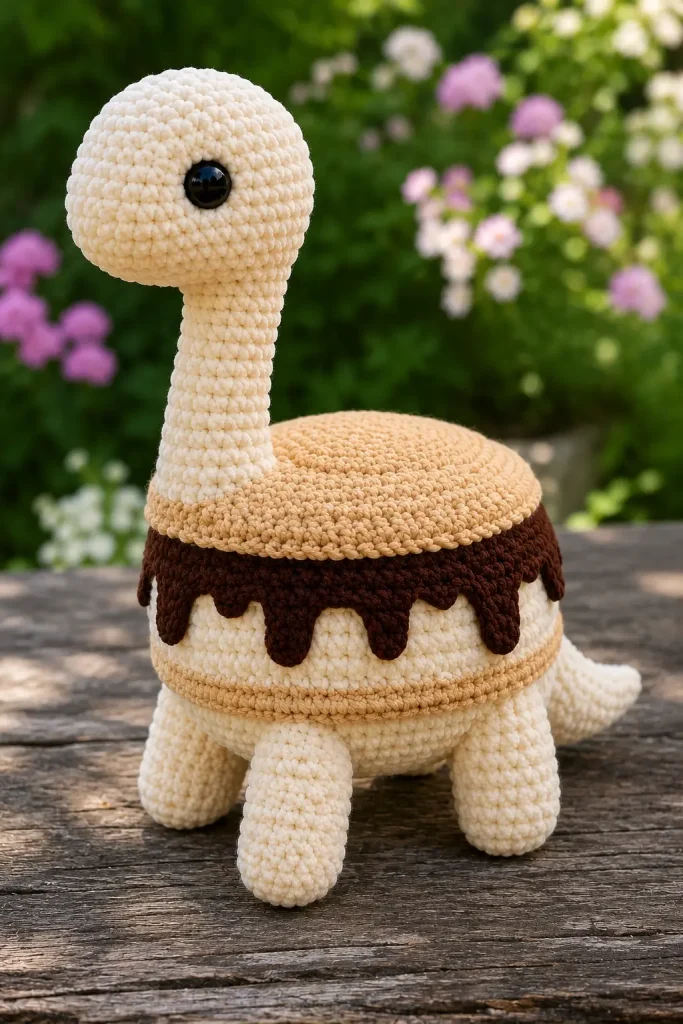
There is something wonderfully cozy about a handmade dinosaur plush, especially when it has a playful campfire-treat twist. This crochet dinosaur amigurumi pattern is soft, chubby, and full of personality, with a creamy plush body, a long curved neck, tiny rounded legs, and layered dessert-inspired details around the middle.
This is the kind of beginner-friendly amigurumi project that feels fun from the first round to the final stitch. The simple dinosaur shape keeps the pattern approachable, while the beige and chocolate-colored layers make the finished plush look unique and memorable.
Whether you are making it for a dinosaur lover, a nursery shelf, a handmade market table, or your own crochet collection, this plush crochet toy is sweet, charming, and sure to get attention.
Description
This crochet dinosaur amigurumi is designed as a soft long-neck dinosaur with a rounded cream body, a gently curved neck, a small rounded head, short plush legs, and a tapered tail. Around the body, it has a cozy campfire-treat look using warm beige yarn for the top and bottom “cracker” layers and chocolate brown yarn for the soft dripping middle layer.
The overall shape is cute and chunky rather than realistic, making it perfect for amigurumi lovers who enjoy playful handmade animals. Plush chenille yarn gives the dinosaur a soft, fluffy texture, while the large black safety eyes create a sweet, innocent expression.
This dinosaur crochet pattern works beautifully as a handmade gift, nursery decor, shelf sitter, birthday present, or plush crochet toy for anyone who loves cute dinosaurs and cozy crochet projects.
Materials
- Cream or white plush chenille yarn for the dinosaur body
- Light beige plush chenille yarn for the top and bottom treat layers
- Chocolate brown plush chenille yarn for the filling layer
- Small amount of black yarn for mouth embroidery
- Crochet hook suitable for your plush yarn, usually 5 mm to 6 mm
- 12 mm to 16 mm black safety eyes
- Polyester fiberfill stuffing
- Yarn needle
- Stitch markers
- Scissors
- Pins for assembly
Abbreviations
- MR: magic ring
- ch: chain
- sc: single crochet
- inc: increase, 2 sc in the same stitch
- dec: decrease, single crochet 2 stitches together
- sl st: slip stitch
- st: stitch
- sts: stitches
- BLO: back loops only
- FLO: front loops only
- R: round
- FO: fasten off
Pattern Notes
This pattern is worked in continuous rounds unless stated otherwise.
Use a stitch marker to mark the first stitch of each round.
Stuff each piece firmly enough to hold its shape, but do not overstuff. Plush yarn expands easily, so add stuffing slowly.
The finished dinosaur size will depend on your yarn and hook. With plush chenille yarn and a 5.5 mm hook, the finished dinosaur will be approximately 8–10 inches tall.
Safety eyes are not recommended for children under 3 years old. For a baby-safe version, embroider the eyes with black yarn.
Step-by-Step Instructions
Head
Use cream or white yarn.
R1: 6 sc in MR. (6)
R2: inc around. (12)
R3: (sc 1, inc) repeat around. (18)
R4: (sc 2, inc) repeat around. (24)
R5–R7: sc around. (24)
R8: sc 6, inc, sc 10, inc, sc 6. (26)
R9: sc around. (26)
Insert safety eyes between R5 and R6, about 8 stitches apart. For a side-facing look, place one eye slightly more visible on the front side and the second eye on the opposite side.
R10: sc 6, dec, sc 10, dec, sc 6. (24)
R11: (sc 2, dec) repeat around. (18)
Begin stuffing the head.
R12: (sc 1, dec) repeat around. (12)
Do not close completely. Continue directly into the neck.
Neck
Continue with cream or white yarn.
R13–R16: sc around. (12)
R17: sc 3, inc, sc 5, inc, sc 2. (14)
R18–R20: sc around. (14)
R21: sc 4, inc, sc 6, inc, sc 2. (16)
R22–R24: sc around. (16)
R25: sc 5, inc, sc 7, inc, sc 2. (18)
R26–R28: sc around. (18)
Stuff the neck lightly as you work. The neck should stay curved and soft, not stiff or overly bulky.
FO, leaving a long tail for sewing the neck to the body.
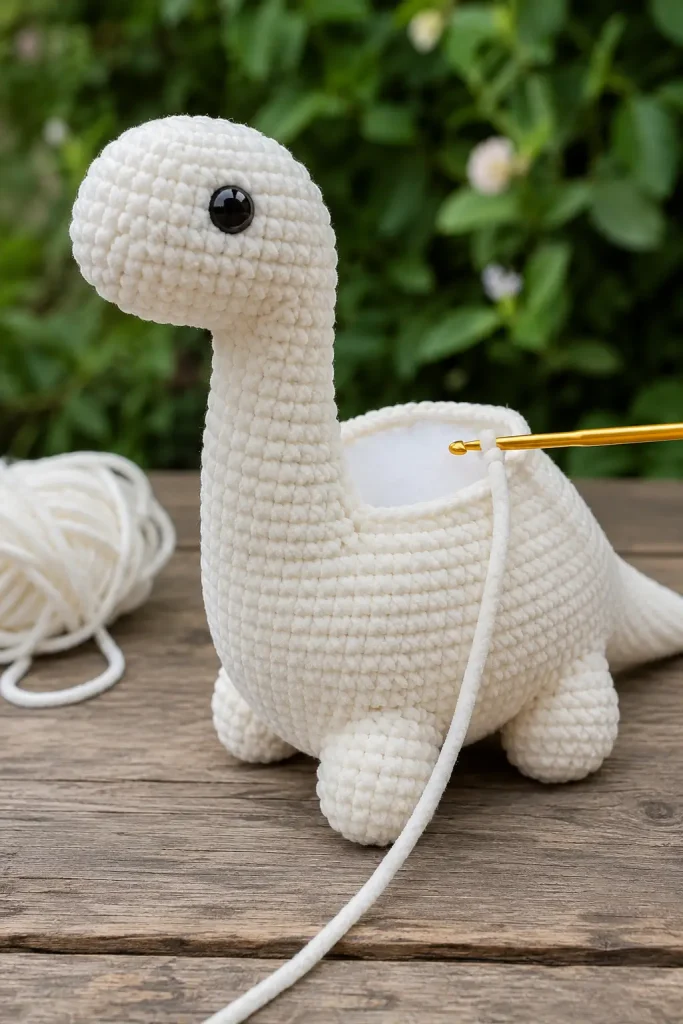
Body
Use cream or white yarn.
R1: 6 sc in MR. (6)
R2: inc around. (12)
R3: (sc 1, inc) repeat around. (18)
R4: (sc 2, inc) repeat around. (24)
R5: (sc 3, inc) repeat around. (30)
R6: (sc 4, inc) repeat around. (36)
R7: (sc 5, inc) repeat around. (42)
R8–R14: sc around. (42)
R15: (sc 5, dec) repeat around. (36)
R16–R17: sc around. (36)
R18: (sc 4, dec) repeat around. (30)
R19: sc around. (30)
R20: (sc 3, dec) repeat around. (24)
Begin stuffing the body firmly.
R21: (sc 2, dec) repeat around. (18)
R22: (sc 1, dec) repeat around. (12)
Finish stuffing.
R23: dec around. (6)
FO, close the hole, and weave in the end.
The body should look oval and chunky, with enough firmness to support the neck and decorative layers.
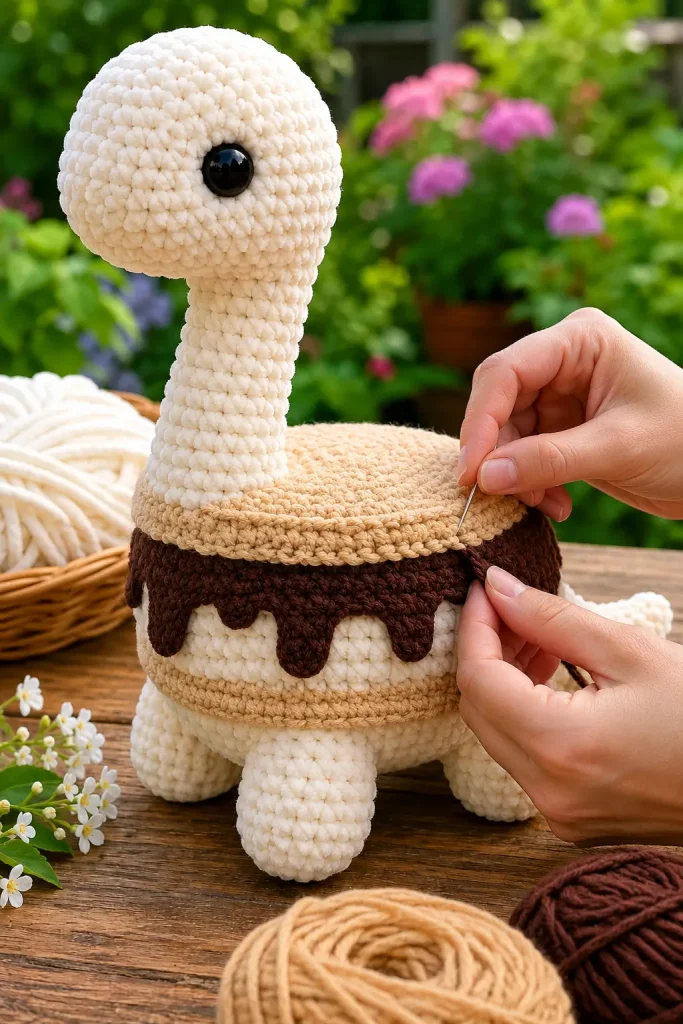
Bottom Treat Layer
Use light beige yarn.
This piece wraps around the lower middle of the body.
R1: ch 38.
R2: Starting in the 2nd ch from hook, sc across. (37)
R3: ch 1, turn, sc across. (37)
R4: ch 1, turn, sc 2, bobble-style texture by making 3 sc in next st, sc 4, 3 sc in next st, sc 4, repeat across naturally until the end.
FO, leaving a long tail for sewing.
Wrap this beige strip around the lower middle of the dinosaur body. Pin it in place before sewing. The textured edge should look slightly wavy and handmade.
Chocolate Filling Layer
Use chocolate brown yarn.
R1: ch 36.
R2: Starting in the 2nd ch from hook, sc across. (35)
R3: ch 1, turn, sc 4, ch 4, sl st back down the chain, sc 5, ch 5, sl st back down the chain, sc 6, ch 3, sl st back down the chain, sc 5, ch 6, sl st back down the chain, sc across to the end.
FO, leaving a long tail for sewing.
This piece creates the soft dripping chocolate effect. Sew it around the middle of the dinosaur body, slightly above the bottom beige layer.
Top Treat Layer
Use light beige yarn.
R1: ch 40.
R2: Starting in the 2nd ch from hook, sc across. (39)
R3: ch 1, turn, sc across. (39)
R4: ch 1, turn, sc 3, 3 sc in next st, sc 5, 3 sc in next st, sc 5, 3 sc in next st, sc across to the end.
FO, leaving a long tail for sewing.
Place this strip over the chocolate brown layer so it sits like the top treat layer on the dinosaur’s back. Sew it securely around the body, making sure it does not cover the neck placement area.
Arms
This design does not include separate arms. The finished plush keeps a simple baby dinosaur silhouette with a long neck, rounded body, four legs, and a tail.
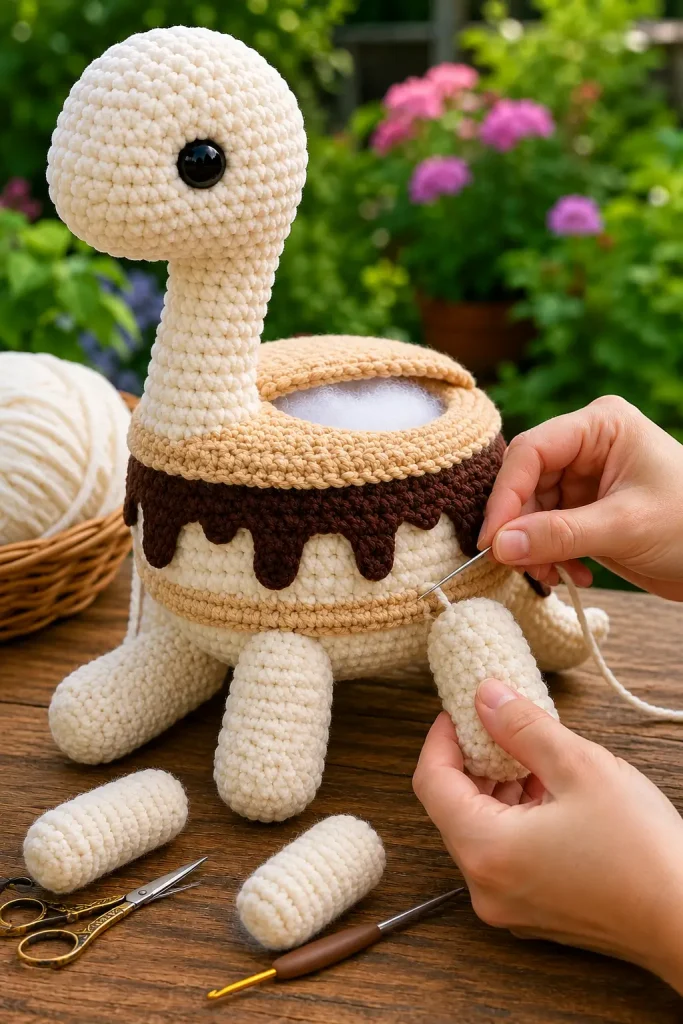
Legs
Make 4 using cream or white yarn.
R1: 6 sc in MR. (6)
R2: inc around. (12)
R3: (sc 1, inc) repeat around. (18)
R4–R5: sc around. (18)
R6: (sc 1, dec) repeat around. (12)
Stuff lightly.
R7: sc around. (12)
Flatten the opening and sc through both layers to close. (6)
FO, leaving a long tail for sewing.
Make sure all four legs are stuffed evenly. They should look short, round, and plush, helping the dinosaur stand or sit nicely.
Ears
This design does not include ears. The head stays smooth and rounded for a classic cute dinosaur look.
Tail
Use cream or white yarn.
R1: 6 sc in MR. (6)
R2: sc around. (6)
R3: (sc 1, inc) repeat around. (9)
R4: sc around. (9)
R5: (sc 2, inc) repeat around. (12)
R6–R7: sc around. (12)
R8: (sc 3, inc) repeat around. (15)
R9–R10: sc around. (15)
Stuff lightly as you go. Keep the tail tapered and soft.
Flatten the opening and sc through both layers to close. (7 or 8 sts)
FO, leaving a long tail for sewing.
Face
Use black yarn for embroidery.
Embroider a small curved smile below the eyes. Keep the mouth simple so the dinosaur keeps its sweet plush expression.
For extra detail, you can add tiny cream yarn stitches above the eyes for soft eyebrow texture, but keep them subtle.
If making this for a baby or toddler, skip safety eyes and embroider both eyes instead.
Assembly
Start by placing all pieces with pins before sewing. This helps you check the balance and shape before making anything permanent.
Sew the neck to the front upper area of the body. Angle it slightly upward so the dinosaur looks like it is lifting its head. Use several rounds of strong stitches around the base of the neck.
Sew the head and neck securely if you made the head separately from the body. Add extra stitches at the back of the neck for support.
Attach the tail to the back of the body, pointing slightly outward and upward. Keep it centered with the body.
Sew two legs to the front lower body and two legs to the back lower body. Position them evenly so the dinosaur can sit or stand with support.
Wrap the bottom beige treat layer around the lower middle of the body and sew it in place.
Place the chocolate brown filling layer above the bottom beige strip. Let the chain drips hang naturally down the side of the body. Sew across the top edge to secure.
Place the top beige treat layer above the chocolate layer. Sew it around the body so it looks like a soft sandwich-style layer wrapped around the dinosaur’s back.
Check all yarn tails and weave them securely into the plush body.
Shape the dinosaur gently with your hands. Adjust the neck, legs, and treat layers until the finished plush looks balanced and rounded.
Tips & Variations
For the softest result, use plush chenille yarn. It creates the cuddly texture that makes this dinosaur amigurumi feel like a real handmade plush toy.
If you want a smaller version, use worsted-weight yarn and a smaller hook. The pattern will create the same shape, but the finished dinosaur will be more compact.
For a pastel version, try a pale yellow body with cream treat layers and light brown filling. This gives the dinosaur a soft nursery-style look.
For a woodland style, use sage green for the dinosaur body, beige for the layers, and dark brown for the filling.
When sewing the decorative strips, avoid pulling too tightly. The layers should sit softly around the body without squeezing the plush shape.
Use pins before sewing every piece. This is especially important for the legs and neck because placement changes the whole personality of the dinosaur.
If the neck feels too floppy, add a little more stuffing near the base and sew the neck with extra support stitches.
For a more handmade look, embroider the eyes instead of using plastic safety eyes.
FAQ
Is this crochet dinosaur pattern beginner-friendly?
Yes, this is a good beginner crochet project for anyone who already knows how to work in continuous rounds, increase, decrease, and sew amigurumi pieces together. The decorative layers make it look detailed, but the main construction uses simple crochet stitches.
What yarn gives the softest dinosaur plush?
Plush chenille yarn gives the softest and fluffiest result. It creates a cuddly finish and makes the dinosaur look extra cozy. Cotton yarn can also be used, but it will create a smaller and firmer toy.
Can I resize this dinosaur amigurumi?
Yes. To make a larger dinosaur, use thicker yarn and a larger hook. To make a smaller dinosaur, use thinner yarn and a smaller hook. Keep the same stitch counts and adjust your safety eye size to match.
Can I make this pattern safe for young children?
Yes. Replace safety eyes with embroidered eyes, sew every piece securely, and avoid any glued decorations. Embroidered details are the safest option for baby-friendly handmade toys.
Conclusion
This crochet dinosaur amigurumi pattern is a playful mix of cozy texture, cute dinosaur shaping, and sweet campfire-inspired details. From the rounded cream body to the soft beige layers and chocolate filling, every part of this plush crochet toy adds charm and personality.
It is a wonderful handmade gift, a cheerful nursery decoration, and a fun project for anyone who loves cute amigurumi animals. Save this easy crochet pattern for your next relaxing craft day, choose your favorite yarn colors, and enjoy bringing this adorable dinosaur plush to life one stitch at a time.



