Intro
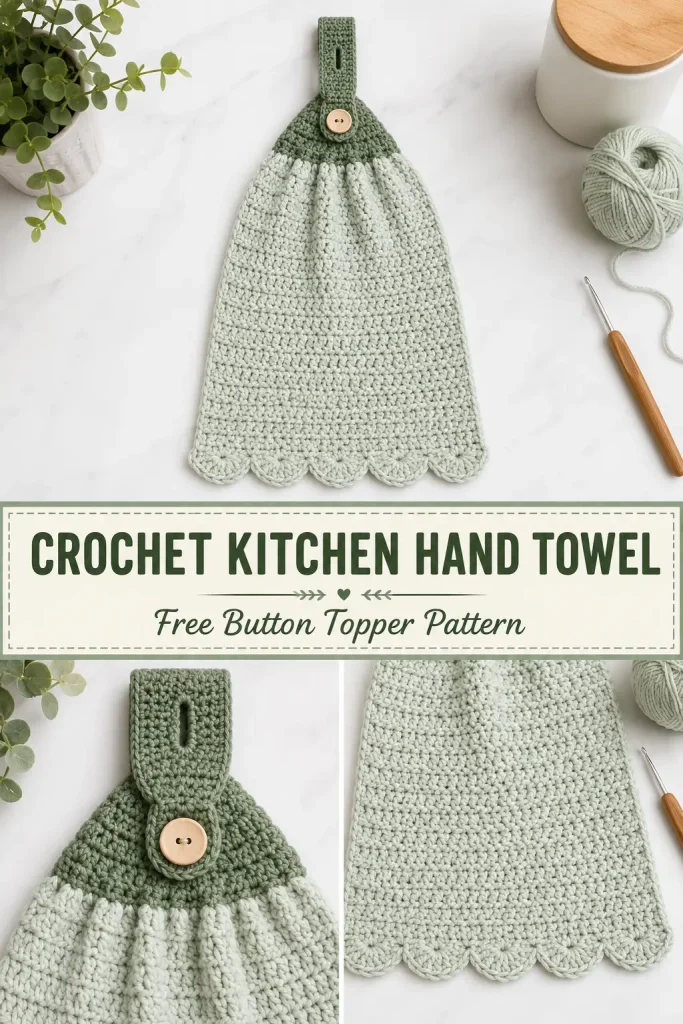
A hanging crochet kitchen towel is one of those practical projects that earns its place in the kitchen every day. This version combines a softly textured sage towel with a darker green tapered topper, a buttoned hanging strap, and a pretty scalloped lower edge.
The design is especially useful on oven handles, cabinet pulls, towel bars, or refrigerator handles because the crochet strap wraps around the bar and buttons securely in place. It also makes a thoughtful handmade housewarming gift and a useful beginner-friendly crochet home decor project.
Description
This crochet kitchen hand towel is worked as a full crocheted towel rather than adding crochet to a purchased fabric towel. The main towel is a wide rectangle in pale sage green with a dense, absorbent textured stitch. The bottom finishes with five rounded crochet scallops. At the top, contrasting darker sage yarn gathers the towel and gradually narrows into a sturdy hanging tab. The long tab folds around a kitchen handle and fastens to a small wooden button sewn onto the front.
The referenced project is described as an easy, beginner-friendly kitchen hand towel with a buttoned hanging strap, using worsted-weight cotton yarn; the original listing gives a finished size of approximately 18 × 13 inches. (Ravelry) The pattern below uses an original construction to create the same general style.
Materials
- Worsted weight #4 cotton yarn
- Approximately 150–180 yards pale sage or mint green for the towel
- Approximately 50–70 yards medium/dark sage green for the topper
- 5.5–6 mm crochet hook
- 1 wooden or washable button, approximately 22–25 mm
- Yarn needle
- Scissors
- Measuring tape
- Stitch markers, optional
Abbreviations
- ch – chain
- sc – single crochet
- dc – double crochet
- sc2tog – single crochet 2 together
- sl st – slip stitch
- st – stitch
- sts – stitches
- sk – skip
Pattern Notes
- US crochet terminology is used.
- Difficulty: easy/confident beginner.
- The pale sage towel body is worked first in turning rows.
- The texture is created with alternating single and double crochet stitches.
- Darker sage yarn is added at the top and used to gather and shape the hanging topper.
- The hanging strap is crocheted directly from the topper.
- A buttonhole near the end of the strap allows it to fold around an oven or cabinet handle.
- The decorative scalloped edge is added to the bottom last.
- Cotton yarn is recommended because it is practical for kitchen towels and gives the stitches good definition.
- Adjust the towel length simply by adding or removing body rows.
Approximate Finished Size
Using worsted cotton and a 5.5–6 mm hook:
- Towel width: 12–13 inches
- Towel body length: approximately 13–14 inches
- Overall length including topper: approximately 18 inches
- Hanging strap width: approximately 2.5–3 inches
Gauge is not critical, but the fabric should be soft without becoming loose or overly open.
Step-by-Step Instructions
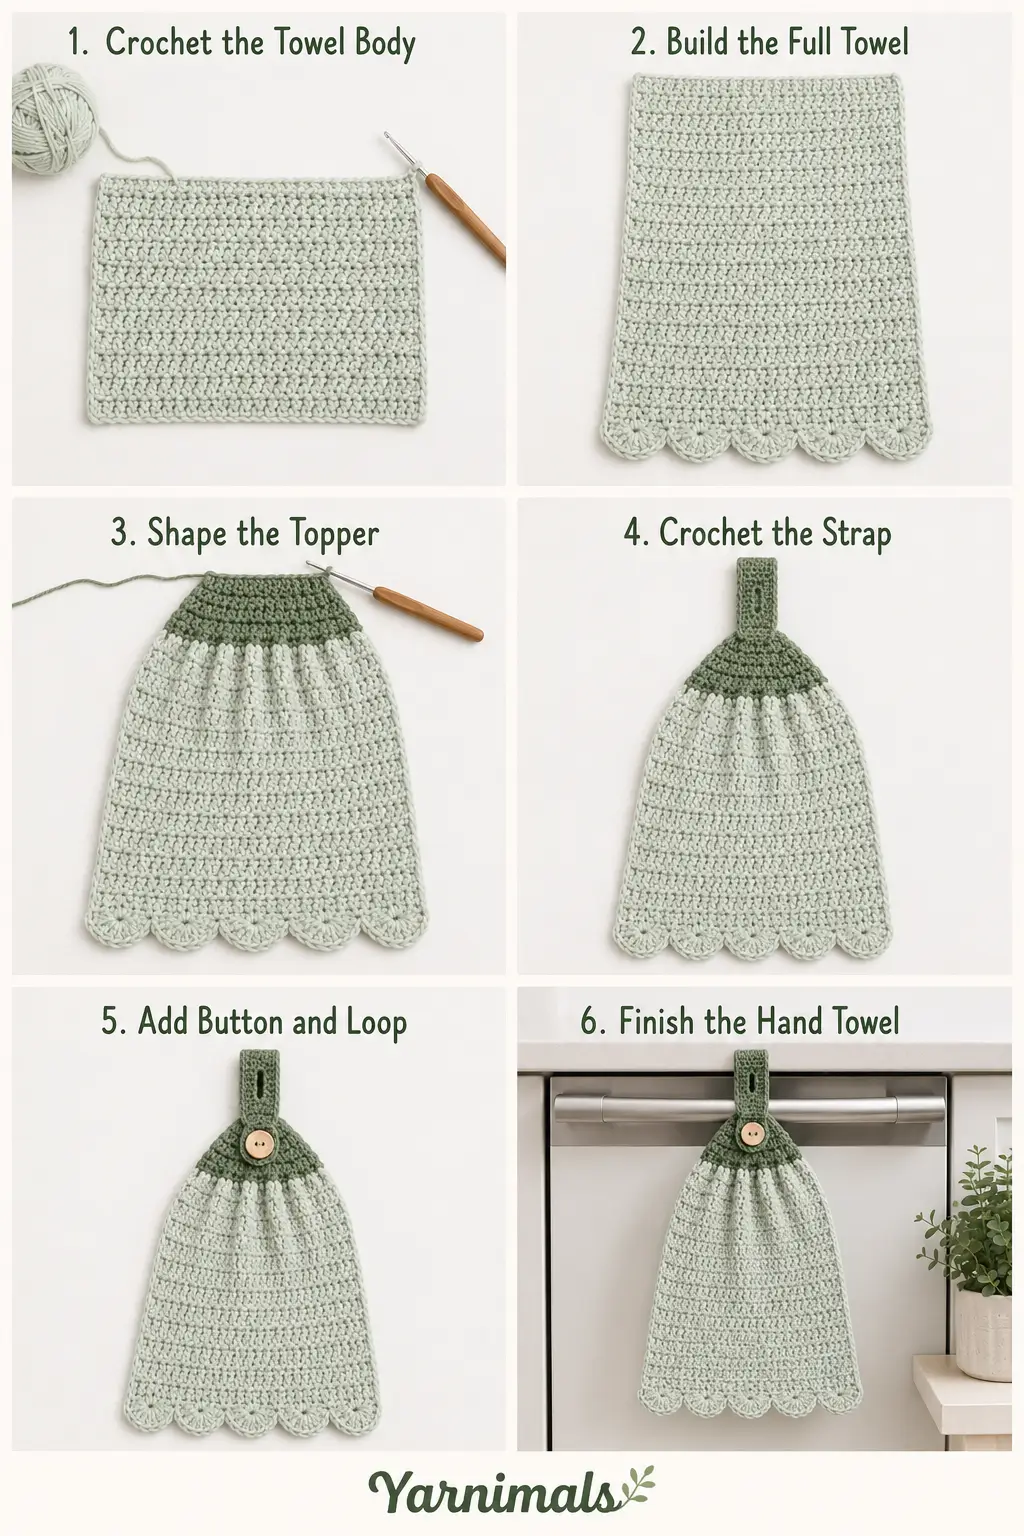
Part 1: Crochet the Towel Body
Using the pale sage yarn:
Ch 41.
Row 1
Sc in the second ch from the hook.
Dc in the next ch.
Continue alternating:
[sc in next ch, dc in next ch]
across.
40 sts
Ch 1 and turn.
Row 2
Sc in the first st.
Dc in the next st.
Continue:
[sc in next st, dc in next st]
across.
40 sts
Ch 1 and turn.
Because the previous row ended with a dc, repeating the same sequence places the short and tall stitches opposite one another and creates the softly pebbled texture.
Rows 3–36
Repeat Row 2.
Or continue until the towel body measures approximately:
13–14 inches long
Do not fasten off if you want the entire towel in one color.
For the two-tone version shown in the inspiration, fasten off the pale sage yarn.
The body should now be a straight rectangular panel.
Part 2: Gather the Top of the Towel
Join the darker sage green yarn at the upper right corner of the towel.
Ch 1.
Topper Row 1
Work across the 40 stitches:
[sc2tog, sc in next 2 sts] × 10
30 sts
Ch 1 and turn.
This begins gathering the wide towel into the narrower topper.
Topper Row 2
Work:
[sc2tog, sc in next st] × 10
20 sts
Ch 1 and turn.
You now have a compact 20-stitch upper section.
The pale towel fabric below should gather slightly rather than remaining completely flat.
Part 3: Shape the Tapered Topper
Row 3
Sc in each st across.
20 sts
Ch 1 and turn.
Row 4
Sc2tog.
Sc in each stitch until 2 sts remain.
Sc2tog.
18 sts
Ch 1 and turn.
Row 5
Sc across.
18 sts
Ch 1 and turn.
Row 6
Sc2tog, sc across until 2 sts remain, sc2tog.
16 sts
Ch 1 and turn.
Row 7
Sc across.
16 sts
Row 8
Sc2tog, sc across until 2 sts remain, sc2tog.
14 sts
Row 9
Sc across.
14 sts
Row 10
Sc2tog, sc across until 2 sts remain, sc2tog.
12 sts
Row 11
Sc across.
12 sts
Row 12
Sc2tog, sc across until 2 sts remain, sc2tog.
10 sts
You should now have a softly tapered dark green section leading into the hanging strap.
Part 4: Crochet the Hanging Strap
Continue using the darker sage yarn.
Rows 13–22
Ch 1 and turn.
Sc in each of the 10 sts across.
10 sts
Repeat until the strap is approximately 4–5 inches long from the narrowest point of the topper.
The strap should be long enough to pass around your intended oven handle or towel bar.
Check the fit before making the buttonhole.
Part 5: Make the Buttonhole
Buttonhole Row
Ch 1 and turn.
Sc in next 3 sts.
Ch 4.
Skip the next 4 sts.
Sc in final 3 sts.
You now have one centered buttonhole.
Next Row
Ch 1 and turn.
Sc in first 3 sts.
Work 4 sc around the ch-4 space.
Sc in remaining 3 sts.
10 sts
Final Strap Row
Ch 1 and turn.
Sc across all 10 sts.
Fasten off.
Weave in the end.
The upper end of the strap should remain rectangular rather than pointed.
Part 6: Add the Button
Lay the towel flat with the front side facing upward.
Fold the hanging strap downward as if it were wrapped around an oven handle.
Use the buttonhole to determine the exact button placement.
The button should sit approximately in the center of the wider dark green topper section.
Thread matching yarn through the button.
Sew it firmly through several crochet stitches.
Pass the yarn through the button several times so it is secure enough for repeated opening and closing.
Weave in the ends on the back.
Do not sew through only one crochet loop.
Part 7: Crochet the Scalloped Bottom
Turn the towel so the foundation edge is facing you.
Join pale sage yarn at the lower corner.
The 40-stitch width allows for five large scallops.
Work across the bottom approximately as follows:
[sl st in next st, sk 3 sts, 7 dc in next st, sk 3 sts]
Repeat across to form 5 rounded shells.
Finish with a sl st at the corner edge.
Fasten off.
Gently spread each 7-dc shell with your fingers so the scallops form smooth rounded points along the bottom.
The edge should resemble the softly scalloped finish visible in the reference design.
Part 8: Optional Side Edging
If your towel edges look uneven, add a simple finishing border.
Join pale sage yarn at one lower side corner.
Work sc evenly up the side of the towel.
Stop when you reach the darker green topper.
Fasten off.
Repeat on the opposite side.
Keep the edging relaxed so the towel does not curl.
Finishing
Weave in all loose ends securely.
Gently wash or wet block the towel according to your yarn’s care instructions.
Lay it flat and straighten:
- the towel sides
- scalloped bottom
- gathered upper edge
- tapered topper
- hanging strap
Allow it to dry completely.
Once dry, wrap the strap around an oven handle or towel bar and fasten the button through the buttonhole.
Your crochet hanging kitchen towel is complete.
Design Consistency Guide
For the closest finished look to the inspiration, keep these details consistent:
- pale mint or very light sage towel body
- medium sage green topper
- textured rectangular towel
- softly gathered upper body
- tapered dark green topper
- narrow rectangular hanging strap
- one round natural wooden button
- five rounded scallops across the lower edge
- no additional flowers
- no appliqués
- no fringe
- no separate fabric towel
The finished project should look clean, practical, botanical, and softly textured.
Tips & Variations
For a kitchen towel that will be used frequently, choose machine-washable cotton rather than a delicate fiber.
If you prefer a longer hand towel, simply continue the textured body for additional rows before beginning the top gathering.
For a shorter towel suitable for a cabinet handle, remove several body rows.
If your oven handle is particularly thick, add two to four extra strap rows before making the buttonhole.
A larger button can become a decorative focal point, but make sure the buttonhole is enlarged accordingly.
Try cream with terracotta for a farmhouse kitchen, oatmeal with olive for a natural look, or white with dusty blue for a clean coastal version.
You can also crochet the entire towel in one color while keeping the wooden button as the main accent.
FAQ
Can I use acrylic yarn for a crochet kitchen towel?
You can, but cotton is generally a better choice for a functional hand towel because it is more absorbent and creates a pleasant, sturdy fabric.
How can I make the towel longer?
Simply repeat the textured body row until you reach the desired length, then begin the darker topper exactly as written.
Can I hang this towel on an oven handle?
Yes. The long crochet tab is designed to wrap around a bar or handle and fasten with the button. Check that your strap length comfortably fits your specific handle before making the buttonhole.
Conclusion
This crochet kitchen hand towel combines useful everyday function with the charm of handmade kitchen decor. The textured sage body, scalloped lower edge, contrasting tapered topper, and wooden button create a finished piece that looks special without requiring complicated crochet techniques. Make one for your own kitchen, save the pattern for future gifts, or experiment with your favorite cotton color combinations.



