Intro
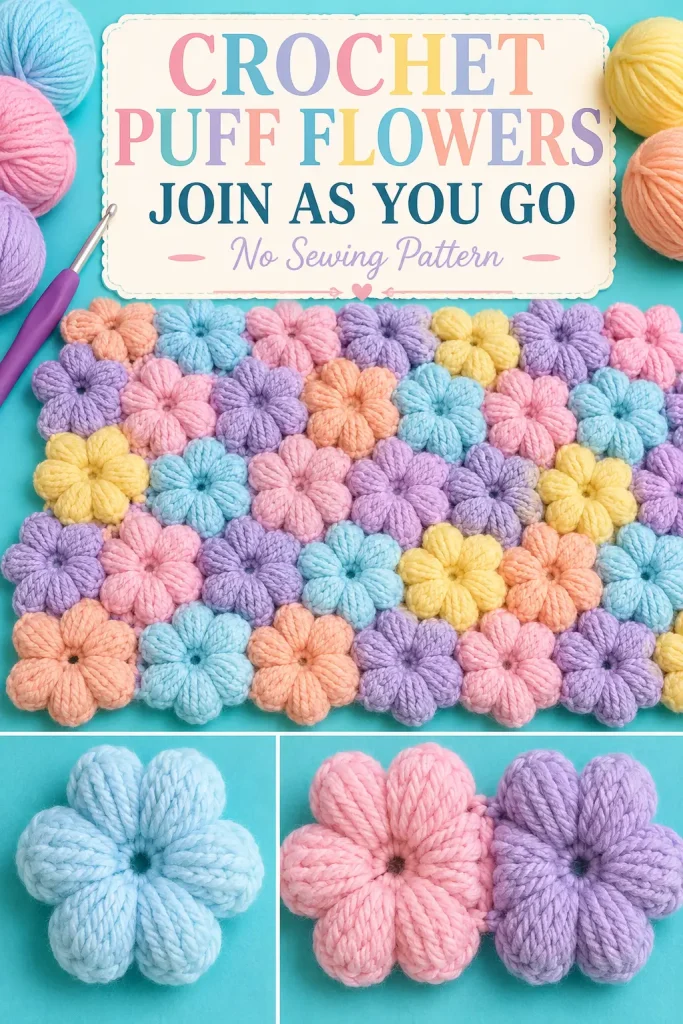
These crochet puff flowers are such a pretty way to turn yarn into something soft, colorful, and useful. The little 3D petals give each flower a plush texture, and the join-as-you-go method makes the whole project feel much easier because you can build your piece as you crochet.
This is a lovely pattern for using pastel shades or scrap yarn, and it works beautifully for baby blankets, cushion covers, bags, scarves, and cheerful crochet panels. If you want that full field of flowers look without sewing every motif together later, this pattern is a very satisfying one to make.
Description
This crochet puff flower motif is made with six rounded puff petals arranged in a neat flower shape. Each flower is worked in one round, creating a soft, slightly raised texture with open spaces between the petals. The motifs can be made in sweet pastel colors like baby blue, lavender, peach, pink, and yellow, then joined together as you crochet so the final fabric grows quickly without a pile of loose motifs waiting to be sewn. The finished panel looks bright, textured, and full of handmade charm.
Materials
- DK weight or light worsted yarn in one or more colors
- 4.0 mm crochet hook
- Scissors
- Yarn needle
- Stitch markers if needed
- Measuring tape
- Blocking mat and pins if desired
Abbreviations
- ch = chain
- sl st = slip stitch
- sc = single crochet
- hdc = half double crochet
- puff = puff stitch
- sp = space
- rep = repeat
- MR = magic ring
Pattern Notes
- This pattern uses US crochet terms.
- Each flower is worked in one round.
- Each flower has 6 puff petals.
- The flowers are joined through the chain spaces between petals.
- For a plump petal, keep your puff loops slightly loose.
- Finished flower size will vary by yarn and tension, but most flowers will measure about 2.5 to 3 inches across.
- When joining as you go, replace a regular chain space with a joining chain space where needed.
Step-by-Step Instructions
Puff Stitch Used in This Pattern
Puff stitch:
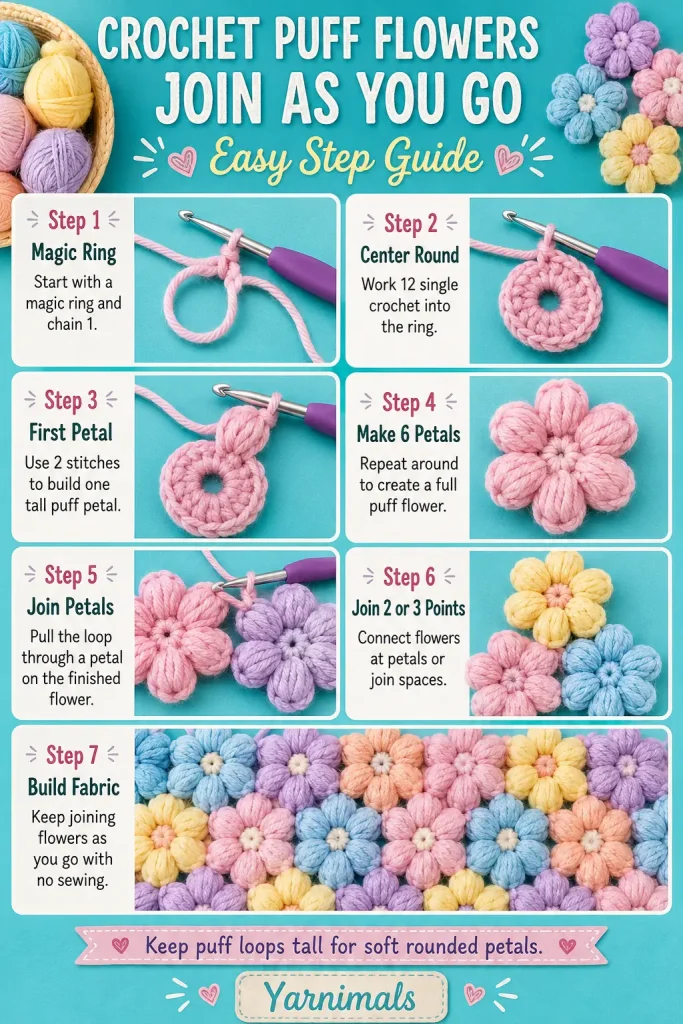
Yarn over, insert hook into the ring, pull up a loop.
Repeat that 2 more times in the same spot.
You should now have 7 loops on the hook.
Yarn over and pull through all 7 loops.
Ch 1 to close the puff.
First Flower
Make a MR.
Round 1:
Work 1 puff into the ring, ch 2.
Repeat from * to * 6 times total.
You should now have 6 puff petals and 6 ch-2 spaces.
Sl st to the top of the first puff to join.
Fasten off and weave in the starting tail later.
Make More Flowers
Work more flowers in the same way if you want separate motifs ready to join later, or begin using the join-as-you-go method below.
Join-As-You-Go Method
The flowers are joined through the ch-2 spaces between petals.
Regular Space
A normal space between petals is:
Ch 2
Joining Space
When a new flower needs to connect to a finished flower, replace the ch-2 space with:
Ch 1, sl st into the ch-2 sp of the finished flower, ch 1
This creates the join while keeping the same spacing.
Second Flower
Make a MR.
Work the first flower shape as before, but when you reach the point where you want to connect it to the first flower, use a joining space instead of a regular ch-2 space.
Example:
- Work puff, ch 2
- Work puff, ch 2
- Work puff, ch 1, sl st into a ch-2 sp of Flower 1, ch 1
- Continue the rest of the petals and spaces
Sl st to the top of the first puff to join.
Joining Flowers in a Row
To make a row of flowers:
- Make the first flower.
- Make the second flower and join it to the first flower using 2 adjacent joining spaces.
- Make the third flower and join it to the second flower using 2 adjacent joining spaces.
- Continue until your row is as long as you want.
Using 2 adjacent joins helps the flowers sit neatly side by side and keeps the panel more stable.
Starting the Next Row
For the next row, offset the flowers so they nest into the spaces between the flowers in the first row.
- Make the first flower of the new row.
- Join it to the flower above using 2 joining spaces.
- For the next flower in the row, join it to:
- the previous flower in the same row
- and the nearby flower or flowers in the row above
In most cases, a flower in the middle of the panel will use 3 or 4 joining spaces total, depending on placement.
Simple Joining Guide
Use this easy guide as you build your project:
- Side-by-side flower: join with 2 adjacent joining spaces
- Flower tucked into a gap between others: join with 3 or 4 joining spaces
- Edge flower: usually 2 joining spaces
- Corner flower in a larger panel: join only where it touches neighboring motifs
Building a Panel
Keep adding flowers until your panel reaches the size you want.
Project ideas:
- Baby blanket
- Cushion front
- Table runner
- Scarf
- Tote bag panel
- Wall hanging
A small cushion front might use around 20 to 30 flowers.
A baby blanket might use many more, depending on your flower size and final measurements.
Optional Border
Once your flower panel is complete, you can add a simple border to tidy the edges.
Attach yarn in any outer space.
Round 1:
Work sc evenly around the outer edge of the flower panel.
Place 2 or 3 sc in wider edge gaps where needed so the border stays flat.
Join with a sl st.
Round 2:
Ch 1, hdc in each st around.
Join with a sl st.
Repeat another round if you want a slightly thicker border.
Finishing
Weave in all ends carefully.
Block the joined flower panel lightly if needed so the flowers sit neatly and the joins look even.
If using the panel for a cushion or bag, stitch or crochet it onto the backing piece after blocking.
Tips & Variations
Pastel shades like baby blue, lavender, peach, soft pink, and butter yellow give these flowers a sweet spring look, while bold colors can make the design feel more playful and modern.
If you want extra puffy petals, keep your loops a little taller when working the puff stitches. If you want a flatter flower, pull the loops a bit tighter.
Cotton yarn gives very crisp stitch definition, while acrylic or acrylic blends make the flowers softer and slightly fluffier.
For the neatest join-as-you-go result, decide where each flower will connect before you begin the motif. That makes it easier to place the joining spaces in the correct spots without undoing stitches.
If your panel starts to cup or pull, block it lightly and make sure your joining spaces are not tighter than your regular ch-2 spaces.
FAQ
Are these crochet puff flowers beginner-friendly?
Yes, they are a good beginner-friendly motif if you are already comfortable with basic stitches and want to try puff stitches and simple joining.
Can I make all the flowers first and join them later?
Yes, but this pattern is designed for join-as-you-go, which saves time and avoids sewing each flower together at the end.
What can I make with crochet puff flowers?
They work well for blankets, pillows, scarves, bags, table toppers, wall hangings, and other colorful crochet accessories.
Conclusion
These crochet puff flowers are a fun and relaxing project with a beautiful textured finish. The no-sew join-as-you-go method makes them even more enjoyable because your project grows as you crochet, one flower at a time. Save this pattern and try it in your favorite color palette for a cheerful handmade piece.



