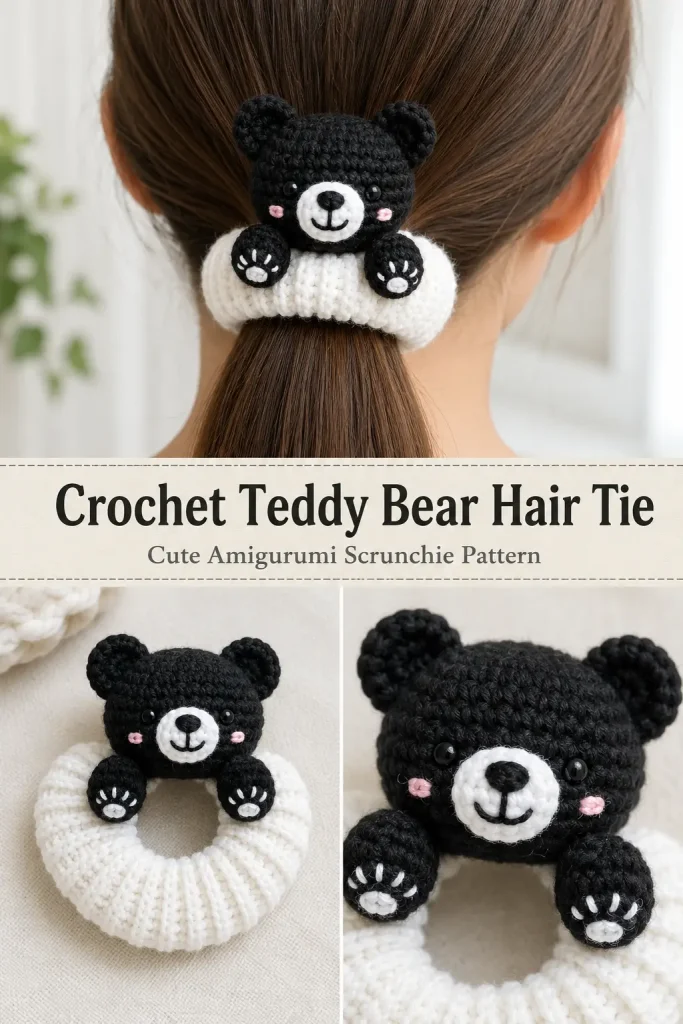
This cute crochet teddy bear hair tie turns a simple crochet scrunchie into a playful handmade accessory. A small stuffed teddy bear sits on the hair tie with its paws resting over the front, making the finished piece look almost like the bear is hugging the ponytail.
For this version, the original brown color is changed to a cleaner black-and-white teddy bear design. The bear is worked mainly in black, with a white muzzle and white paw details, tiny pink cheeks, and black facial embroidery. The scrunchie is worked in white so the teddy stands out clearly.
Description
The finished crochet hair accessory combines a ribbed white crochet scrunchie with a small black amigurumi teddy bear attached securely to the front. The bear has a rounded stuffed head, two small ears, two stuffed front paws, a white muzzle, white embroidered paw pads, black eyes and nose, a simple smile, and tiny blush-pink cheeks.
The black-and-white color palette gives this beginner-friendly crochet project a modern look while keeping all of the construction and stitch counts from the supplied pattern unchanged.
Materials
- DK or light worsted yarn in black
- DK or light worsted yarn in white
- Small amount of pink yarn for cheeks
- Small amount of black yarn or embroidery thread for facial details
- Crochet hook appropriate for your yarn, approximately 3–4 mm
- Ponytail elastic
- Polyester fiberfill
- Yarn needle
- Scissors
- Stitch marker
- Safety eyes or black embroidered eyes
For children’s accessories, embroidered eyes are the safer option.
Abbreviations
- mr – magic ring
- sc – single crochet
- inc – increase
- dec – decrease
- st – stitch
- sts – stitches
- fo – fasten off
- BLO – back loop only
- sl st – slip stitch
Pattern Notes
US crochet terminology is used.
The project is made in separate parts:
- white ribbed hair-tie cover
- black teddy head
- 2 black ears
- 2 black arms/paws
- white muzzle
- embroidered face and paw details
The teddy head is stuffed firmly enough to hold its rounded shape.
The ears should remain lightly shaped rather than heavily stuffed.
The arms are only lightly stuffed.
The supplied instructions use a crochet strip wrapped around an ordinary ponytail elastic to create the scrunchie base.
Step-by-Step Instructions
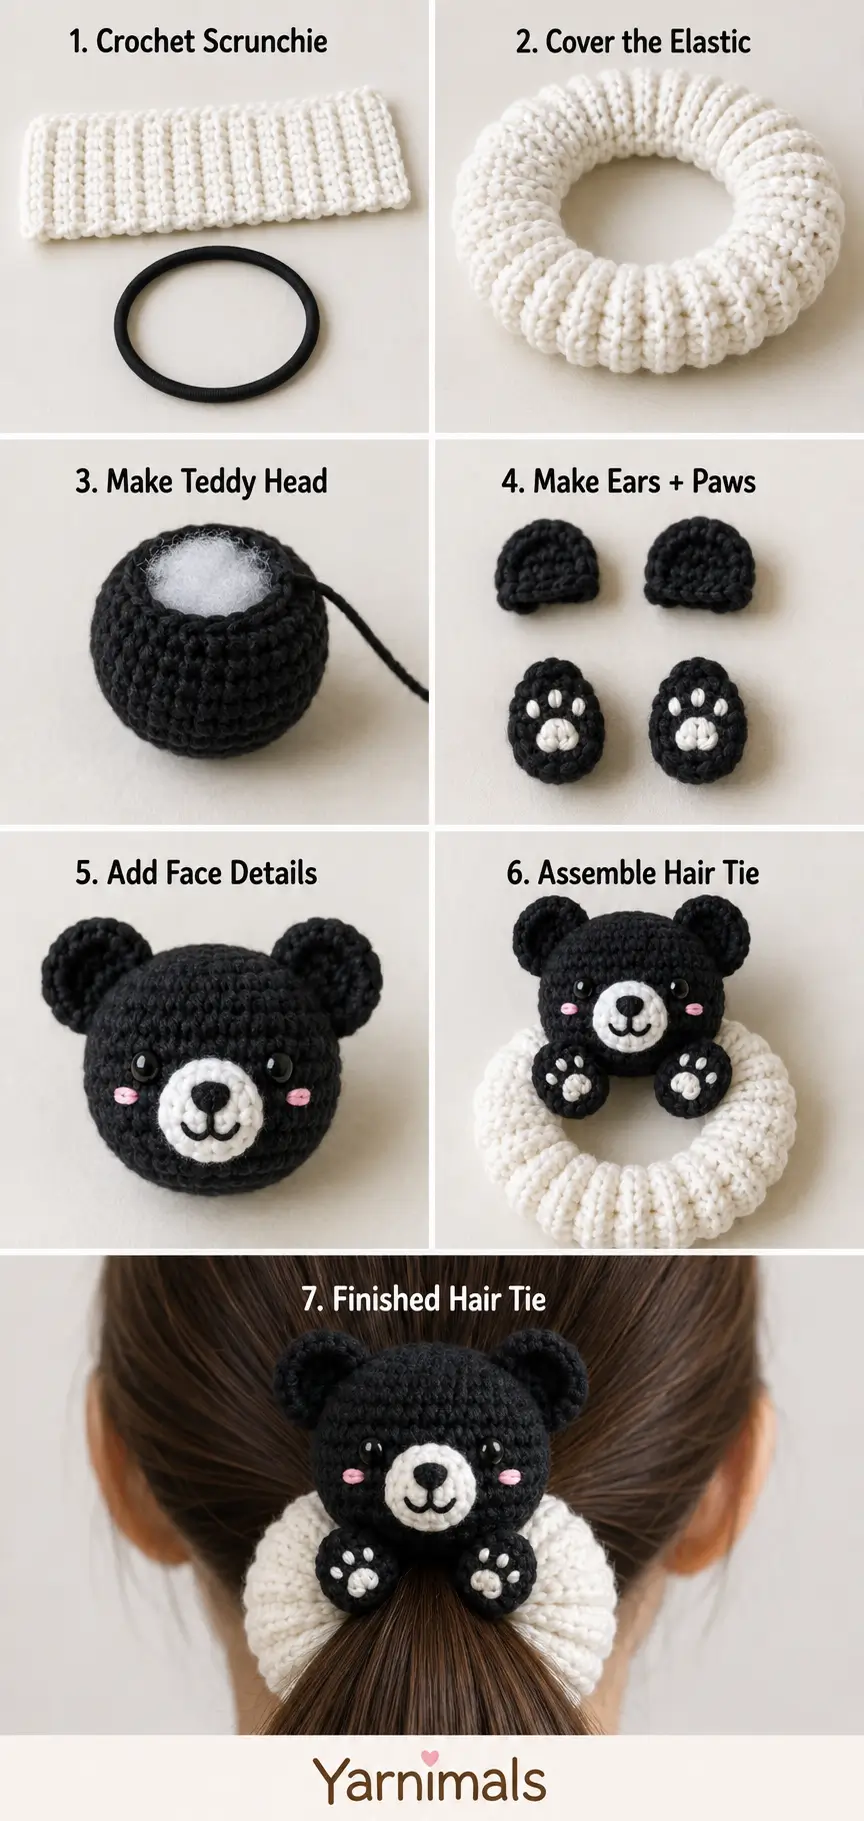
Part 1 – Crochet Hair Tie
Using white yarn.
Foundation
Ch 18.
Row 1
Skip the first ch.
Sc into each remaining ch across.
You will have:
18 sc
Row 2
Ch 1 and turn.
Working in the back loop only:
Sc in each st across.
18 sc
Continue
Repeat Row 2 until the crochet strip reaches the required length.
The supplied instructions mention continuing until approximately 14–16 cm, while the demonstrated sample was measured at approximately 25 cm before joining.
Make the strip long enough to wrap comfortably around your chosen ponytail elastic.
Do not change the 18-stitch row count.
Insert the Elastic
Place the ponytail elastic inside the crochet strip.
Bring the two long edges together around the elastic.
Join the edges using either:
- slip stitches
- single crochet
Continue until the full length is closed around the elastic.
Join the short ends securely to form the circular hair tie.
Fasten off.
Use a yarn needle to hide the remaining yarn ends inside the crochet fabric.
Set aside.
Part 2 – Teddy Bear Head
Using black yarn.
Round 1
6 sc into mr.
6 sts
Round 2
2 sc into each sc around.
12 sts
Round 3
Repeat:
sc, 2 sc into next st
around.
18 sts
Round 4
Repeat:
2 sc, inc into next st
around.
24 sts
Round 5
Repeat:
3 sc, inc into next st
around.
30 sts
Round 6
Repeat:
4 sc, inc into next st
around.
36 sts
Rounds 7–12
Sc into each st around.
36 sts
Round 13
Repeat:
4 sc, dec into next sts
around.
30 sts
Round 14
Repeat:
3 sc, dec into next sts
around.
24 sts
Round 15
Repeat:
2 sc, dec into next sts
around.
18 sts
Stuff the head.
Keep the shape rounded and smooth.
Round 16
Repeat:
sc, dec into next sts
around.
12 sts
Round 17
Dec into all sts.
6 sts
Fo.
Cut the yarn and sew the remaining 6 sts closed.
Part 3 – Teddy Bear Ears
Make 2 using black yarn.
Round 1
6 sc into mr.
6 sts
Round 2
Inc in every st around.
12 sts
Round 3
Repeat:
3 sc, inc into next st
around.
15 sts
Repeat this round for 2 rounds as instructed.
Final Round
Repeat:
3 sc, dec into next 2 sts
around.
12 sts
Close with sl st.
Fo, leaving a long yarn tail for sewing.
Make the second ear identically.
Attach the Ears
Position both ears near the top of the teddy head.
The supplied construction places them around the third-round area of the head.
Use the long black yarn tails to sew each ear firmly in place.
Fold each ear slightly inward while sewing to create the soft rounded teddy-ear shape.
Part 4 – Teddy Arms
Make 2 using black yarn.
Round 1
6 sc into mr.
6 sts
Round 2
2 sc into each st around.
12 sts
Next 4 Rounds
Sc in every st around.
12 sts
Lightly stuff the arm.
Do not overfill.
Flatten the opening.
Close the remaining stitches together using sl st through both sides.
Fo, leaving a long yarn tail for sewing.
Make the second arm identically.
White Paw Details
Using white yarn, embroider small paw marks near the rounded end of each arm.
Keep the details small and simple.
Use the same placement on both paws.
Part 5 – White Muzzle
Using white yarn.
Round 1
6 sc into mr.
Round 2
Increase around.
Round 3
Increase again as instructed.
Close after completing the third round.
Fo, leaving a long yarn tail for sewing.
The muzzle should be a small round white piece centered on the lower half of the face.
Assemble the Teddy Face
Position the white muzzle on the front of the black head.
Before completely sewing it closed, add a very small amount of polyester filling underneath so the muzzle remains slightly raised.
Sew securely around the outer edge.
Add Eyes
Position the black eyes evenly above the white muzzle.
The eyes should sit close enough to keep the teddy expression cute and compact.
If this accessory is intended for a young child, embroider the eyes instead of using removable components.
Add the Nose
Using black yarn or embroidery thread, make a small black nose near the upper center of the white muzzle.
Keep the nose compact.
Embroider the Smile
From the bottom of the nose, embroider a short vertical line.
Add a small curved smile underneath.
Keep the expression simple and symmetrical.
Add Pink Cheeks
Using pink yarn, embroider one tiny blush spot beneath each eye.
The cheeks should remain small so the black-and-white teddy design stays clean.
Attach the Teddy to the Hair Tie
Place the completed teddy head at the center front of the white crochet scrunchie.
The lower part of the teddy head should overlap the hair tie slightly.
Using black yarn and a yarn needle, stitch the head securely to the crochet scrunchie.
Make several passes through the head base and scrunchie fabric.
Do not sew through the ponytail elastic itself.
Attach the Arms
Place one black arm on each side of the teddy.
Arrange the arms so they appear to rest over or hug the white scrunchie.
The rounded paw ends should point toward the front.
Sew the upper ends of both arms firmly to the teddy and hair-tie base.
Keep the white embroidered paw details visible.
Final Assembly Check
Check that:
- the scrunchie stretches freely
- the teddy head is centered
- both ears are securely attached
- both arms are secure
- the white muzzle is centered
- the eyes sit evenly
- the nose and smile are neat
- pink cheeks are symmetrical
- paw details remain visible
- no loose yarn ends remain
Design Consistency Lock
Keep this finished version exactly as:
- white ribbed crochet scrunchie
- black teddy head
- black ears
- black arms
- white muzzle
- white paw details
- black eyes
- black nose and smile
- tiny pink cheeks
- teddy positioned at the center of the hair tie
- arms resting over the scrunchie
Do not add a body.
Do not add legs.
Do not add clothing.
Do not add bows.
Do not add flowers.
Do not add extra ears or accessories.
The teddy should remain a small head-and-paws hair-tie decoration.
Tips & Variations
Keep the black stitches fairly tight so white stuffing does not show through the teddy head.
A smooth cotton or cotton-acrylic yarn works especially well because it gives the little facial features clear definition.
For the white scrunchie, keep the BLO stitches consistent so the ribbed texture remains neat.
Do not stuff the arms heavily. A softer paw shape sits more naturally against the hair tie.
When attaching the teddy, stretch the scrunchie slightly while sewing. This helps prevent the teddy attachment stitches from restricting the elasticity too much.
If using very dark black yarn makes your stitches difficult to see, work in bright natural light and use a light-colored stitch marker.
FAQ
Can beginners make this crochet teddy hair tie?
Yes. The project mainly uses single crochet, increases, decreases, back-loop crochet, simple assembly, and embroidery.
Can I use a different teddy color?
Yes, but this version is specifically designed in black and white for a strong contrasting look. The white muzzle and paw details are especially visible against the black teddy.
Does the teddy have a full body?
No. The design uses a stuffed teddy head and two small paws attached directly to the crochet scrunchie, which keeps the hair accessory compact and comfortable.
Conclusion
This black-and-white crochet teddy bear hair tie is a cute way to combine a practical scrunchie with a small amigurumi project. The white ribbed hair band gives the black teddy plenty of contrast, while the white muzzle, tiny paw details, pink cheeks, and simple embroidered face bring the character to life. Make it as a handmade gift, a fun girl’s hair accessory, or a quick crochet project in your favorite high-contrast colors.



