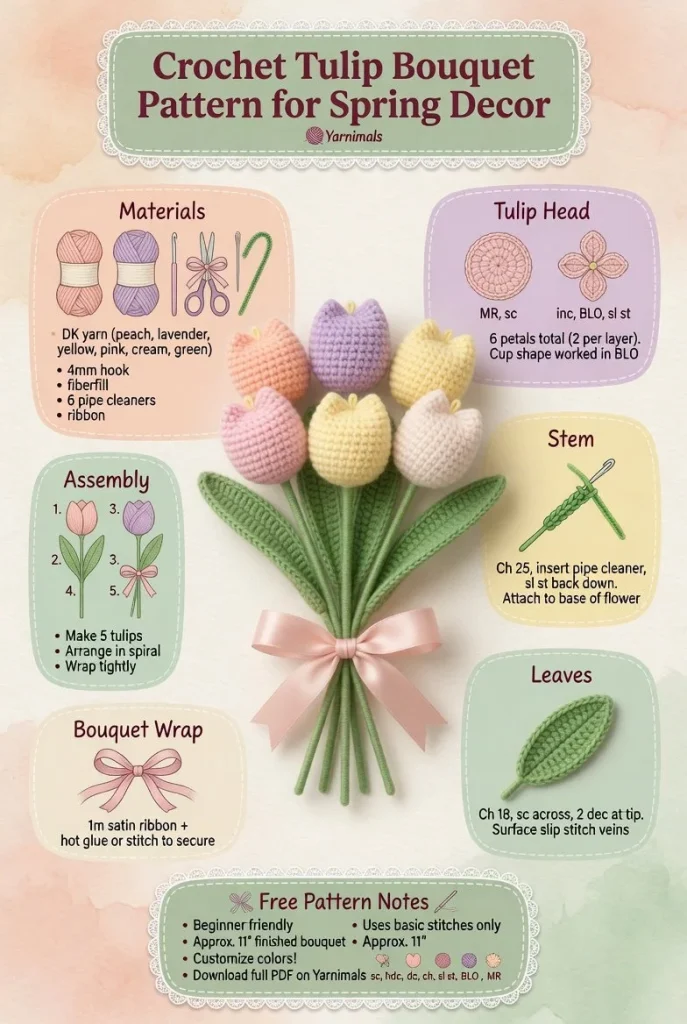
Spring is a wonderful time for creating bright and cheerful handmade decorations, and what better way to celebrate the season than with a lovely crochet tulip bouquet? This easy crochet project is designed with beginners in mind, featuring cup-shaped flower heads, slender green stems, and long leaves for a fresh, elegant look. In just a few simple steps, you can craft a bouquet that’s perfect for brightening up your home or making a heartfelt gift.
Materials
- Worsted weight yarn in your preferred tulip colors (e.g., pink, yellow, white)
- Green yarn for the stems and leaves
- 4.0 mm (G) crochet hook
- Scissors
- Yarn needle
- Ribbon for bouquet wrap
- Stitch markers (optional)
Abbreviations
- MR: magic ring
- ch: chain
- sc: single crochet
- hdc: half double crochet
- dc: double crochet
- inc: increase
- dec: decrease
- sl st: slip stitch
Instructions
Tulip Head
- Begin with a magic ring (MR).
- Round 1: 6 sc into the MR. (6 sts)
- Round 2: inc in each stitch around. (12 sts)
- Round 3: sc in next st, inc in next stitch repeat around. (18 sts)
- Rounds 4-6: sc in each stitch around. (18 sts)
- Round 7: sc in next st, dec repeat around. (12 sts)
- Round 8: dec around. (6 sts)
- Fasten off, leaving a long tail for sewing. Stuff lightly.
Stem
- Using green yarn, ch 20.
- Row 1: starting in the second chain from the hook, sc in each chain across. (19 sts)
- Fasten off and weave in ends.
Leaves (Make 2)
- Using green yarn, ch 10.
- Row 1: starting in the second chain from the hook, sc in next 3 ch, hdc in next 2 ch, dc in last 4 ch.
- Row 2: Working back down the other side, dc in next 4, hdc in next 2, sc in last 3.
- Fasten off, leaving a tail for sewing.
Bouquet Wrap
- Cut a length of ribbon to wrap around the stems of your tulips.
- Arrange tulips, stems, and leaves to your liking, then use the ribbon to secure them together.
Assembly
- Sew the tulip heads to the tops of the stems securely.
- Attach the leaves to the sides of the stems by sewing them in place.
This bouquet is not only an enjoyable crochet project but also a beautiful display for any spring-themed decor. If you’re looking for more beginner-friendly crochet projects, you can explore the Spring Crochet Tulip Bouquet tutorial for beginners for detailed guidance.
Tips for the Best Result
- Maintain consistent tension throughout your project to ensure neat, uniform edges.
- When stuffing your tulip heads, remember not to overstuff, as this may distort their shape.
- Experiment with different colors to create a unique bouquet that reflects your personal style.
- Use stitch markers to keep track of your rows if you find it helpful.
- Consider adding a small decorative element, such as a button on the center of the flowers, for an extra touch.
This delightful crochet tulip bouquet is not just a fun project; it can also be a meaningful gift, especially when crafted with personal touches in color and design. Enjoy crafting each tulip, and don’t forget to try out different arrangements for a truly custom bouquet!



