Intro
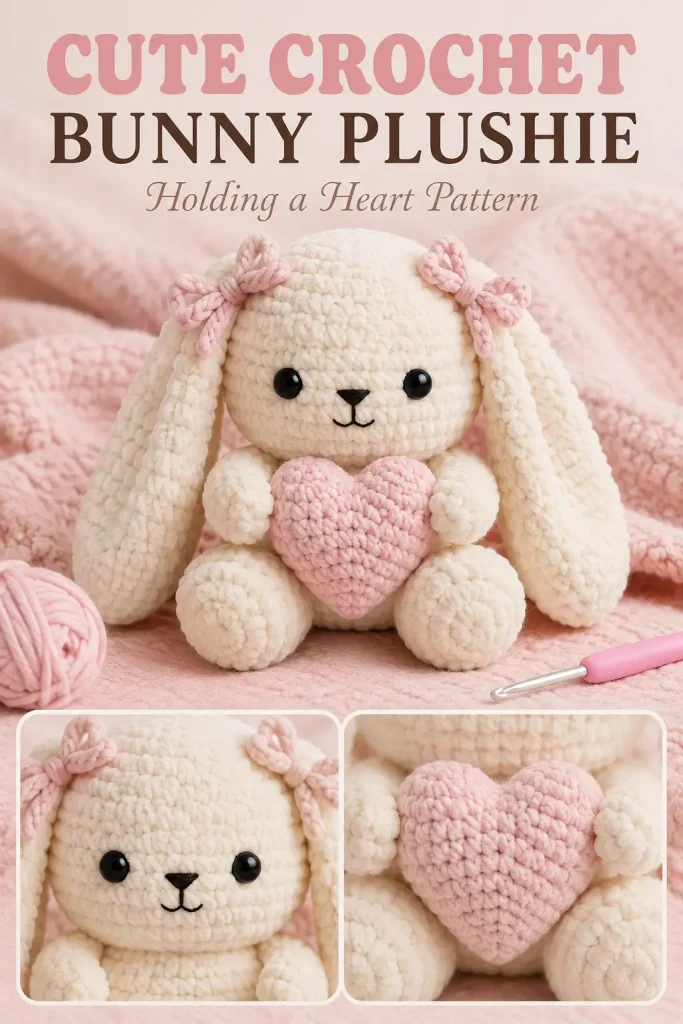
This cute crochet bunny holding a heart is the kind of plushie that feels soft, sweet, and handmade from the very first stitch. With its floppy ears, tiny black face, pink bows, and little heart held close to the body, it makes a lovely gift for Valentine’s Day, birthdays, nursery decor, or anyone who loves cozy amigurumi projects.
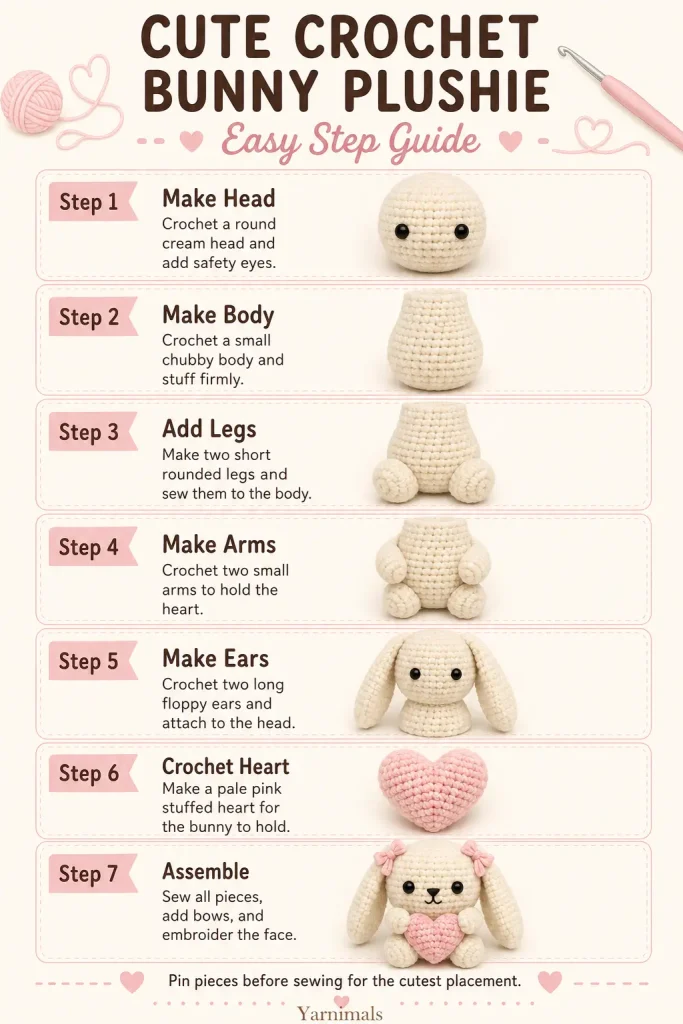
The design is beginner-friendly if you already know the basic amigurumi stitches. It is made in separate pieces, then assembled into a soft bunny plush with a rounded head, chubby body, long ears, small arms, rounded legs, and a puffy crochet heart.
Description
This amigurumi bunny is made with cream plush yarn for a soft, cuddly finish. The head is rounded and slightly oversized, with black safety eyes and a simple embroidered black nose and mouth. The body is short and chubby, with two rounded legs at the bottom and small arms stitched forward to hold a pale pink crochet heart. The long floppy ears hang down on each side of the head, and each ear is finished with a small pink bow near the top. The finished bunny has a gentle plush toy look that is cute, simple, and perfect as a handmade crochet gift.
Materials
- Plush yarn in cream for the bunny
- Plush yarn in pale pink for the heart and bows
- Small amount of black yarn for the nose and mouth
- 10 mm or 12 mm black safety eyes
- 4.5 mm crochet hook
- Yarn needle
- Stitch marker
- Scissors
- Polyester fiberfill stuffing
- Pins for assembly
Abbreviations
- ch = chain
- sl st = slip stitch
- sc = single crochet
- inc = increase
- dec = invisible decrease
- st = stitch
- sts = stitches
- FO = fasten off
Pattern Notes
- This pattern uses US crochet terms.
- Work in continuous rounds unless stated otherwise.
- Use a stitch marker to mark the first stitch of each round.
- Stuff the head and body firmly, but do not overstuff the ears or arms.
- The bunny can be started with a magic ring or a chain ring. For a no-magic-ring version, ch 4, sl st into the first ch to form a ring, then work Round 1 into the center.
- Finished size depends on yarn and tension.
Step-by-Step Instructions
Head
Use cream yarn.
Round 1: Work 8 sc into a magic ring or chain ring.
(8)
Round 2: Inc in each st around.
(16)
Round 3: Sc in next st, inc in next st, repeat around.
(24)
Round 4: Sc in next 2 sts, inc in next st, repeat around.
(32)
Round 5: Sc in next 3 sts, inc in next st, repeat around.
(40)
Rounds 6–12: Sc in each st around.
(40)
Insert safety eyes between Rounds 8 and 9, about 7 stitches apart.
Round 13: Sc in next 3 sts, dec, repeat around.
(32)
Round 14: Sc in next 2 sts, dec, repeat around.
(24)
Begin stuffing the head.
Round 15: Sc in next st, dec, repeat around.
(16)
Round 16: Dec around.
(8)
Finish stuffing. FO, leaving a tail. Close the opening and weave in the end.
Body
Use cream yarn.
Round 1: Work 8 sc into a magic ring or chain ring.
(8)
Round 2: Inc in each st around.
(16)
Round 3: Sc in next st, inc in next st, repeat around.
(24)
Round 4: Sc in next 2 sts, inc in next st, repeat around.
(32)
Rounds 5–9: Sc in each st around.
(32)
Round 10: Sc in next 2 sts, dec, repeat around.
(24)
Round 11: Sc in each st around.
(24)
Round 12: Sc in next st, dec, repeat around.
(16)
Stuff the body firmly.
FO, leaving a long tail for sewing.
Legs
Make 2 with cream yarn.
Round 1: Work 8 sc into a magic ring or chain ring.
(8)
Round 2: Inc in each st around.
(16)
Round 3: Sc in each st around.
(16)
Round 4: Sc in next 2 sts, dec, repeat around.
(12)
Rounds 5–6: Sc in each st around.
(12)
Stuff lightly.
Flatten the top and sc through both layers to close.
FO, leaving a long tail for sewing.
Arms
Make 2 with cream yarn.
Round 1: Work 6 sc into a magic ring or chain ring.
(6)
Round 2: Inc in each st around.
(12)
Rounds 3–5: Sc in each st around.
(12)
Round 6: Sc in next 2 sts, dec, repeat around.
(9)
Rounds 7–9: Sc in each st around.
(9)
Stuff the lower hand area lightly only. Leave the upper arm flat.
Flatten the top and sc through both layers to close.
FO, leaving a long tail for sewing.
Ears
Make 2 with cream yarn.
Round 1: Work 6 sc into a magic ring or chain ring.
(6)
Round 2: Inc in each st around.
(12)
Round 3: Sc in next st, inc in next st, repeat around.
(18)
Rounds 4–10: Sc in each st around.
(18)
Round 11: Sc in next 4 sts, dec, repeat around.
(15)
Rounds 12–16: Sc in each st around.
(15)
Round 17: Sc in next 3 sts, dec, repeat around.
(12)
Rounds 18–22: Sc in each st around.
(12)
Do not stuff the ears.
Flatten the opening and sc through both layers to close.
FO, leaving a long tail for sewing.
Heart
Use pale pink yarn.
Make the first heart bump.
Round 1: Work 6 sc into a magic ring or chain ring.
(6)
Round 2: Inc in each st around.
(12)
Round 3: Sc in each st around.
(12)
FO on the first bump.
Make the second heart bump the same way, but do not fasten off.
Join the bumps:
Round 4: Continue from the second bump. Sc around the second bump, then sc around the first bump.
(24)
Round 5: Sc in each st around.
(24)
Round 6: Sc in next 4 sts, dec, repeat around.
(20)
Round 7: Sc in next 3 sts, dec, repeat around.
(16)
Begin stuffing the heart lightly.
Round 8: Sc in next 2 sts, dec, repeat around.
(12)
Round 9: Sc in next st, dec, repeat around.
(8)
Round 10: Dec around.
(4)
FO and close the opening.
Shape the heart gently with your fingers.
Pink Bows
Make 2 with pale pink yarn.
Ch 20.
FO, leaving both tails long.
Tie the chain into a small bow around the base of one ear.
Adjust the loops and tails until the bow looks even.
Repeat for the second ear.
Trim the bow tails neatly.
Face Details
Use black yarn.
Embroider a small horizontal nose between the eyes.
From the center of the nose, stitch one short vertical line downward.
Keep the face simple and soft.
Weave the black yarn tails inside the head.
Assembly
Sew the head to the body, lining the center of the head with the center of the body.
Sew both legs to the lower front of the body so they sit rounded and slightly apart.
Sew the ears to the top sides of the head. Let them hang down softly along each side of the face.
Sew the arms to the front sides of the body.
Place the heart between the arms.
Sew or tack the arms lightly to the heart so the bunny looks like it is holding it.
Add the pink bows near the top of both ears.
Check all pieces and sew down any loose areas.
Finishing
Weave in all ends.
Shape the head, ears, body, and heart with your hands.
Add a little extra stuffing where needed before closing final seams.
Make sure the safety eyes are secure before giving the plushie as a gift.
Tips & Variations
Use cream plush yarn for the soft bunny look shown in this design. You can also make the bunny in white, beige, pastel gray, or soft brown.
For the heart, pale pink gives the sweetest look, but red, lavender, peach, or cream also work well.
If you are making this plushie for a young child, embroider the eyes instead of using safety eyes.
To make the bunny larger, use thicker plush yarn and a larger hook. To make it smaller, use worsted weight yarn and a smaller hook.
For cleaner assembly, pin all pieces in place before sewing. This helps you check the ear placement, arm angle, and heart position before everything is attached.
FAQ
Is this crochet bunny pattern beginner-friendly?
Yes, this is a beginner-friendly amigurumi pattern if you know single crochet, increases, decreases, and simple sewing.
Can I make this bunny without a magic ring?
Yes. You can ch 4, sl st into the first chain to make a ring, then work the first round into the center of that ring.
Can I use cotton yarn instead of plush yarn?
Yes. Cotton yarn will make a smaller, firmer bunny with clearer stitches, while plush yarn creates a softer and cuddlier toy.
Conclusion
This cute crochet bunny holding a heart is a sweet handmade plushie with soft details and a gentle giftable look. The floppy ears, tiny bows, rounded body, and puffy heart make it a lovely amigurumi pattern to save for birthdays, Valentine’s Day, baby gifts, or cozy handmade collections.




Loved the site