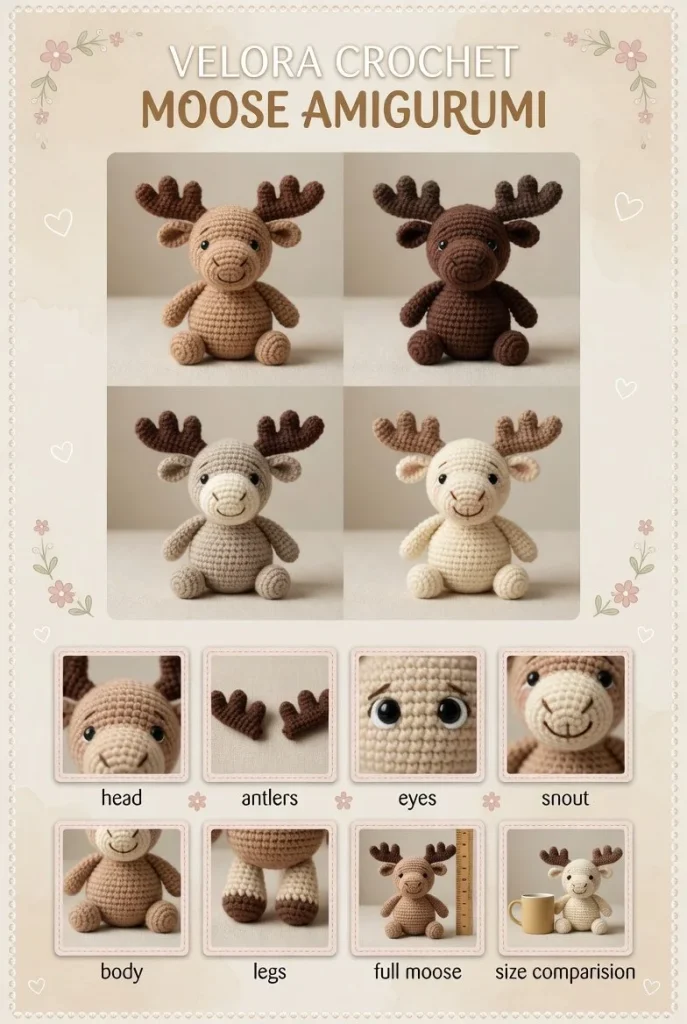
Create your own delightful mini crochet moose with this easy amigurumi pattern. This charming stuffed toy features a rounded snout, oversized branching antlers, and playful black safety eyes, all crafted in cozy, soft yarn with natural earthy tones. Enjoy the process of creating a woodland animal that’s perfect for both beginners and seasoned crafters.
Materials
- Soft plush yarn in light brown, dark brown, beige, and cream
- Black safety eyes
- Crochet hook (size appropriate for yarn)
- Yarn needle
- Stitch marker
- Scissors
- Fiberfill stuffing
Abbreviations
- ch: chain
- sc: single crochet
- inc: increase (2 sc in the same stitch)
- dec: decrease (single crochet two stitches together)
- sl st: slip stitch
Pattern Instructions
Head
- With your choice of yarn color, start with a magic ring.
- Round 1: 6 sc in the magic ring (6)
- Round 2: inc in each stitch around (12)
- Round 3: sc in the next stitch, inc in the next stitch repeat around (18)
- Rounds 4-6: sc in each stitch around (18)
- Round 7: sc in the next stitch, dec repeat around (12)
- Add safety eyes between rounds 6 and 7, about 6 stitches apart.
- Round 8: dec around (6)
- Finish off, leaving a long tail for sewing.
Body
- Using the body color, start with a magic ring.
- Round 1: 6 sc in the magic ring (6)
- Round 2: inc in each stitch around (12)
- Round 3: sc in the next stitch, inc in the next stitch repeat around (18)
- Rounds 4-8: sc in each stitch around (18)
- Round 9: sc in the next stitch, dec repeat around (12)
- Round 10: dec around (6)
- Finish and leave a long tail for attaching the head.
Arms
- Start with a magic ring using the arm color.
- Round 1: 6 sc in the magic ring (6)
- Rounds 2-5: sc in each stitch around (6)
- Finish, leaving a long tail for sewing. Make 2.
Legs
- Begin with a magic ring using the leg color.
- Round 1: 6 sc in the magic ring (6)
- Rounds 2-6: sc in each stitch around (6)
- Finish, leaving a long tail for sewing. Make 2.
Ears / Details
- For each ear, chain 4.
- Row 1: sc in the second chain from the hook, sc in the next 2 chains (3)
- Row 2: turn, ch 1, dec, finish off (2)
- Leave a long tail for attaching. Make 2.
Accessories (if any)
- Feel free to add a small scarf or other embellishments using leftover yarn.
Assembly & Finishing
- Sew the head onto the body securely.
- Attach the legs and arms to the body as desired.
- Position and sew on the ears.
- Weave in all loose ends and ensure the toy is stuffed well.
Tips for Best Results
- Use a stitch marker to keep track of your rounds.
- Always check your tension to ensure an even finish.
- Experiment with color variations for a unique look.
- Make sure to securely attach all parts for safe play.
- Practice your techniques on scrap yarn if you’re new to amigurumi.
Conclusion
This delightful mini crochet moose pattern is perfect for beginners looking to explore the world of amigurumi. As you create your woodland friend, remember to enjoy the process. Happy crocheting!



