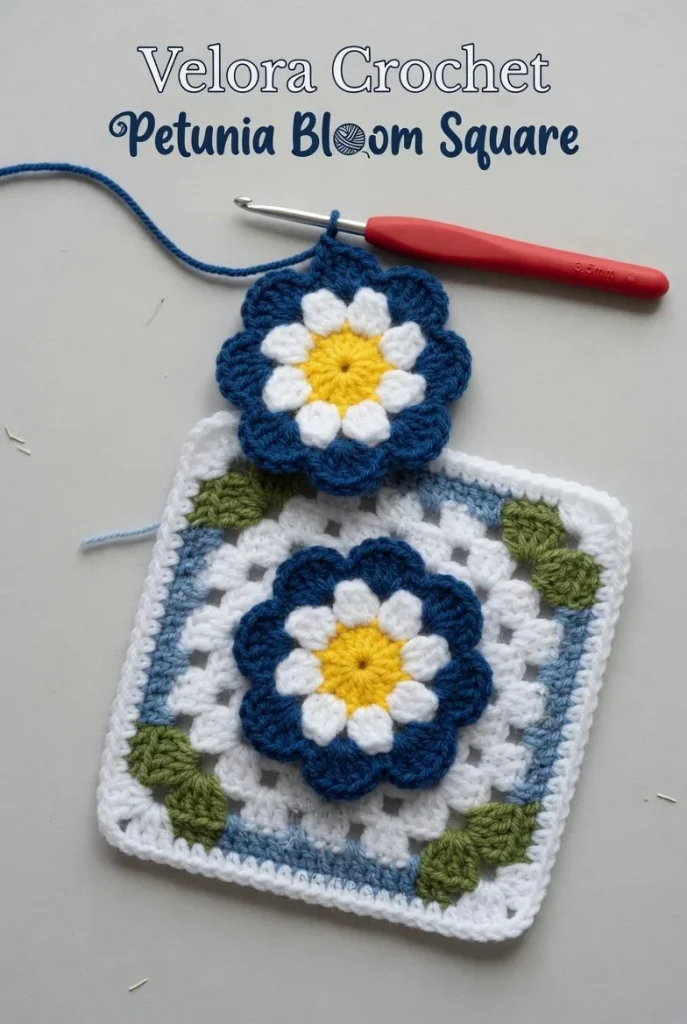
Creating a dimensional anemone flower granny square is a delightful way to add a touch of vibrant color and texture to your crochet projects. Whether you’re crafting a cozy blanket or a unique bag panel, this design features a striking mustard yellow flower center, soft white inner petals, deep blue puff-stitch outer petals, and olive green leaves, all set against a clean white square background. Let’s dive into this fun crochet tutorial that beautifully blends layered petals, leaf motifs, and traditional granny square clusters.
Materials
- Worsted weight yarn in:
- Mustard yellow (for the flower center)
- White (for inner petals)
- Deep blue (for outer petals)
- Olive green (for leaves)
- White (for the granny square background)
- Crochet hook appropriate for worsted weight yarn (typically 5.0 mm / H-8)
- Scissors
- Tapestry needle (for weaving ends)
Abbreviations
- MR: magic ring
- ch: chain
- sc: single crochet
- hdc: half double crochet
- dc: double crochet
- inc: increase (2 stitches in one stitch)
- dec: decrease (2 stitches together)
- sl st: slip stitch
- puff: puff stitch
Main Motif
Center
- Start with a MR.
- Ch 2 (counts as first dc), make 11 dc in the ring. Pull the ring tight and sl st to the top of the ch-2. (12 dc)
Inner Petals
- Sl st into the first dc to start the first petal.
- Ch 3 (counts as first dc), dc in the same st, then 2 dc in the next st, ch 2, sl st in the top of the last dc for a petal—repeat from * to * for a total of 6 petals.
- Join with a sl st to the base of the ch-3.
Outer Petals
- Sl st to the ch-2 space of a petal.
- Ch 3 (counts as first dc), then work a puff stitch (3 yarn overs, insert into st, pull through, yarn over and pull through all 4 loops) in the same space, then ch 2, puff in the next ch-2 space—repeat for each petal.
- Join with a sl st to the base of the ch-3.
Leaves
- With olive green yarn, attach in the space between two petals.
- Ch 5, sc in the 2nd ch from the hook, hdc in the next, dc in the next, and 2 dc in the last one.
- Turn and work down the other side of the leaf: dc in the first st, hdc in the next, and sc in the last. Fasten off and weave in the ends.
- Repeat for a total of 3 leaves.
{image_template}
Granny Square Base
- With white yarn, ch 4 and join with a sl st to form a ring.
- Ch 3 (counts as first dc), then work 2 dc in the ring. Ch 1, make 3 dc in the ring—repeat from * to * three more times.
- Join with a sl st to the top of the ch-3. You should have four clusters of 3 dc.
Border
-
Round 1: Sl st into any ch-1 space. Ch 3 (counts as first dc), and work 2 dc, ch 1, 3 dc into the same space. Continue in each ch-1 space around, joining with a sl st to the top of the ch-3.
-
Round 2: Sl st into any ch-1 space. Ch 5, sl st in the next ch-1 space—repeat around to create a picot effect. Finish with a sl st to the first ch-5.
Assembly
Carefully place the flower motif in the center of the granny square. Use your tapestry needle to sew the flower in place. If you’re making a bag or blanket, feel free to join multiple squares together in a layout that excites you!
Tips for the Best Result
- Keep your tension consistent to ensure your granny squares lie flat and neat.
- Consider blocking your granny squares for a more polished finish, especially after assembling your pieces.
- Experiment with color variations to customize your project even further.
Incorporating this beautiful anemone flower granny square into your handmade projects not only adds a unique flair but also creates an opportunity to express your crochet creativity. This square is perfect for gifting or even keeping for yourself, adding a splash of color to your home decor or everyday accessories. Enjoy crafting!



