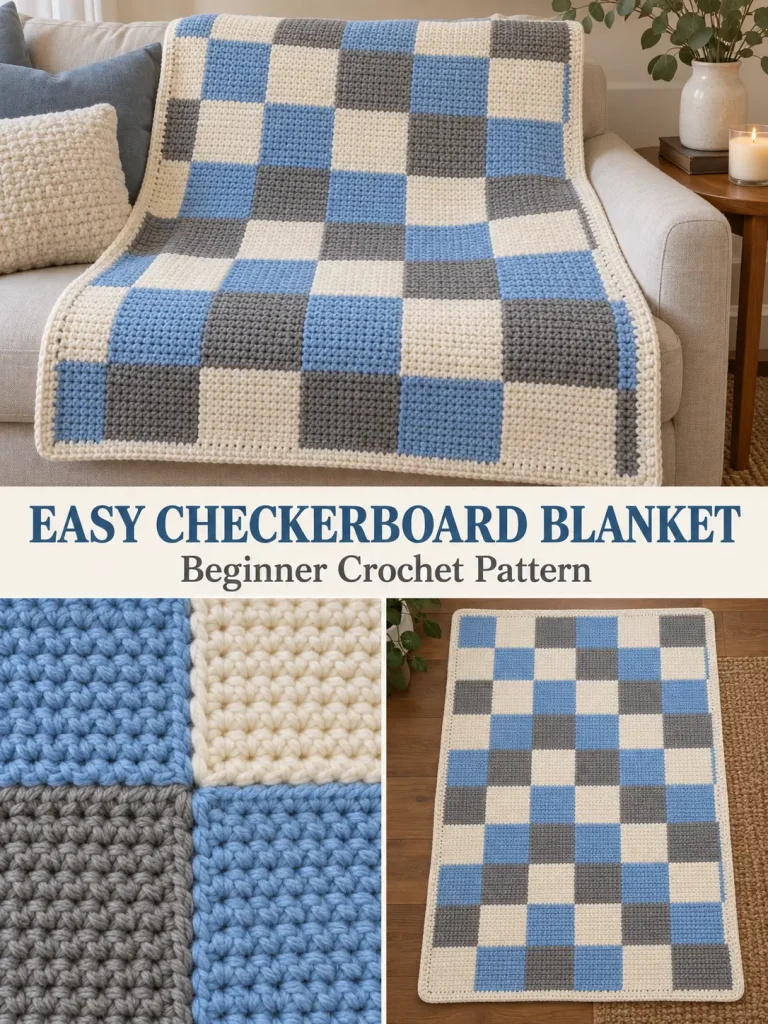
This simple checkerboard crochet blanket creates a clean patchwork look using individual crochet squares in three coordinating colors.
The design is beginner-friendly, easy to resize, and perfect for using a classic combination such as sky blue, soft gray, and cream.
Each square is crocheted separately in the same stitch pattern and size, then arranged into a repeating checkerboard layout and joined into one blanket.
Skill Level
Easy / Confident Beginner
You should know how to:
- chain
- single crochet
- turn your work
- sew or crochet squares together
- weave in yarn ends
Finished Size
The sample blanket uses 48 squares arranged:
6 squares across × 8 squares long
Each finished square measures approximately:
6 × 6 inches
Approximate finished blanket size before an optional border:
36 × 48 inches
With the border:
about 38 × 50 inches
This makes a useful baby, toddler, lap, or stroller blanket.
Materials
- Medium weight #4 yarn
- Approximately 1,350–1,600 yards total
- 5 mm crochet hook
- Yarn needle
- Scissors
- Stitch markers
- Measuring tape
Colors
Use three colors:
Color A: Sky Blue
Color B: Cream or White
Color C: Medium Gray
For a balanced 48-square blanket, make:
- 16 blue squares
- 16 cream squares
- 16 gray squares
Abbreviations — US Terms
ch – chain
sc – single crochet
sl st – slip stitch
st(s) – stitch(es)
Gauge
Approximately:
14 sc × 15 rows = 4 inches
Gauge is not extremely important, but every square must finish at approximately the same size.
If your squares are too large, use a smaller hook.
If they are too small, use a larger hook.
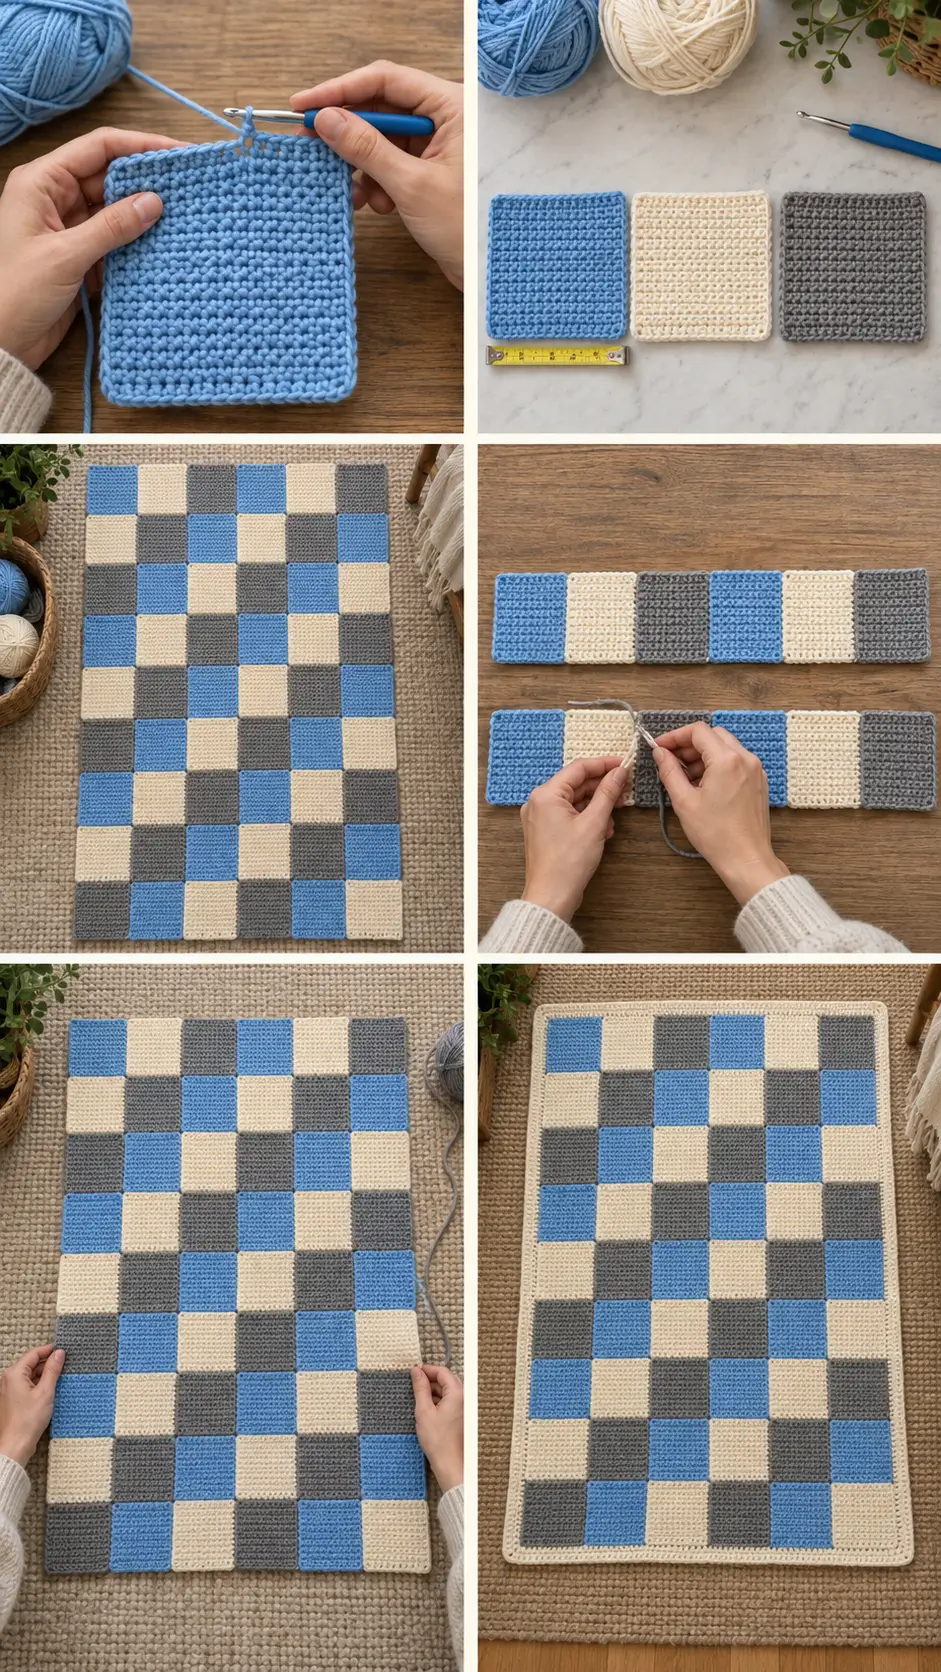
PART 1: Crochet the Squares
All squares are made exactly the same way.
Only the yarn color changes.
Foundation
Chain 23.
Row 1
Single crochet in the second chain from the hook and in every chain across.
22 sc
Chain 1 and turn.
Row 2
Single crochet in every stitch across.
22 sc
Chain 1 and turn.
Rows 3–22
Repeat Row 2.
At the end of Row 22, check the measurements.
The square should measure approximately:
6 × 6 inches
If necessary, add or remove a row so the height matches the width.
Fasten off.
Make 48 Squares
Crochet:
Sky Blue
16 squares
Cream
16 squares
Gray
16 squares
Every square should have:
- the same stitch count
- the same number of rows
- the same dimensions
- the same yarn weight
- the same hook size
Consistency is important because uneven squares can cause the finished blanket to ripple.
PART 2: Block the Squares
Before joining, lay all the squares flat.
Gently shape each one into a neat 6-inch square.
If your yarn can be wet blocked, lightly dampen the squares and allow them to dry completely.
You can also pin them to a blocking mat.
Try to make all 48 squares as close to the same size as possible.
PART 3: Arrange the Checkerboard
Lay the squares on a large flat surface before joining.
Use this 6 × 8 arrangement.
Row 1
Blue – Cream – Gray – Blue – Cream – Gray
Row 2
Cream – Gray – Blue – Cream – Gray – Blue
Row 3
Gray – Blue – Cream – Gray – Blue – Cream
Row 4
Blue – Cream – Gray – Blue – Cream – Gray
Row 5
Cream – Gray – Blue – Cream – Gray – Blue
Row 6
Gray – Blue – Cream – Gray – Blue – Cream
Row 7
Blue – Cream – Gray – Blue – Cream – Gray
Row 8
Cream – Gray – Blue – Cream – Gray – Blue
This creates the repeating three-color checkerboard appearance.
The same color should never sit immediately beside itself horizontally or vertically.
PART 4: Join the Squares
There are several ways to join crochet squares.
For the clean appearance of this blanket, use a simple mattress stitch or slip-stitch join.
Mattress Stitch Method
Place two squares beside each other with the right sides facing upward.
Thread a yarn needle with matching or neutral yarn.
Beginning at one corner, sew through corresponding edge stitches on both squares.
Continue evenly along the entire edge.
Pull the yarn gently so the seam closes, but do not pull so tightly that the fabric puckers.
Fasten securely.
Join Into Rows First
Join all six squares of Row 1 together.
Repeat for Rows 2–8.
You should now have eight long strips.
Join the Rows
Place Row 1 and Row 2 together.
Match every square corner carefully.
Sew across the entire row.
Continue joining:
Row 2 to Row 3
Row 3 to Row 4
Row 4 to Row 5
Row 5 to Row 6
Row 6 to Row 7
Row 7 to Row 8
Check frequently that the square intersections line up.
Alternative: Slip Stitch Join
If you prefer crocheting instead of sewing, join the squares with slip stitches.
Place two squares with right sides together.
Insert the hook through corresponding edge stitches on both pieces.
Work slip stitches evenly along the edge.
Do not make the slip stitches too tight.
A tight join can cause the finished blanket to bunch.
PART 5: Add the Border
The blanket can be left without a border for a simple patchwork appearance, but a small border gives the edges a cleaner finish.
Use cream, gray, or another neutral yarn.
Border Round 1
Attach yarn in any corner.
Chain 1.
Single crochet evenly around the entire blanket.
Along straight edges:
Work approximately one single crochet into each stitch or row end.
At each corner:
Work:
3 sc in the corner
Continue around.
Join with a slip stitch to the first single crochet.
Border Round 2
Chain 1.
Single crochet in every stitch around.
Work:
3 sc in each corner stitch
Join with a slip stitch.
Fasten off.
Optional Third Border Round
For a slightly more substantial edge, repeat Border Round 2 once more.
Weave In the Ends
Use a yarn needle to weave all yarn tails securely into the fabric.
Because this blanket contains many individual squares, weaving in ends as you work can save a lot of finishing time.
A useful routine is:
Crochet square → weave in ends → place completed square in your layout pile.
How to Make a Smaller Blanket
For a small baby blanket, try:
5 squares across × 6 squares long
Using 6-inch squares gives an approximate size of:
30 × 36 inches
before adding a border.
You will need:
30 squares total
How to Make a Larger Blanket
Simply add more squares.
Lap Blanket
7 × 9 squares
Approximate size:
42 × 54 inches
Throw Blanket
8 × 10 squares
Approximate size:
48 × 60 inches
Large Throw
9 × 11 squares
Approximate size:
54 × 66 inches
The construction stays exactly the same.
Easy Square Size Formula
You can also change the size of each block.
Smaller squares create a busier checkerboard.
Larger squares create a bolder graphic look.
For example:
4-inch squares → small-scale checkerboard
6-inch squares → balanced classic design
8-inch squares → oversized modern checkerboard
Whatever size you choose, make every square identical.
Best Yarn for This Blanket
A soft medium-weight #4 yarn works especially well.
Good options include:
- washable acrylic
- acrylic-wool blends
- soft cotton blends
For a baby blanket, choose yarn that is:
- soft against the skin
- machine washable
- easy to care for
- comfortable without being too heavy
Avoid mixing yarns with dramatically different thicknesses because the squares may finish at different sizes.
Color Combination Ideas
The checkerboard construction makes this pattern easy to customize.
Classic Blue
Sky blue + cream + gray
Soft Neutral
Cream + beige + taupe
Baby Girl
Blush pink + cream + light gray
Pastel
Mint + pale yellow + cream
Modern
Black + cream + camel
Coastal
Navy + pale blue + white
Autumn
Rust + mustard + cream
Christmas
Deep green + cream + muted red
Beginner Tips
Make one test square before crocheting all 48.
Measure your first square carefully.
Use the same hook and yarn weight throughout the project.
Count your stitches at the end of each row.
Do not accidentally crochet into the turning chain.
Block the squares before joining.
Lay out the entire blanket before sewing anything together.
Take a quick photo of your arrangement so you can refer back to it while joining.
Match all four-square intersections carefully.
Do not pull the joining yarn too tightly.
Weave in ends as you go.
Why Individual Squares Work So Well
Making the blanket from separate squares has several advantages.
Each piece is small and portable.
You do not have to hold a large heavy blanket while crocheting.
It is easy to work on one square at a time.
You can also rearrange the colors before joining everything together.
This construction is especially useful for crocheters who enjoy short, repetitive projects.
Easy Three-Color Checkerboard Crochet Blanket
The beauty of this blanket comes from keeping the crochet itself extremely simple and allowing the color arrangement to create the visual effect.
Each block uses straightforward single crochet, but once the blue, cream, and gray squares are joined together, they create a clean geometric checkerboard design.
The pattern is easy to customize, easy to resize, and ideal for beginners who want a blanket that looks polished without requiring complicated stitches.



