Easy Crochet Baby Booties Pattern
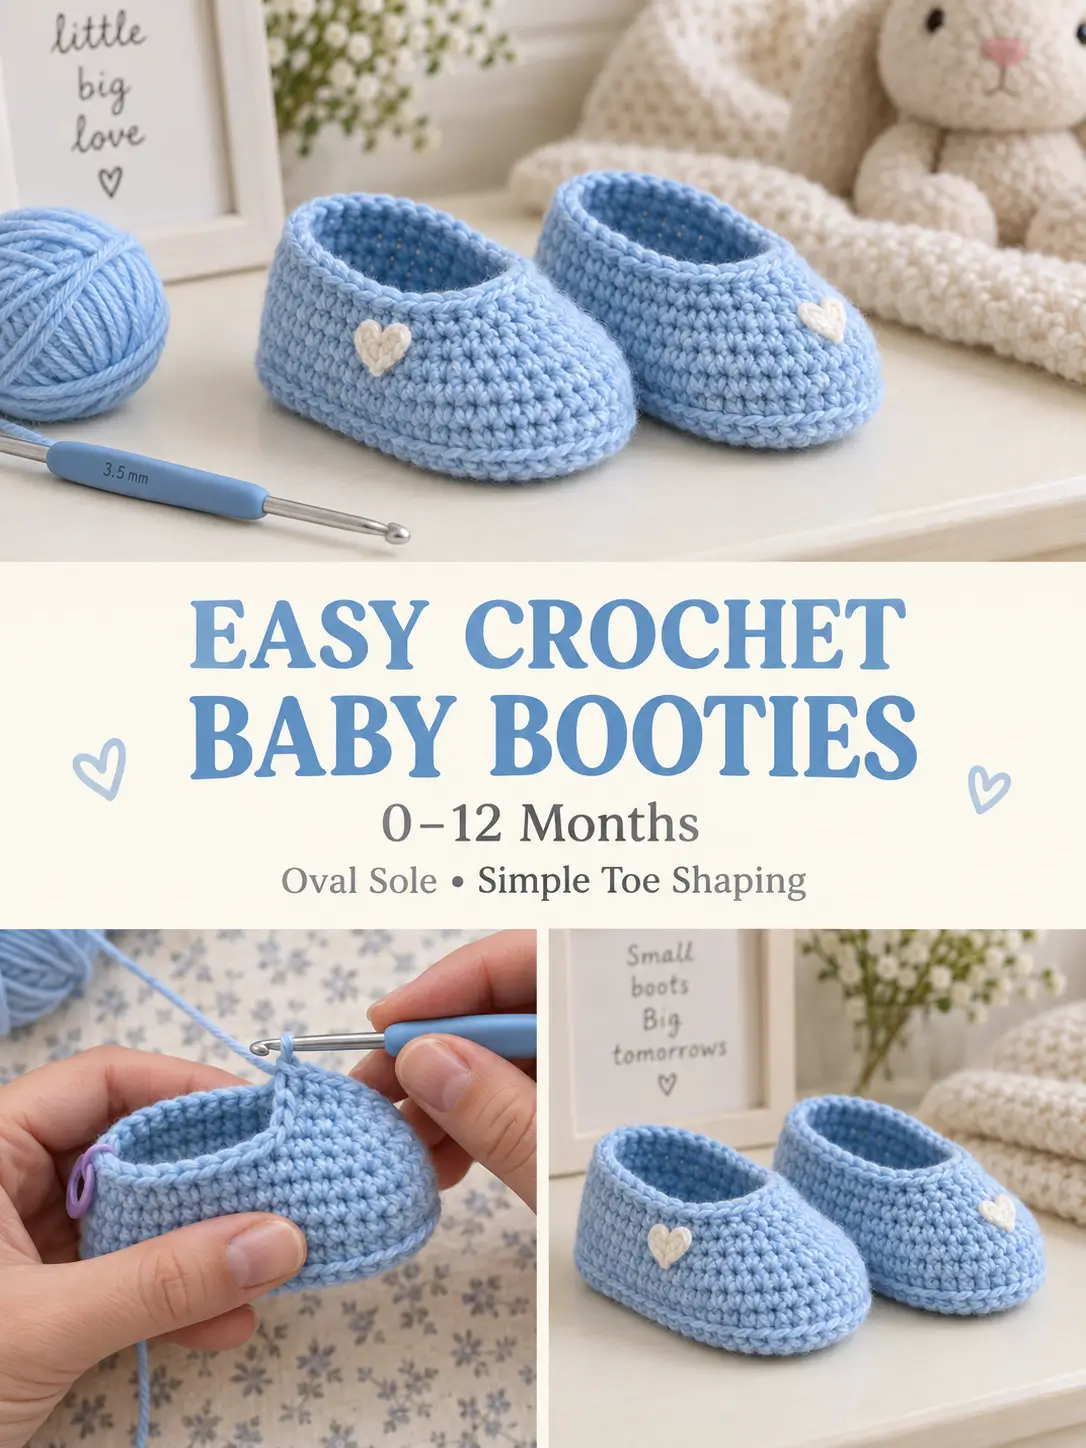
These soft crochet baby booties recreate the simple low-cut slipper shape of a classic knitted baby shoe, but the construction is designed completely for crochet.
The booties begin with an oval crocheted sole, then the upper is worked directly around the sole. A few carefully placed decreases shape the rounded toe while leaving a comfortable opening around the ankle.
The finished shoes are soft, flexible, and almost completely seamless. A tiny crocheted heart can be added to the front for decoration, but the booties also look lovely left plain.
Pattern at a Glance
Skill level: Advanced beginner
Terminology: US crochet terms
Construction: Oval sole worked in rounds, upper worked directly from sole
Sizes: Newborn/0–3 months, 3–6 months, 6–12 months
Yarn weight: DK / Category 3
Hook: 3.5 mm
Main stitch: Single crochet and half double crochet
Sole construction: Oval
Seaming: None except optional heart appliqué
Finished style: Low-cut baby slipper
Finished Sizes
0–3 Months
Approximate sole length:
3¾–4 inches
3–6 Months
Approximate sole length:
4¼–4½ inches
6–12 Months
Approximate sole length:
4¾–5 inches
Baby foot sizes vary considerably, so measure the baby’s foot whenever possible.
For a comfortable fit, make the sole approximately:
¼–½ inch longer than the foot.
Materials
You will need:
- approximately 70–90 yards DK-weight yarn for one pair
- 3.5 mm crochet hook
- yarn needle
- scissors
- stitch marker
- measuring tape
Optional:
- small amount of contrasting yarn for crocheted hearts
A soft washable yarn works best.
Good choices include:
- baby acrylic
- merino/acrylic blend
- cotton/acrylic blend
- soft DK wool blend
Avoid extremely stiff cotton because the booties should remain flexible.
Suggested Color
For the photographed look, use:
Bright Baby Blue
Other pretty options include:
- cream
- pale pink
- sage
- oatmeal
- lavender
- dusty blue
- mint
- soft gray
A solid color makes the shaping easiest to see while crocheting.
Abbreviations
- ch = chain
- sc = single crochet
- hdc = half double crochet
- sc2tog = single crochet 2 together
- sl st = slip stitch
- BLO = back loop only
- st = stitch
- sts = stitches
Important Pattern Notes
The bootie begins at the sole.
The sole is crocheted around both sides of the foundation chain.
Rounds are joined with a slip stitch.
The beginning ch-1 does not count as a stitch.
Place a stitch marker in the first stitch of each round if necessary.
Make both booties exactly the same.
The decreases are centered over the toe.
The joining point remains approximately at the back heel.
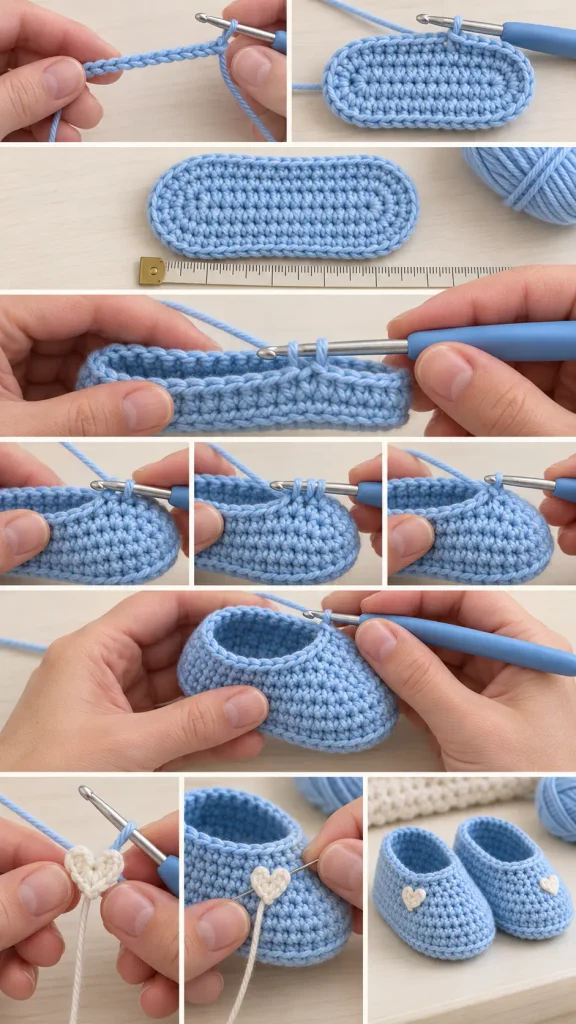
Special Stitch — Single Crochet 2 Together
Insert hook into next stitch.
Yarn over and pull up a loop.
Insert hook into following stitch.
Yarn over and pull up another loop.
You now have 3 loops on the hook.
Yarn over and pull through all 3 loops.
One sc2tog is complete.
This turns 2 stitches into 1 stitch.
Size Instructions
Use the following foundation chains:
0–3 Months
Ch 11
3–6 Months
Ch 13
6–12 Months
Ch 15
The instructions below are written:
0–3 months (3–6 months, 6–12 months)
PART 1 — CROCHET THE SOLE
Using the 3.5 mm hook:
Ch:
11 (13, 15)
Sole Round 1
Work:
2 hdc in second ch from hook.
Hdc in next:
8 (10, 12) chains.
Work:
5 hdc in final chain.
You will now work along the opposite side of the foundation chain.
Hdc in next:
8 (10, 12) chains.
Work:
3 hdc in the final remaining foundation chain.
Join with sl st to first hdc.
You should have:
26 (30, 34) hdc
Check the Shape
The work should now resemble a narrow oval.
You should clearly see:
- one rounded heel
- one broader rounded toe
- two relatively straight sides
Do not turn.
Sole Round 2
Ch 1.
Work:
2 hdc in each of next 2 sts.
Hdc in next:
8 (10, 12) sts.
Work:
2 hdc in each of next 5 sts.
Hdc in next:
8 (10, 12) sts.
Work:
2 hdc in each of final 3 sts.
Join.
You should now have:
36 (40, 44) hdc
Sole Round 3
Ch 1.
Sc in every stitch around.
Join.
Stitch count remains:
36 (40, 44) sc
Fasten off only if you want to change color.
Otherwise continue directly into the upper.
Check the Sole Size
Before continuing, measure the sole.
It should be approximately:
0–3 Months
3¾–4 inches
3–6 Months
4¼–4½ inches
6–12 Months
4¾–5 inches
If the sole is significantly larger than expected, use a smaller hook.
If it is too short, use a slightly larger hook or move up one size.
It is much easier to correct sizing now than after completing the upper.
PART 2 — CREATE THE SIDE WALL
The first upper round turns the sole upward.
Upper Round 1
Ch 1.
Working in the:
BLO
sc in every stitch around.
Join.
You should still have:
36 (40, 44) sc
Working through the back loops leaves a subtle ridge around the sole and helps the upper turn upward instead of continuing outward.
Upper Round 2
Ch 1.
Sc in every stitch around.
Join.
36 (40, 44) sc
At this point, the shoe should clearly begin taking shape.
PART 3 — SHAPE THE TOE
The joining point should be at the center back heel.
The decreases are worked across the front half of the bootie.
Upper Round 3
0–3 Months
Sc in next 11 sts.
Work:
sc2tog 7 times.
Sc in final 11 sts.
Join.
29 sts
3–6 Months
Sc in next 13 sts.
Work:
sc2tog 7 times.
Sc in final 13 sts.
Join.
33 sts
6–12 Months
Sc in next 15 sts.
Work:
sc2tog 7 times.
Sc in final 15 sts.
Join.
37 sts
Checkpoint
The toe should now curve inward.
The sides and heel should remain almost unchanged.
All shaping should be concentrated at the front.
Upper Round 4
Decrease again across the toe.
0–3 Months
Sc in next 10 sts.
Work:
sc2tog 4 times.
Sc in final 11 sts.
Join.
25 sts
3–6 Months
Sc in next 11 sts.
Work:
sc2tog 5 times.
Sc in final 12 sts.
Join.
28 sts
6–12 Months
Sc in next 13 sts.
Work:
sc2tog 5 times.
Sc in final 14 sts.
Join.
32 sts
Upper Round 5
Ch 1.
Sc in every stitch around.
Join.
Stitch count remains:
25 (28, 32) sts
Try the Shape
The bootie should now have:
- rounded closed toe
- low sides
- cupped heel
- comfortable ankle opening
- soft slipper shape
Do not worry if the opening looks slightly small while the bootie is lying flat.
The crochet fabric should stretch gently.
PART 4 — FINISH THE OPENING
For a neat upper edge:
Final Round
Ch 1.
Sl st loosely in every stitch around.
Join.
Fasten off.
Do not work the slip stitches tightly.
A tight final edge could make the shoe difficult to put on.
Optional Softer Edge
Instead of slip stitching around the opening, work:
1 sc loosely in each stitch
using a hook:
0.5 mm larger
than the main hook.
This creates a slightly softer and stretchier edge.
Make the Second Bootie
Repeat the entire pattern.
Before adding decorations, place both shoes next to each other.
Check that they match in:
- sole length
- toe shape
- height
- ankle opening
Small differences can usually be corrected during blocking.
PART 5 — OPTIONAL CROCHET HEART
Instead of attaching a plastic heart button, make a small flat crochet heart from yarn.
This keeps the decorative detail soft.
Using contrasting yarn and the 3.5 mm hook:
Make a magic ring.
Into the ring work:
ch 2, 2 dc, 2 hdc, ch 1, dc, ch 1, 2 hdc, 2 dc, ch 2, sl st into ring.
Pull the magic ring closed.
Fasten off, leaving a long sewing tail.
Make:
2 hearts
if decorating both booties.
Attach the Heart
Place the heart toward the outer front side of the bootie.
Using the yarn tail and a yarn needle, sew around the heart securely.
Pass through multiple crochet stitches.
Do not leave loose loops.
Weave the tail securely inside the bootie.
For very young babies, leaving the shoes completely undecorated is also a lovely option.
Finishing
Use a yarn needle to weave in every yarn tail.
Weave through several stitches.
Change direction.
Weave through several more stitches.
Trim only after the tail is secure.
Because baby items are washed and stretched frequently, secure the ends especially well.
Light Blocking
These booties normally need only gentle shaping.
Lightly dampen them.
Use your fingers to shape:
- toe
- sides
- heel
- opening
Stuff each bootie lightly with a clean cloth or small amount of tissue while drying if you want a rounder shoe shape.
Allow them to dry completely.
Making the Booties More Textured
For subtle horizontal ridges, work Upper Rounds 1–2 using:
BLO sc
instead of ordinary sc.
Continue the toe shaping normally afterward.
This gives the upper a slightly more defined crochet texture.
Making the Booties Taller
For a higher ankle:
After Upper Round 4, work:
2–4 additional sc rounds
before finishing the opening.
This changes the low-cut slipper into a more traditional baby bootie.
Making the Booties Lower
For an even more ballerina-style shoe:
Skip Upper Round 5.
Finish the opening immediately after Upper Round 4.
Check that the opening still feels stable and does not become too loose.
Two-Color Version
Use:
Color A
Sole and upper
Color B
Final edge
For example:
- cream + blush
- pale blue + white
- sage + oatmeal
- lavender + cream
Change to Color B only for the final opening round.
Contrasting Sole
Another simple option is:
Sole
Cream
Upper
Blue, pink, sage, or mustard
Fasten off after Sole Round 3.
Join the second color before Upper Round 1.
The BLO ridge creates a clean visual division between sole and upper.
How to Make the Sole Longer
If the baby has a longer foot but the opening size seems correct, add:
2 foundation chains
and follow the next size.
Each size increases the long straight sections by:
2 stitches
while maintaining the same general shaping.
Always make one complete sole and measure it before continuing.
How to Make the Bootie Wider
Use a slightly larger hook.
Try:
4 mm
instead of 3.5 mm.
This usually increases both:
- width
- length
so measure the sole carefully.
For a much wider foot, it is better to move up one size rather than adding random stitches around the upper.
How to Make the Bootie Narrower
Try:
3.25 mm hook
with the same yarn.
Do not make the final opening edge too tight.
Why Is My Sole Curling?
A little curvature after the first round is normal.
After Round 2, the oval should lie substantially flatter.
If it still cups severely:
- loosen your tension
- use a slightly larger hook
- check that every increase was worked
Missing one or more toe increases can cause cupping.
Why Is My Sole Ruffling?
Your tension may be too loose for the number of increases.
Try:
- a smaller hook
- slightly firmer tension
Make sure you did not accidentally work extra increases.
Why Is the Toe Off-Center?
The decrease section must sit directly opposite the heel join.
Before beginning Upper Round 3, fold the bootie lengthwise.
The join should sit at the center back.
The decreases should cover the center front.
If necessary, move your starting point slightly with slip stitches before beginning the decrease round.
Why Is One Bootie Larger?
Check:
- foundation chain count
- hook size
- Round 2 increase count
- toe decrease count
- tension
Make both shoes during the same crocheting session when possible because tension can change over time.
Why Is the Opening Too Tight?
The most common cause is the final edge.
If your slip-stitch round is tight:
Undo it.
Work it again more loosely or switch to:
sc with a larger hook.
The opening should stretch without needing force.
Why Is the Opening Too Loose?
Work one additional round of sc with:
2 evenly spaced sc2tog decreases
around the opening.
Try the bootie shape again before fastening off.
Can I Use Worsted-Weight Yarn?
Yes, but the booties will be larger and thicker.
Use a smaller starting chain or a smaller hook if you want similar dimensions.
For newborn booties, DK yarn generally produces a softer, less bulky result.
Can I Use Sport-Weight Yarn?
Yes.
Try approximately:
3–3.5 mm hook.
The finished shoes may be slightly smaller.
Use physical sole measurements to select the size rather than relying only on age.
Can I Use Cotton?
Yes.
Choose a soft cotton or cotton blend.
Very firm mercerized cotton may produce a stiffer shoe.
For newborns, softness is more important than heavy structure.
Can I Make These Without the Heart?
Absolutely.
The plain version is simpler and especially practical for newborns.
You can also add a single contrasting edge round instead of an appliqué.
Baby Safety Notes
For baby footwear, avoid attaching:
- loose buttons
- beads
- plastic decorations
- bells
- detachable charms
A flat crocheted or embroidered decoration is safer than a hard button-like embellishment.
Check the booties regularly for loose yarn ends or damaged stitches.
These are soft decorative baby shoes rather than footwear for walking.
Are These Suitable for Beginners?
They are a good next project after learning:
- chain
- single crochet
- half double crochet
- slip stitch
- simple decreases
The only part requiring close attention is the toe shaping.
Use stitch markers and count after every decrease round.
How Much Yarn Do I Need?
A pair uses relatively little yarn.
Approximately:
0–3 Months
50–65 yards
3–6 Months
60–75 yards
6–12 Months
70–90 yards
Actual usage depends on yarn thickness and tension.
This makes the booties an excellent leftover-yarn project.
Gift Set Idea
The same DK yarn can be used to make a coordinated:
- baby beanie
- stroller blanket
- baby cardigan
- washcloth
- small lovey
Using one color palette across several small projects creates an easy handmade baby-gift set.
Final Thoughts
The construction comes down to three main steps:
crochet an oval sole
→ build the sides upward
→ decrease across the front to shape the toe
The back remains full while the centered decreases turn the flat oval into a tiny slipper.
Finish with a loose edge around the opening and, if desired, sew on a soft crocheted heart.
The result is a simple pair of low-cut crochet baby booties that can be resized easily, made from small amounts of yarn, and finished in almost any baby-friendly color.