Easy Crochet Cheeky Hamster in Flower Cup Crochet Pattern for Beginners
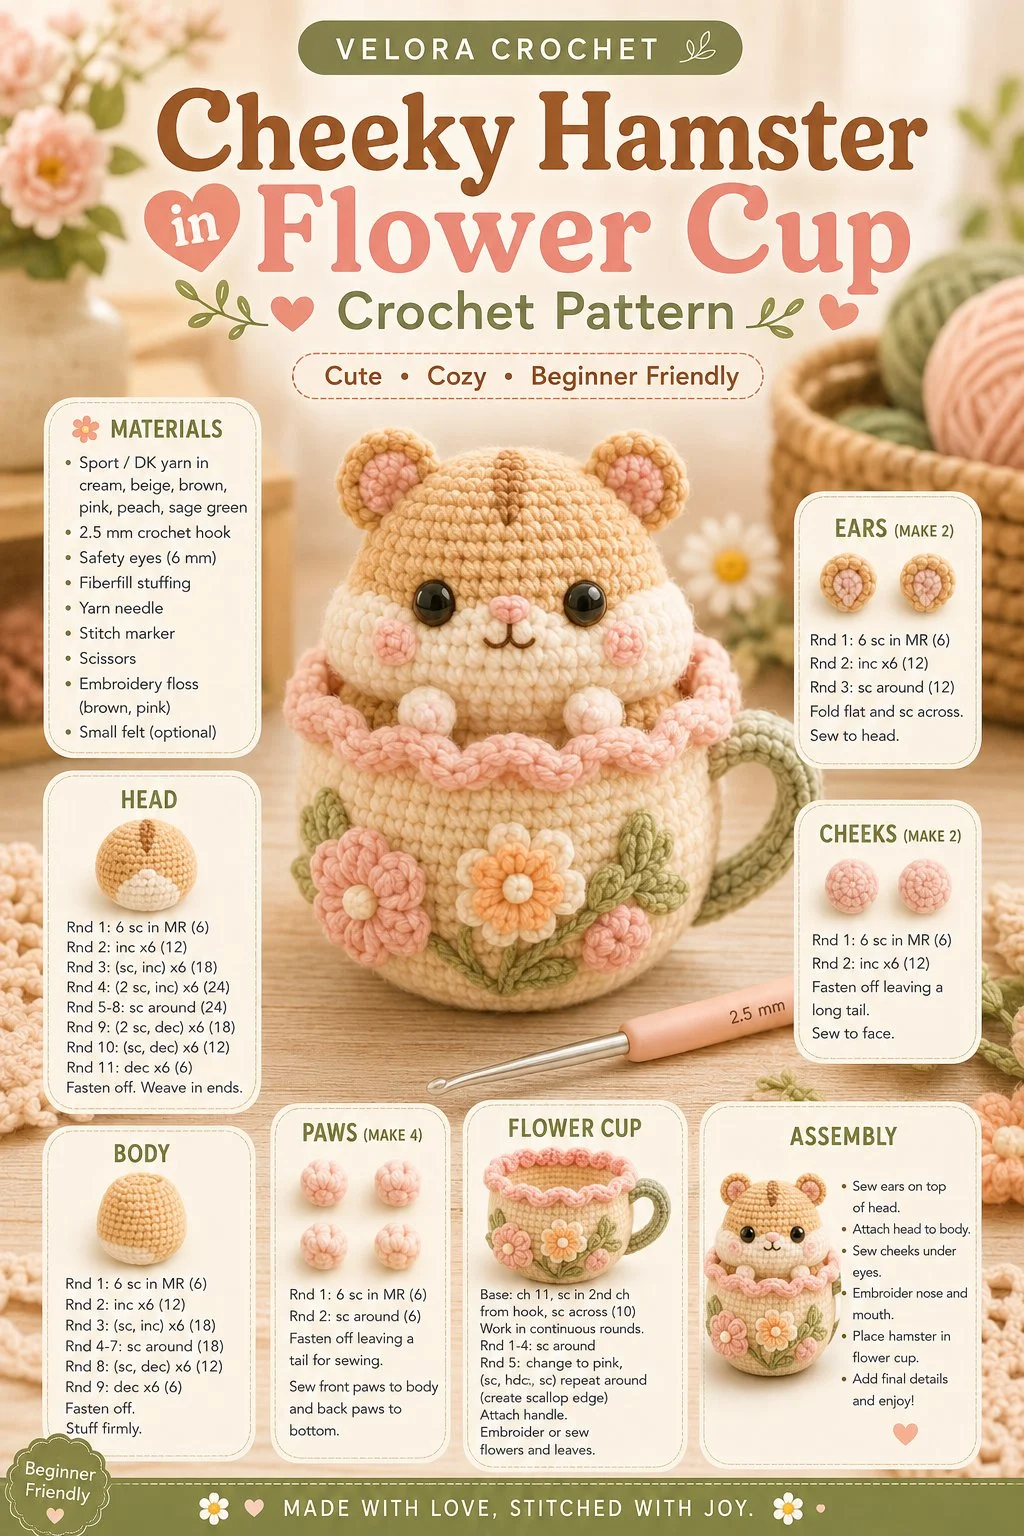
Dive into the charming world of crochet with this delightful pattern featuring a tiny hamster nestled inside a flower cup! This design showcases adorable details like a round head, tiny ears, soft cheeks, and a cozy cup adorned with mini crochet flowers. Perfect for beginners and seasoned crocheters alike, this project brings together simple amigurumi techniques to create a heartwarming gift or decoration.
Materials
- Worsted weight yarn in desired colors (for hamster and cup)
- Crochet hook (recommended size: 3.5mm or G hook)
- Polyester fiberfill for stuffing
- Yarn needle for weaving in ends
- Scissors
- Stitch marker (optional)
Abbreviations
- MR: magic ring
- ch: chain
- sc: single crochet
- inc: increase
- dec: decrease
- sl st: slip stitch
Instructions
Head
- Start with a magic ring.
- Round 1: 6 sc in MR (6).
- Round 2: inc in each stitch around (12).
- Round 3: (sc in next stitch, inc) repeat around (18).
- Round 4: (sc in next 2 stitches, inc) repeat around (24).
- Rounds 5-8: sc in each stitch around (24).
- Round 9: (sc in next 2 stitches, dec) repeat around (18).
- Round 10: (sc in next stitch, dec) repeat around (12).
- Stuff the head lightly and continue with the next rounds.
- Round 11: dec around (6). Fasten off and leave a long tail for assembly.
Ears (make 2)
- Start with a magic ring.
- Round 1: 6 sc in MR (6).
- Round 2: inc in each stitch around (12).
- Rounds 3-4: sc in each stitch around (12). Fasten off, leaving a long tail for sewing.
Cheeks (make 2)
- Ch 2.
- Round 1: 6 sc in 2nd ch from hook (6).
- Fasten off, leaving a long tail for sewing.
Body
- Start with a magic ring.
- Round 1: 6 sc in MR (6).
- Round 2: inc in each stitch around (12).
- Round 3: (sc in next stitch, inc) repeat around (18).
- Rounds 4-8: sc in each stitch around (18).
- Round 9: (sc in next stitch, dec) repeat around (12).
- Stuff the body lightly.
- Round 10: dec around (6). Fasten off and leave a long tail for assembly.
Paws (make 4)
- Start with a magic ring.
- Round 1: 6 sc in MR (6).
- Round 2: sc in each stitch around (6). Fasten off, leaving a long tail for sewing.
Flower Cup
- Start with a magic ring.
- Round 1: 6 sc in MR (6).
- Round 2: (sc in next stitch, inc) repeat around (9).
- Rounds 3-5: sc in each stitch around (9). Fasten off and weave in ends.
Face Details
- Use embroidery thread or yarn to stitch a small nose and mouth onto the hamster’s face.
- For the eyes, you can use safety eyes or embroider them directly onto the head.
Assembly and Finishing
- Sew the head to the body using the long tail.
- Attach the ears to the top of the head, placing them symmetrically.
- Position the cheeks on either side of the face and sew them in place.
- Attach the paws to the lower part of the body, making sure they are securely fastened.
- Place the hamster inside the flower cup, ensuring a snug fit.
- Optionally, you can embellish the flower cup with mini crochet flowers by making small petals and attaching them around the cup’s edge.
Tips for the Best Result
- Keep your tension even to ensure the hamster holds a nice shape while being stuffed.
- Don’t overstuff the head to maintain its round look; a little stuffing goes a long way!
- Use stitch markers to track rounds if you’re prone to losing count.
Create this adorable hamster flower cup as a lovely handmade gift or a charming decoration for your own space. With its playful design and cozy feel, it’s sure to bring a smile to anyone who sees it! You can also experiment with color variations to give your hamster a unique personality. Happy crocheting!