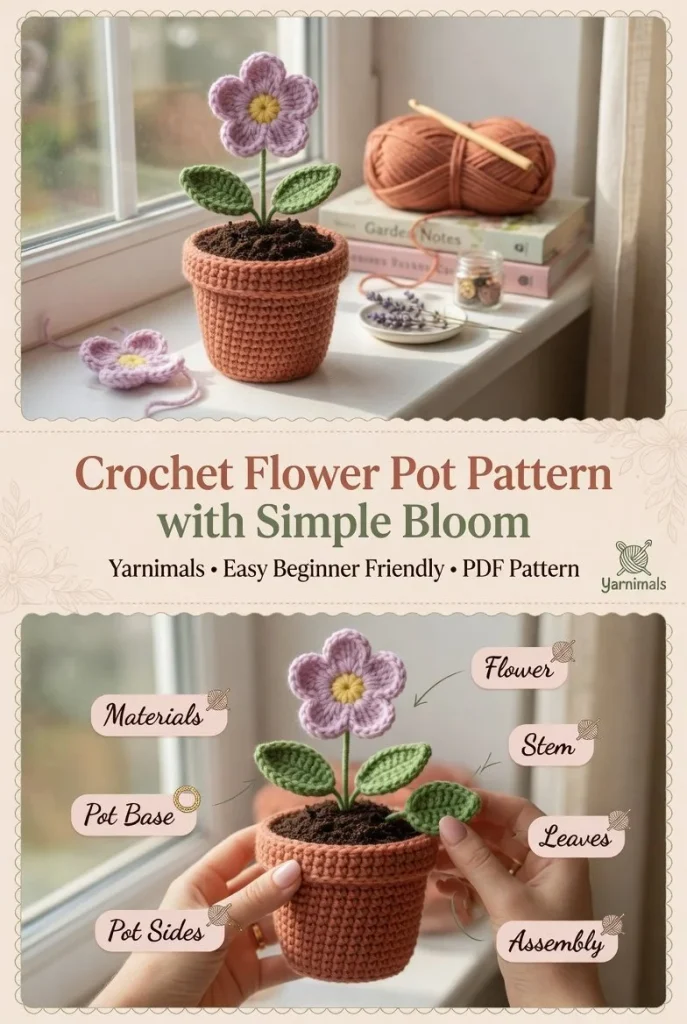
Creating a charming crochet flower pot is a delightful way to enhance your home decor while practicing your crochet skills. This beginner-friendly project features a cozy small pot shape, a top layer representing soil, a beautiful crochet flower, along with a sturdy green stem and resilient leaves. It makes a great decorative piece for desks or shelves, or even a thoughtful handmade gift.
Materials
- Worsted weight yarn in various colors (for the pot, flower, and leaves)
- Crochet hook (appropriate size for your yarn)
- Yarn needle
- Scissors
- Stuffing (optional for the flower)
Abbreviations
- MR: magic ring
- ch: chain
- sc: single crochet
- hdc: half double crochet
- dc: double crochet
- inc: increase
- dec: decrease
- sl st: slip stitch
Instructions
Pot Base
- Using your chosen color for the pot, create a magic ring.
- Round 1: sc 6 in the ring (6 stitches).
- Round 2: inc in each stitch around (12 stitches).
- Round 3: sc 1, inc repeat around (18 stitches).
- Round 4: sc 2, inc repeat around (24 stitches).
- Round 5: sc in each stitch around (24 stitches) for a few rounds until the base measures about 3 inches in diameter.
Pot Sides
- Continue working in the round (without increasing).
- Work for about 6 rounds (or to your desired height).
- Finish off and leave a long enough tail for sewing.
Soil Top
- Switch to brown yarn.
- Make a magic ring, sc 8 in the ring (8 stitches).
- Round 1: inc in each stitch around (16 stitches).
- Work one more round (16 stitches).
- Cut the yarn but leave a long tail for sewing.
Flower
- Using your chosen flower color, make a magic ring.
- Round 1: ch 2, and work 12 dc into the ring.
- Pull the ring closed, and slip stitch to the top of the first dc.
- Round 2: ch 2, 1 dc in the next stitch to create petals around.
- Finish off and leave a tail for securing the flower.
Stem
- With green yarn, ch 12.
- Work sc in each ch back to the start (12 stitches).
- Finish off, leaving a long tail for attaching to the flower.
Leaves
- With green yarn, ch 6.
- Row 1: hdc in the 3rd ch from the hook, dc in the next ch, hdc in the last.
- Row 2: working back, skip the first hdc, and make a slip stitch in the next. Finish off and leave a tail.
- Make two leaves for your flower pot.
Assembly
- Sew the pot sides together to form a complete pot.
- Attach the soil top securely to the pot’s rim.
- Position the flower atop the stem and sew it in place.
- Finally, attach the leaves at the base of the flower.
For a more decorative effect, consider pairing your crochet flower pot with a lovely bloom by following a detailed crochet pattern that captures the essence of floral design.
Tips for the Best Result
- Maintaining even tension in your stitches ensures your flower pot holds its shape well.
- If the flower appears too flat, gently stuff it for a fuller look.
- Experiment with different yarn colors for each component to create a unique appearance.
The finished crochet flower pot is not only cute but also a perfect addition to any handmade decor. Whether you choose to use it as a gift or keep it for yourself, it’s sure to bring a smile to anyone’s face.



