Easy Crochet Ocean Bunny Floatie Amigurumi Pattern for Beginners
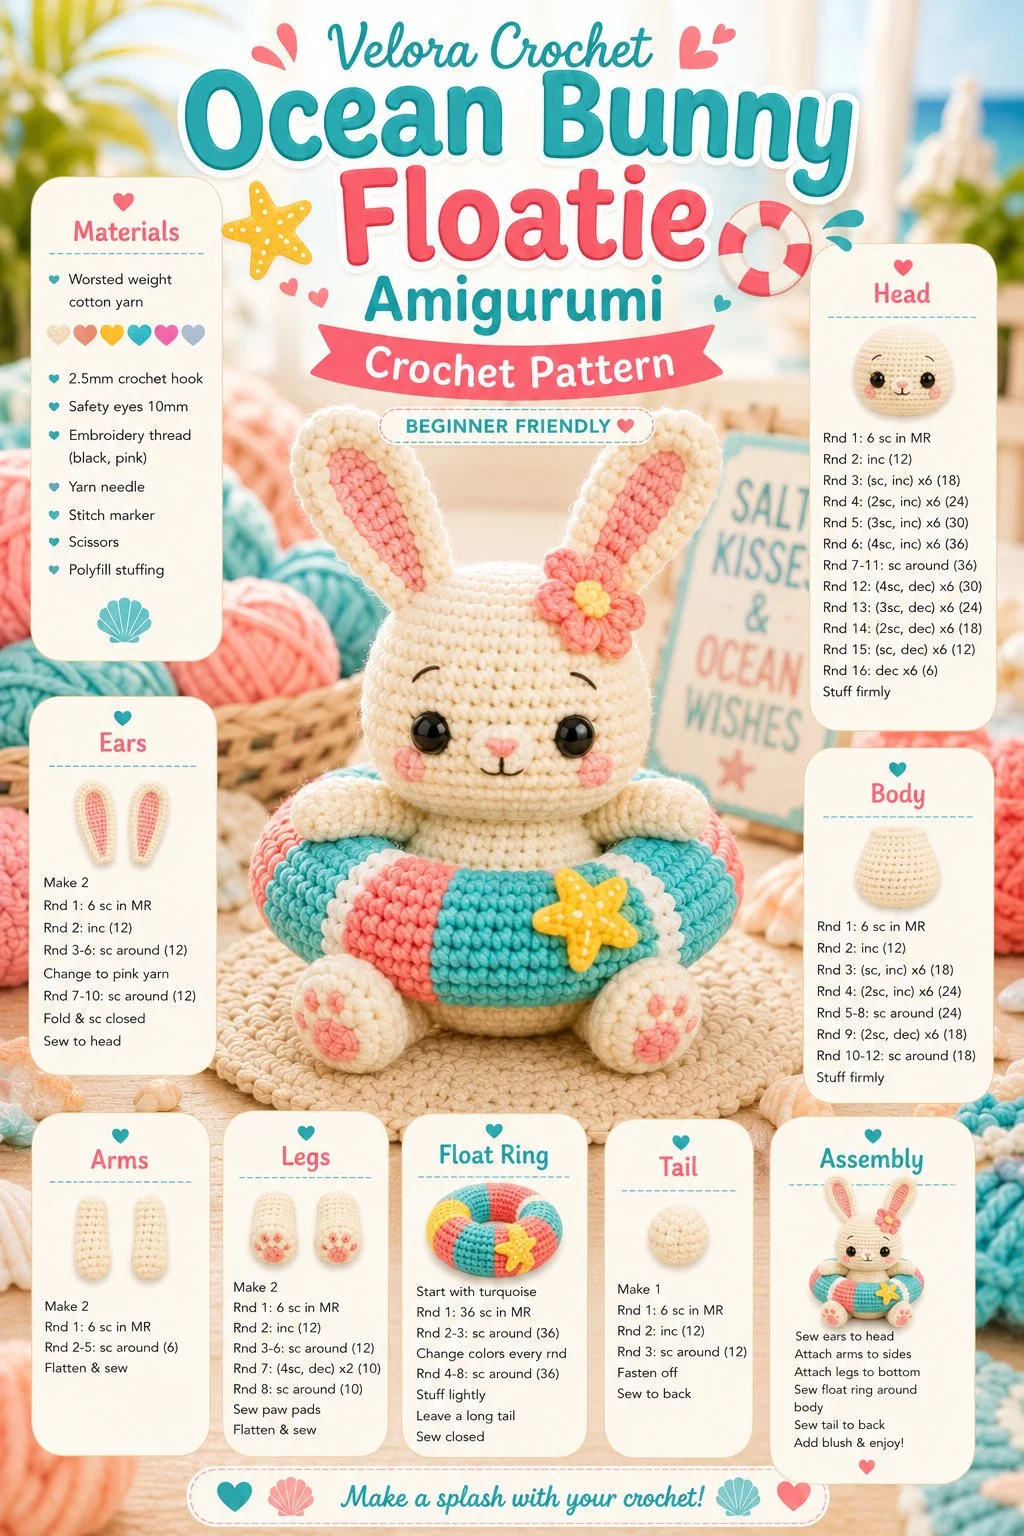
Creating a charming crochet bunny with a pool floatie is a delightful project that combines whimsical design with a playful summer vibe. This handmade crochet toy is not only cute and colorful but also beginner-friendly, making it an ideal DIY crochet project for those looking to enhance their skills. Whether you want to make it for a child or as a fun decorative piece, this bunny is sure to bring joy.
Materials
- Yarn in various colors for the bunny and float ring
- Crochet hook (size appropriate for your yarn)
- Fiberfill stuffing
- Stitch marker
- Tapestry needle
- Safety eyes (or yarn for the eyes and nose)
- Scissors
Abbreviations
- MR: magic ring
- ch: chain
- sc: single crochet
- inc: increase
- dec: decrease
- sl st: slip stitch
Instructions
Head
- Begin with a MR and crochet 6 sc into the ring. (6)
- Round 2: Inc in each stitch around. (12)
- Round 3: sc in next stitch, inc in next repeat around. (18)
- Round 4: sc in next 2 stitches, inc in next repeat around. (24)
- Rounds 5-10: sc in each stitch around. (24)
- Round 11: sc in next 2 stitches, dec repeat around. (18)
- Round 12: sc in next stitch, dec repeat around. (12)
- Insert safety eyes and complete stuffing.
- Round 13: Dec around until closed. Fasten off.
Ears
- Start with a MR, crochet 6 sc. (6)
- Rounds 2-4: sc in each stitch around. (6)
- Fold in half and sl st to close. Leave a long tail for sewing. Make 2 ears.
Body
- With a MR, crochet 6 sc. (6)
- Round 2: Inc in each stitch around. (12)
- Round 3: sc in next stitch, inc in next repeat around. (18)
- Round 4: sc in next 2 stitches, inc in next repeat around. (24)
- Rounds 5-8: sc in each stitch around. (24)
- Round 9: sc in next 2 stitches, dec repeat around. (18)
- Round 10: sc in next stitch, dec repeat around. (12)
- Stuff the body firmly as you continue.
- Round 11: Dec around until closed. Fasten off.
Arms
- For each arm, begin with a MR, crochet 4 sc. (4)
- Rounds 2-4: sc in each stitch around. (4)
- Leave a long tail for sewing and fasten off. Make 2 arms.
Legs
- Start with a MR, crochet 6 sc. (6)
- Round 2: Inc in each stitch around. (12)
- Rounds 3-5: sc in each stitch around. (12)
- Leave a long tail for sewing and fasten off. Make 2 legs.
Tail
- With a MR, crochet 4 sc. (4)
- Rounds 2-3: sc in each stitch around. (4)
- Leave a long tail for sewing and fasten off.
Float Ring
- With a different color, chain 12.
- Join with a slip stitch to form a circle.
- Rounds 1-3: sc around. This will create a thick float ring.
- Leave a long tail for sewing.
Face Details
- Use a tapestry needle to stitch a nose and mouth.
- Position the ears on the head and sew them securely.
Assembly and Finishing
- Begin by attaching the head to the body, ensuring it’s centered.
- Sew the arms and legs onto the body, creating a playful pose.
- Attach the tail to the back of the body.
- Finally, place the float ring around the bunny, securing it with stitches to hold it in place.
Tips for the Best Result
- It’s important to keep an even tension throughout your stitches to ensure a cohesive look.
- Don’t overstuff the parts; a nice, soft touch creates a lovable plush.
- Using stitch markers can help keep track of your rounds, especially for the body and head.
- Try experimenting with different colors for the float ring to match the theme or personality you want for your bunny.
For an engaging, colorful approach, check out this bunny crochet pattern that features floppy ears and adds an extra charm to your crochet collection.
This delightful crochet bunny is perfect as a gift or as a fun summer decoration. Enjoy making your creation, and don’t hesitate to try out various colors for each piece. Happy crocheting!