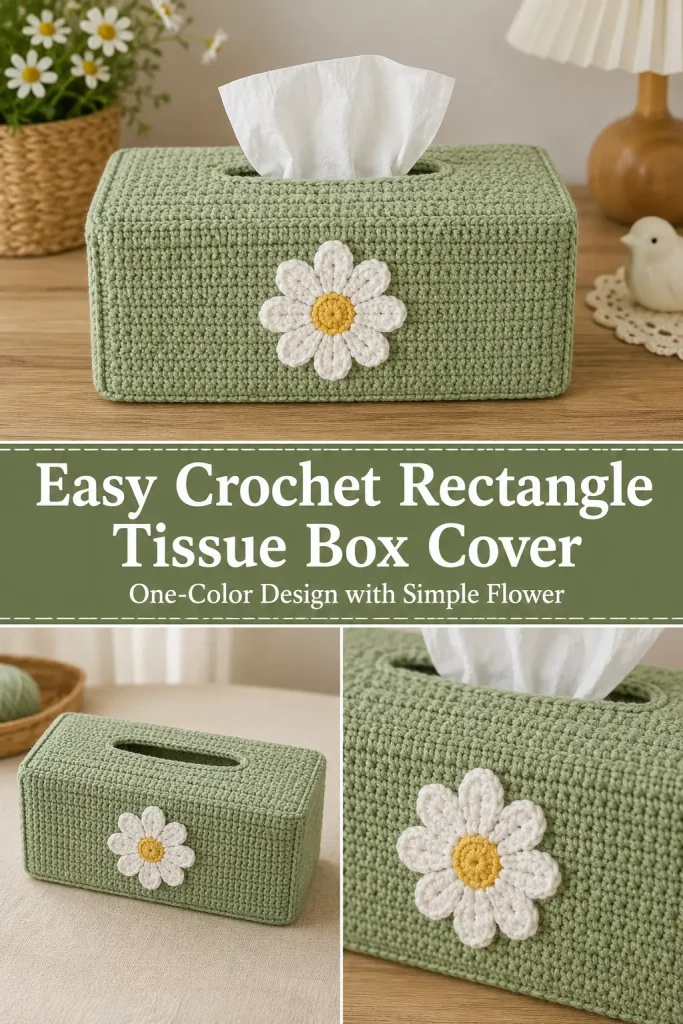
This crochet tissue box cover keeps the same useful handmade decor idea as the reference, but simplifies it into a clean rectangular design worked mostly in one color. Instead of colorful granny squares on every side, this version uses a solid crochet fabric with one simple flower applique for decoration.
The result is much easier to make, easier to match with home decor, and more practical for everyday use. The cover is designed for a standard rectangular tissue box, with a neat opening at the top so tissues can pull through easily.
Description
The finished crochet tissue box cover is a fitted rectangular sleeve with four straight side panels, a flat top, softly rounded corners, and one centered flower applique on the front.
The main cover is worked in one solid color, such as warm cream, sage green, dusty rose, soft beige, or pale blue. A simple contrasting flower is attached to the front for a small decorative detail without making the project overly colorful.
The top has a long oval-style tissue opening centered over the box.
Materials
- Worsted or aran-weight yarn in one main color
- Small amount of contrasting yarn for the flower
- Small amount of yellow yarn for the flower center, optional
- 4 mm crochet hook
- Yarn needle
- Scissors
- Stitch markers
- Flexible measuring tape
- Standard rectangular tissue box for fitting
Abbreviations
- ch – chain
- sc – single crochet
- hdc – half double crochet
- dc – double crochet
- sl st – slip stitch
- st – stitch
- sts – stitches
- sp – space
- inc – 2 stitches in the same stitch
Pattern Notes
US crochet terminology is used.
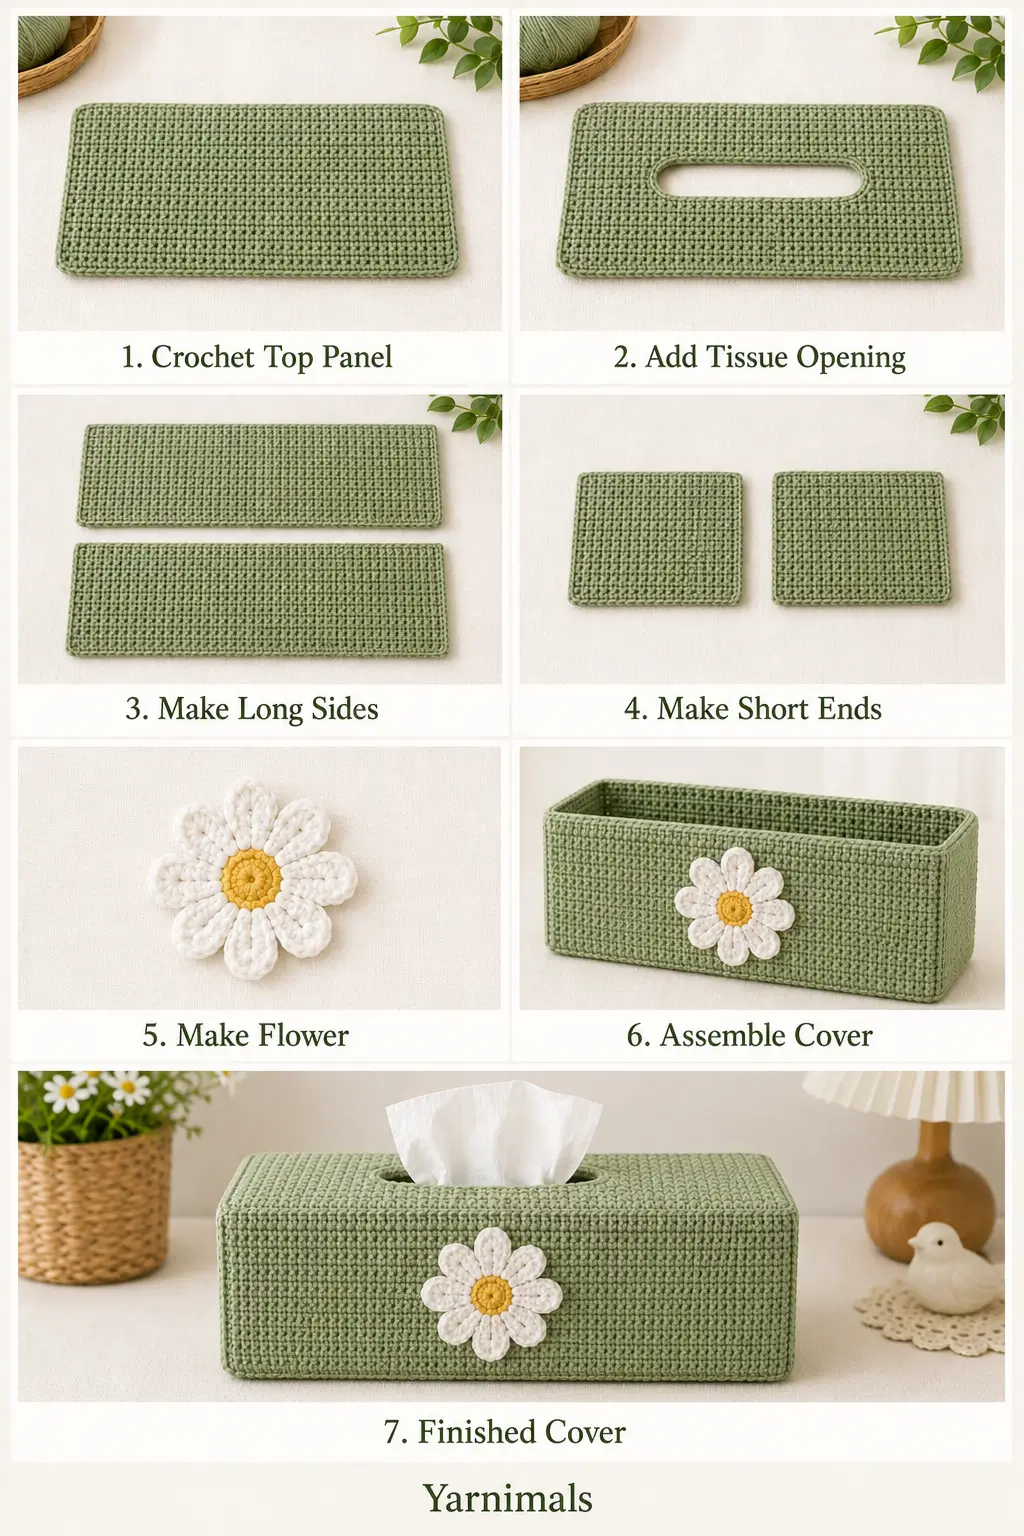
The cover is made from:
- 1 rectangular top panel with tissue opening
- 2 long side panels
- 2 short end panels
- 1 simple flower applique
The panels are crocheted separately and joined with single crochet seams.
This construction is reliable because you can measure each panel directly against your own tissue box.
The sample is designed around a standard rectangular tissue box measuring approximately:
- 9 in / 23 cm long
- 4.75 in / 12 cm wide
- 3.5 in / 9 cm high
Measure your own box before beginning and adjust the foundation chains if necessary.
For a fitted cover, make each panel approximately 0.25 in / 0.5 cm larger than the corresponding box measurement.
Step-by-Step Instructions
Main Stitch Pattern
The entire cover uses half double crochet for a dense, simple texture.
For every flat panel:
Ch the required length.
Hdc in the second ch from hook and across.
Ch 1 and turn.
Hdc in every st across.
Repeat until the piece reaches the required height.
Keeping the stitch pattern simple helps the rectangular cover hold its shape.
Part 1 – Top Panel
Using the main color.
The finished panel should measure approximately the length and width of the top of your tissue box.
For a 9 x 4.75 in box, aim for approximately:
9.25 x 5 in / 23.5 x 12.5 cm
Foundation
Ch until the foundation measures approximately 9.25 in / 23.5 cm.
Row 1
Hdc in second ch from hook.
Hdc across.
Ch 1 and turn.
Following Rows
Hdc across.
Ch 1 and turn.
Continue until the panel measures approximately 2 in / 5 cm wide.
You will now create the tissue opening.
Tissue Opening
The opening should be centered lengthwise.
A finished opening approximately:
5–5.5 in / 12.5–14 cm long
works well for many rectangular tissue boxes.
Count the stitches across the row.
Mark an equal number of stitches at both ends so the center section measures approximately 5–5.5 in.
Opening Row
Hdc from the beginning of the row to the first marker.
Chain the same number of stitches as you are skipping across the center.
Skip the marked center stitches.
Hdc into the first stitch after the second marker.
Hdc across to the end.
Ch 1 and turn.
Next Row
Hdc in each hdc to the chain section.
Work one hdc into every chain across the opening.
Continue hdc across.
The opening is now formed.
Continue working straight hdc rows until the top panel reaches approximately:
5 in / 12.5 cm wide
Fasten off.
Finish the Tissue Opening
Join the main yarn anywhere along the opening.
Ch 1.
Sc evenly around the entire opening.
At the curved ends, place 2 sc into the corner areas if needed so the edging lies flat.
Join with sl st.
Fasten off.
This creates a cleaner, stronger tissue opening.
Part 2 – Long Side Panels
Make 2.
Using the main color.
Each panel should measure approximately:
9.25 in / 23.5 cm long x 3.75 in / 9.5 cm high
Foundation
Ch until the foundation measures approximately 9.25 in.
Row 1
Hdc in second ch from hook.
Hdc across.
Ch 1 and turn.
Remaining Rows
Hdc across.
Ch 1 and turn.
Continue until the panel measures approximately 3.75 in high.
Fasten off.
Make the second long panel identically.
Part 3 – Short End Panels
Make 2.
Each panel should measure approximately:
5 in / 12.5 cm wide x 3.75 in / 9.5 cm high
Foundation
Ch until the foundation measures approximately 5 in.
Row 1
Hdc in second ch from hook.
Hdc across.
Ch 1 and turn.
Remaining Rows
Hdc across.
Continue until the panel measures approximately 3.75 in high.
Fasten off.
Make the second panel identically.
Part 4 – Simple Crochet Flower
This flower is intentionally simple so the cover remains clean and modern.
Use a contrasting color for the petals.
Use yellow for the center if desired.
Flower Center
Using yellow yarn.
Make a magic ring.
Ch 1.
Work 8 sc into the ring.
Pull closed.
Join with sl st.
Fasten off.
Flower Petals
Join the petal color into any stitch.
In the same stitch work:
ch 2, 2 dc, ch 2, sl st
Move to the next stitch.
Repeat the same sequence in each stitch around.
You will have:
8 petals
Fasten off, leaving a long tail for sewing.
Gently shape the petals with your fingers.
Attach the Flower
Choose one long side panel to be the front.
Lay it flat.
Position the flower approximately in the center.
Sew around the flower center and the inner base of the petals.
Leave the outer petal edges slightly free so the flower remains dimensional.
Weave in ends.
Assembly
Use the main color.
Join Long Panels to Top
Place one long side panel along one long edge of the top panel.
Wrong sides together.
Join at one corner.
Ch 1.
Sc through both layers evenly across the edge.
Fasten off.
Repeat with the second long panel on the opposite side.
Join Short Panels
Place one short panel along a short edge of the top.
Sc through both layers across.
Repeat at the opposite end.
You should now have all four sides hanging from the top panel.
Join the Vertical Corners
Bring one long side edge together with the neighboring short side edge.
Sc evenly through both layers from top to bottom.
Repeat at all four corners.
This creates a clean boxed rectangular shape.
Bottom Edge
Join yarn at any lower corner.
Ch 1.
Sc evenly around the entire bottom edge.
At each corner, work:
2 sc or 3 sc as needed
to keep the edge flat.
Join with sl st.
Fasten off.
The lower edge remains open so the finished cover can slide over the tissue box.
Optional Firm Bottom Border
If you want the cover to hold its shape more strongly, work one additional round of sc around the lower edge.
Do not make the border too tight.
The cover should still slide on and off the tissue box comfortably.
Fitting the Cover
Place the finished cover over the tissue box.
Check that:
- the top sits flat
- the tissue opening aligns with the box opening
- the four corners sit vertically
- the lower edge reaches close to the bottom of the box
- the flower remains centered on the front
- the cover is snug but easy to remove
If the cover is slightly loose, lightly steam or wet block it to the correct dimensions.
Design Consistency Lock
For this simplified version, keep the design consistent:
- rectangular tissue box shape
- one solid main color
- dense half double crochet texture
- rectangular top panel
- centered tissue opening
- four straight side panels
- one simple flower on the front only
- clean crochet seams
- no granny-square construction
- no multicolor patchwork
- no flower on every side
- no tassels
- no fringe
- no beads
- no ribbons
A good finished color combination would be:
- sage-green cover with one cream daisy
- cream cover with one dusty-pink flower
- pale-blue cover with one white flower
- beige cover with one soft-yellow flower
Tips & Variations
Cotton or cotton-acrylic yarn works especially well because it creates a firmer rectangular shape.
If your cover feels too floppy, use a hook 0.5 mm smaller.
If the tissue box has rounded upper corners, lightly block the crochet cover over the empty box to help it conform naturally.
For a more minimal design, omit the flower completely and keep the entire cover one color.
For a slightly richer version, add one flower to each long side while leaving the short sides plain.
You can also surface crochet one narrow decorative line around the top edge without changing the basic construction.
Always measure the actual tissue box rather than relying entirely on standard dimensions because packaging sizes vary.
FAQ
Can I make this for any rectangular tissue box?
Yes. Measure the length, width, and height of your own box, then crochet each panel to those dimensions with a small amount of ease.
Why are the panels made separately?
Separate panels make it much easier to create accurate rectangular dimensions and straight corners. They also let you adjust the size without complicated shaping.
Can I make this without the flower?
Yes. The flower is purely decorative. A single-color version makes a very simple modern crochet home decor project.
Conclusion
This easy crochet rectangular tissue box cover takes the decorative idea of a crochet tissue holder and simplifies it into a practical one-color home accessory. The solid rectangular construction keeps it easy to size correctly, while one small flower adds just enough handmade detail. Choose a soft neutral or muted color for the cover, add a simple contrasting flower, and you have a useful crochet home decor project that can fit naturally into almost any room.
:::



