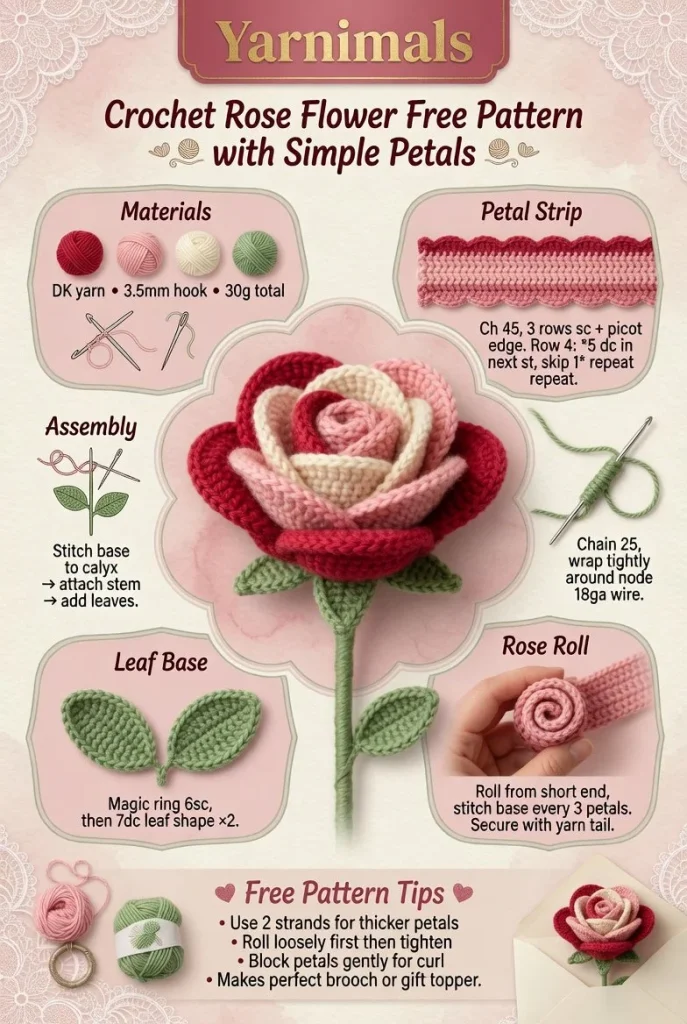
Creating a stunning crochet rose is a delightful way to explore your creativity and enhance your crochet skill set. This elegant flower features layered petals, a small green base, and an optional stem with leaves, making it a versatile addition for bouquets, gifts, or decorative accents in your home. With clear assembly steps, this project is beginner-friendly and perfect for those who enjoy DIY crochet projects. If you love roses and want to create a beautiful handmade piece, this easy crochet pattern will guide you through every step.
Materials
- Worsted weight yarn in your choice of colors (red or pink for the petals, green for the base)
- Crochet hook (size G/4.0 mm)
- Scissors
- Yarn needle for weaving in ends
Abbreviations
- MR: magic ring
- ch: chain
- sc: single crochet
- hdc: half double crochet
- dc: double crochet
- inc: increase
- dec: decrease
- sl st: slip stitch
Petal Strip
To create the petal strip, start by making a magic ring. Chain 3, then work 12 double crochets (dc) into the ring. Pull the tail to close the ring and slip stitch into the top of the starting chain to complete the round. This creates the first row of your petals.
Next, chain 3 and make one double crochet in the same stitch from the previous round. Work 2 double crochets in each of the next 12 stitches for a total of 24 stitches. Slip stitch to close the round. At this point, you will notice the petal strip taking its shape.
Rose Roll
Now, it’s time to form the rose. Carefully roll the petal strip into a spiral, ensuring that the petals curve outward as you go. Use your yarn needle to secure the base of the rose with a few stitches. This will keep the petals in place and form a beautiful rose shape.
For a more delicate look, try folding and shaping the petals as you go, so they have varied heights for added dimension.
Leaf Base
To add a lovely finishing touch, create a small green base for the rose. Start with a magic ring and chain 3 followed by 7 double crochets (dc), which will create a small circle. Slip stitch to close and weave in the ends to form a neat base that will sit under your rose.
Stem
If you want to add a stem, chain 18 and work a single crochet in the back loop of each chain stitch. This will give the stem a nice ribbed texture. Once you’ve reached your desired length, fasten off.
Leaves
For the leaves, make a small green shaped piece. Start with 5 chains and work 4 double crochets into the second chain from the hook; then work a slip stitch at the end to finish the leaf shape. Create a second leaf in the same way, then attach them to the stem using your yarn needle.
Assembly
Finally, assemble all the pieces. Attach the leaf base under the rose and sew the stem to the bottom, anchoring it securely. You can position the leaves either against the stem or slightly spaced out for a more natural look. Remember to hide any loose ends with your yarn needle for a tidy finish.
Tips for the Best Result
- Check your tension while creating the rose to ensure it holds its shape well.
- Experiment with different colors for a vibrant bouquet that showcases various shades of roses.
- Consider adding a sprinkle of glitter or iridescence to your yarn for a magical effect on your finished flower.
Creating this charming handmade rose is not only a great way to indulge in your crochet passion but also makes for a touching gift. For more inspiration, feel free to check out this beginner-friendly crochet rose flower pattern.
With patience and practice, you’ll master this beautiful crochet rose and be ready to share your creations with friends and family!



