Easy Crochet Square Coin Purse With Zipper
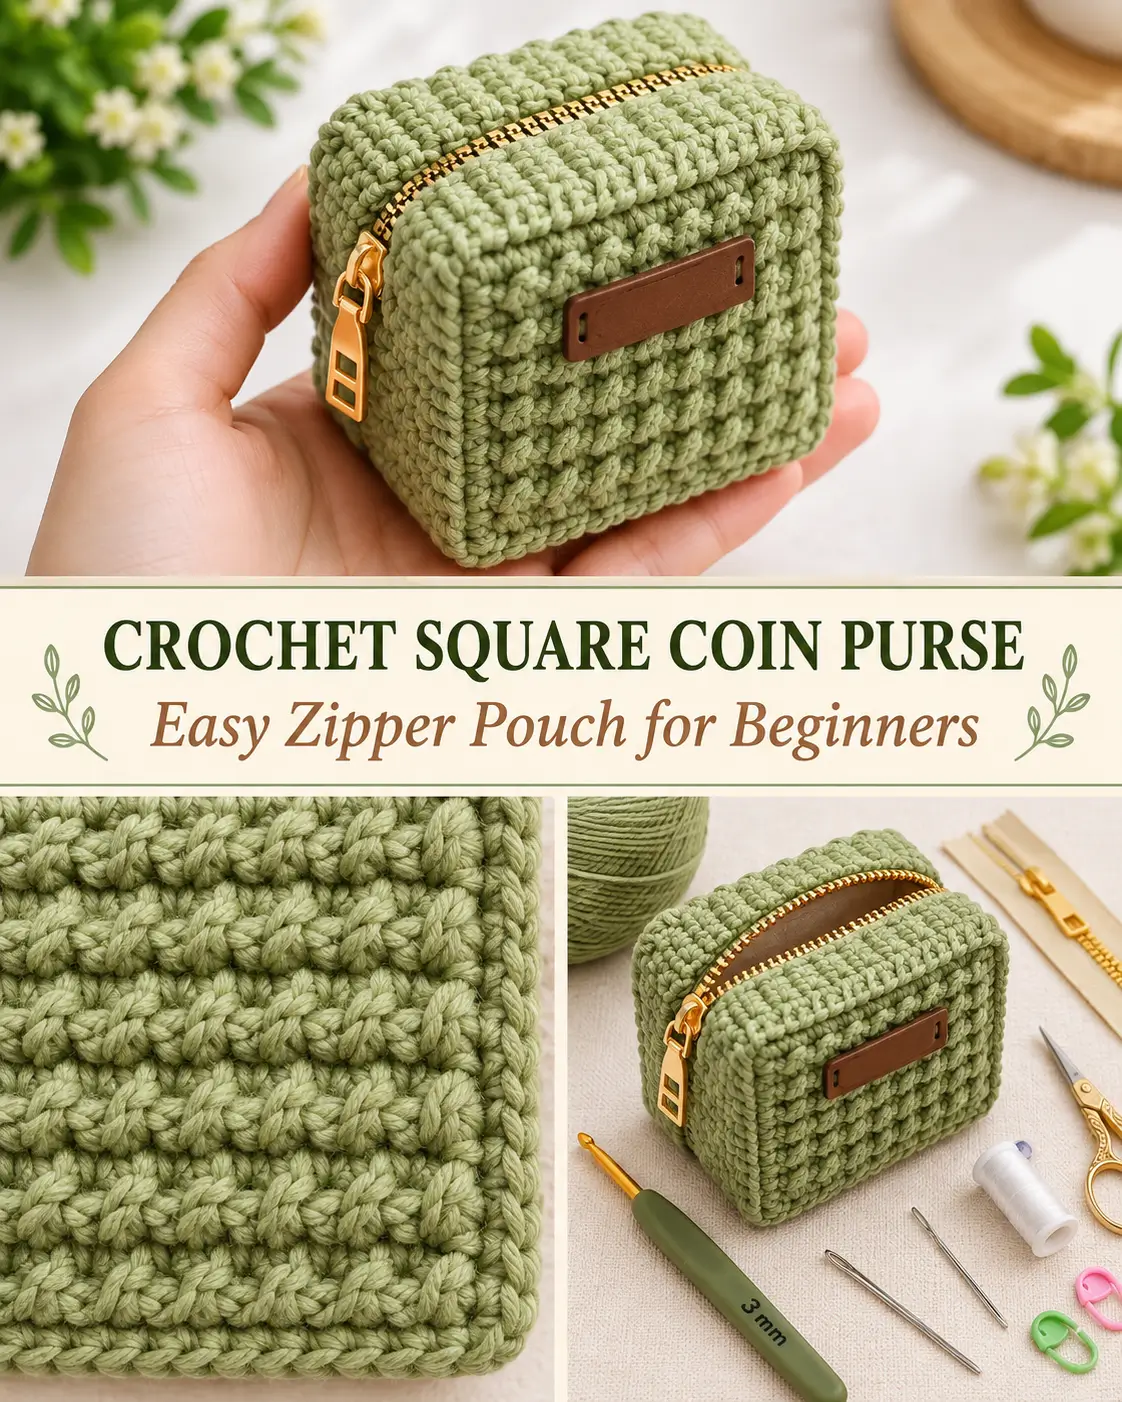
This small crochet coin purse is built from two textured square panels, one narrow gusset that forms the sides and bottom, and two slim crochet bands that hold the zipper across the top.
The textured front and back use a very simple alternating repeat of slip stitch and half double crochet. Repeating the same sequence row after row creates the compact raised columns visible on the finished purse.
The result is a firm, boxy little pouch that works well for coins, earbuds, small cosmetics, jewelry, stitch markers, or other small items.
Finished Size
With thin macramé cotton and a 3 mm hook, the finished pouch should be approximately:
3½–4 inches / 9–10 cm wide
3½–4 inches / 9–10 cm tall
about 2 inches / 5 cm deep
Exact size depends on your yarn and tension.
Materials
- Thin macramé cotton or firm cotton yarn
- 3 mm crochet hook
- Small zipper long enough to span the top opening
- Yarn needle
- Scissors
- Stitch markers
- Sewing needle
- Strong matching sewing thread or transparent nylon thread
- Optional small label
Abbreviations
US crochet terminology:
ch — chain
sl st — slip stitch
sc — single crochet
hdc — half double crochet
st / sts — stitch / stitches
Special Texture
The main panels use:
sl st in next stitch, hdc in next stitch
repeated across.
Because the panel has an even number of stitches, you can begin every row the same way.
Keep the slip stitches relaxed. If they are worked too tightly, the square will become stiff and difficult to crochet into on the next row.
FRONT PANEL
The panel uses:
16 working stitches
To make exactly 16 stitches with a standard foundation chain:
Ch 17
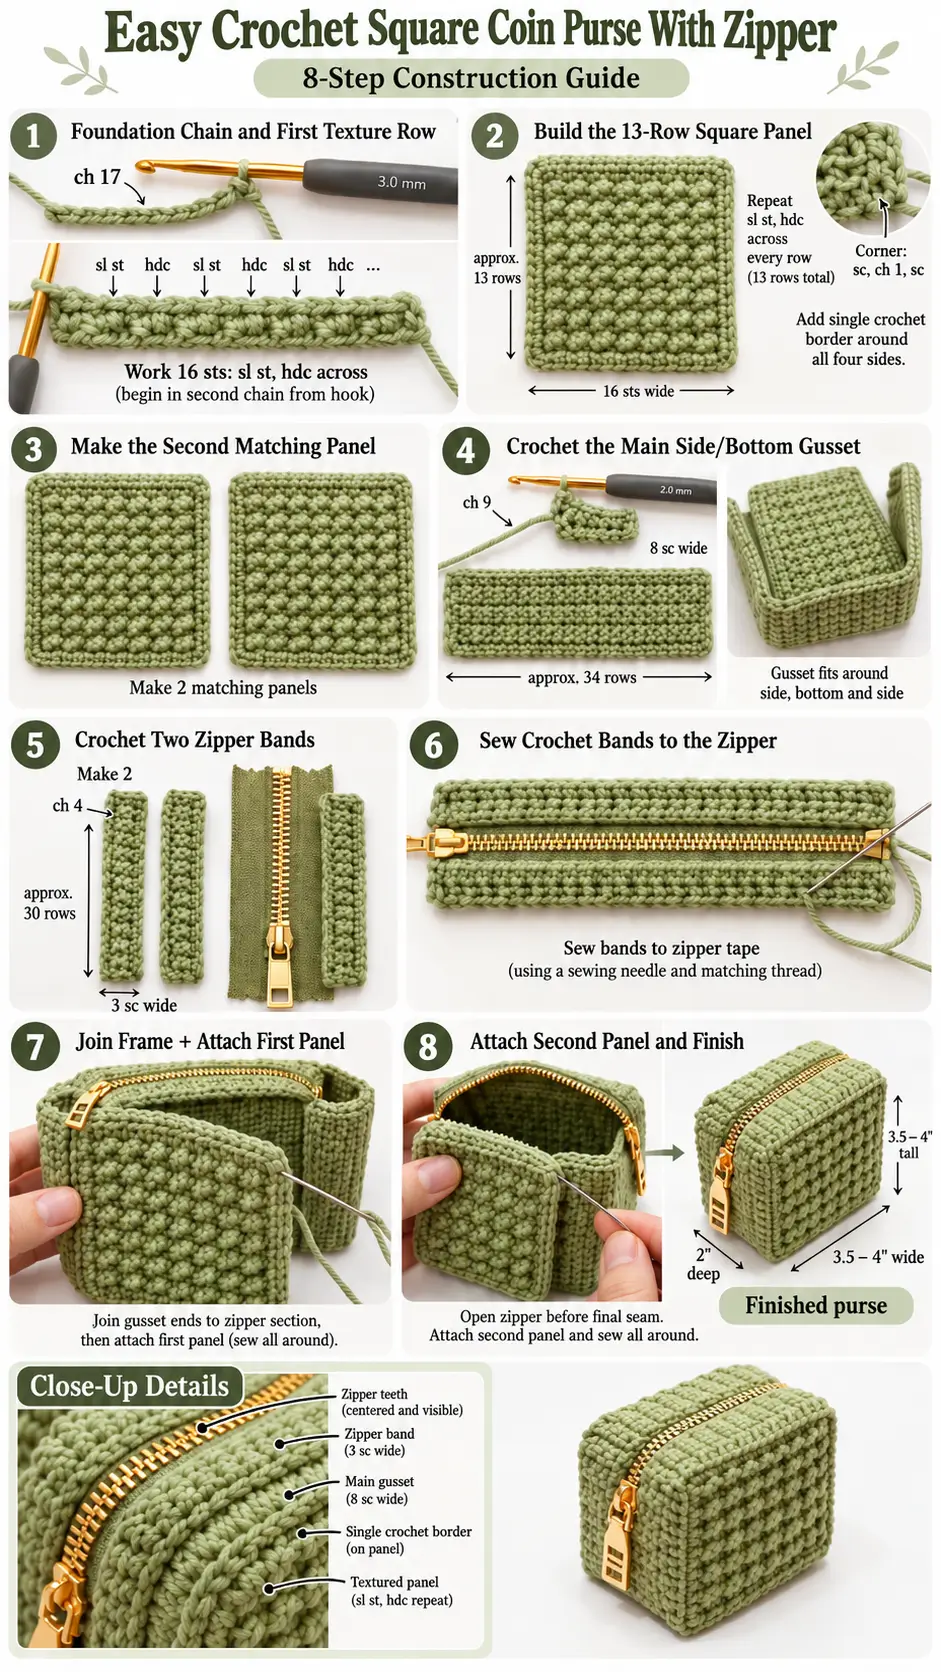
Row 1
Beginning in the second chain from the hook:
sl st in first chain
hdc in next chain
Repeat:
sl st, hdc
across.
You should have:
16 stitches
Ch 1.
Turn.
The turning chain does not count as a stitch.
Row 2
Work:
sl st in first stitch
hdc in next stitch
Repeat:
sl st, hdc
across.
16 stitches
Ch 1.
Turn.
Rows 3–13
Repeat Row 2.
After Row 13, the panel should be a compact square or nearly square.
Do not fasten off yet.
BORDER AROUND THE PANEL
A single-crochet border gives the square a clean edge and makes assembly much easier.
Ch 1.
Work sc evenly around all four sides.
Across the top:
1 sc in each stitch
At the corner:
sc, ch 1, sc
Down the first side:
Work approximately:
1 sc into each row end
At the next corner:
sc, ch 1, sc
Across the foundation edge:
Work evenly across.
Repeat the same treatment around the remaining side and corners.
Join with a sl st.
Fasten off.
The square should lie flat.
Do not add so many side stitches that the edge begins to ruffle.
BACK PANEL
Make a second panel exactly the same.
You should now have:
2 matching 16-stitch × 13-row textured squares
Both panels must be the same size before continuing.
MAIN SIDE AND BOTTOM GUSSET
This strip forms:
one side → bottom → opposite side
of the box-shaped purse.
Make:
8 working sc
For a standard foundation chain:
Ch 9
Gusset Row 1
Sc in second chain from hook and across.
8 sc
Ch 1.
Turn.
Gusset Rows 2–34
Sc in every stitch across.
8 sc
Ch 1 and turn after each row.
After:
34 rows
fasten off.
The strip should be long enough to travel down one side of a square panel, across the bottom, and back up the opposite side.
Before assembly, wrap the strip around those three sides of one panel.
It should reach from one upper corner to the other without pulling.
If your yarn or tension makes the strip slightly too short or too long, adjust the number of rows now. The physical fit is more important than forcing the strip to stretch.
ZIPPER BANDS
The top of the purse is made from two narrow crochet strips, one on each side of the zipper.
Make two identical pieces.
Each strip is:
3 sc wide
and approximately:
30 rows long
Zipper Band — Make 2
Ch:
4
Row 1
Sc in second chain from hook and across.
3 sc
Ch 1.
Turn.
Rows 2–30
Sc in all 3 stitches.
Ch 1.
Turn.
After Row 30:
Fasten off.
Make a second identical strip.
CHECK THE ZIPPER SECTION
Lay the two 3-stitch strips parallel with the zipper between them.
Together, they should create a top section approximately the same width as the 8-stitch gusset, with the zipper teeth centered.
The length of the crochet bands should match the top edge of the front and back panels.
If necessary, add or remove a few rows from both zipper strips equally.
Do not make one strip longer than the other.
ATTACH THE CROCHET BANDS TO THE ZIPPER
Open the zipper.
Place one crochet strip beside one side of the zipper teeth.
Keep the crochet edge close to the teeth, but not so close that the yarn catches in the slider.
Using matching sewing thread or transparent nylon thread, sew through:
zipper tape → crochet strip
with small, evenly spaced stitches.
Sew the full length.
Repeat with the second crochet strip on the opposite side.
The zipper should now sit neatly between the two crocheted bands.
Test it several times.
The zipper must open and close freely.
CREATE THE COMPLETE GUSSET FRAME
You now have:
- one 8-stitch × 34-row side/bottom strip
- one zipper section made from two narrow crochet bands and the zipper
Join one short end of the main gusset to one end of the zipper section.
Join the other end of the gusset to the opposite end of the zipper section.
You have now created a continuous rectangular side frame.
Its sections are:
zipper across top
crochet side
crochet bottom
crochet side
Check that the frame is not twisted.
ATTACH THE FRONT PANEL
Place one textured square against one side of the gusset frame.
Keep the textured/right side facing outward.
Start at one top corner near the zipper.
Using matching yarn and a yarn needle, sew the square to the gusset.
Work slowly around:
top edge beside zipper → side → bottom → opposite side → remaining top edge
Use a simple whip stitch or mattress-style seam.
Match the edges evenly rather than forcing one stitch of the panel to correspond to exactly one row of the gusset.
The seam should lie flat without puckering.
SHAPE THE LOWER CORNERS
At each bottom corner, bend the gusset naturally around the square corner.
Do not pull the seam tightly across the turn.
Use several smaller stitches around the corner so the purse keeps its boxy shape.
The finished corner should be rounded slightly, not sharply folded.
ATTACH THE BACK PANEL
Place the second textured square against the opposite side of the gusset.
Make sure:
- both textured panels face outward
- the zipper is centered
- the bottom edges align
- the corners match
Sew the second panel around the entire frame using the same method.
Before closing the final few inches:
open the zipper
This is important because once the purse is completely sewn, you need the zipper open to turn and shape the pouch.
Finish the seam.
TURN AND SHAPE THE PURSE
Turn the purse right side out through the zipper opening if necessary.
Push out the four lower corners gently with your fingers.
Straighten:
- front panel
- back panel
- side gusset
- zipper bands
- bottom
The pouch should now hold a compact rectangular box shape.
ZIPPER FINISHING
Inspect both ends of the zipper.
If your zipper is longer than the crocheted opening, secure the unused end with several strong stitches before trimming it.
Never cut a zipper before creating a secure new zipper stop.
Hide the zipper tape neatly inside the pouch.
Use a few small stitches to anchor the tape to the crochet if needed.
OPTIONAL LABEL
A small faux-leather or fabric label can be sewn onto the center of the front panel.
Position it before sewing.
Use a thin sewing needle and matching thread so the stitches do not distort the crochet texture.
WEAVE IN THE ENDS
Use a yarn needle to weave every yarn tail securely into the inside of the purse.
Change direction at least once while weaving.
Trim the excess.
Avoid leaving bulky knots inside the pouch.
Keeping the Texture Even
The panel texture depends on maintaining the same repeat:
sl st, hdc
through every row.
Do not accidentally reverse the sequence partway across a row.
Every panel row should contain:
16 stitches
If the Panel Becomes Narrower
Your slip stitches may be too tight.
Make each sl st with relaxed tension.
You should be able to insert the hook easily when you return on the next row.
If the Panel Is Not Square After 13 Rows
Different yarn produces different row heights.
Instead of forcing exactly 13 rows, continue until the height is approximately equal to the width.
Make the second panel with exactly the same final row count.
If the Gusset Does Not Fit
The 34-row gusset is the sample construction, but row gauge can vary.
Wrap it around:
side + bottom + side
of one completed panel.
If it falls short, add rows.
If it is too long, remove rows.
The strip should fit naturally without stretching the square.
If the Zipper Bands Do Not Fit
Both zipper bands must be identical.
Their finished length should match the remaining top edge of the purse.
Adjust the row count equally on both strips before sewing in the zipper.
If the Purse Looks Flat Instead of Boxy
Check the gusset width.
The main strip should have approximately:
8 working stitches
The two zipper bands plus the zipper should produce approximately the same finished depth.
If the top section is much narrower than the bottom gusset, the purse will taper.
Optional Lining
For a cleaner interior, add a fabric lining after the crochet pieces are assembled.
Cut two fabric rectangles slightly smaller than the front and back panels.
Add a narrow fabric strip around the sides and bottom.
Sew the fabric pieces together.
Insert the lining into the purse.
Turn the upper raw edge inward.
Hand-sew the lining to the zipper tape.
Do not sew through the outside crochet if you want the stitches hidden.
Final Pattern at a Glance
Front Panel — Make 2
Make:
16 working stitches
For standard chaining:
Ch 17
Rows 1–13:
Repeat:
sl st, hdc
across.
16 stitches
Add a sc border around each panel.
Main Gusset
Make:
8 working stitches
For standard chaining:
Ch 9
Sc across.
Work approximately:
34 rows
This forms:
side + bottom + side
Zipper Bands — Make 2
Ch 4.
Work:
3 sc
for approximately:
30 rows
Sew one strip to each side of the zipper.
Assembly
Join the zipper section to both ends of the main gusset.
This creates one complete side frame.
Sew:
front panel to one side
and:
back panel to the opposite side
Open the zipper before completing the final seam.
Shape the corners.
Weave in all ends.
The finished purse has two square textured faces, a firm narrow gusset, a centered top zipper, and the compact box-shaped silhouette shown in the design.