Easy Lemon Bunny Amigurumi Crochet Pattern for Beginners
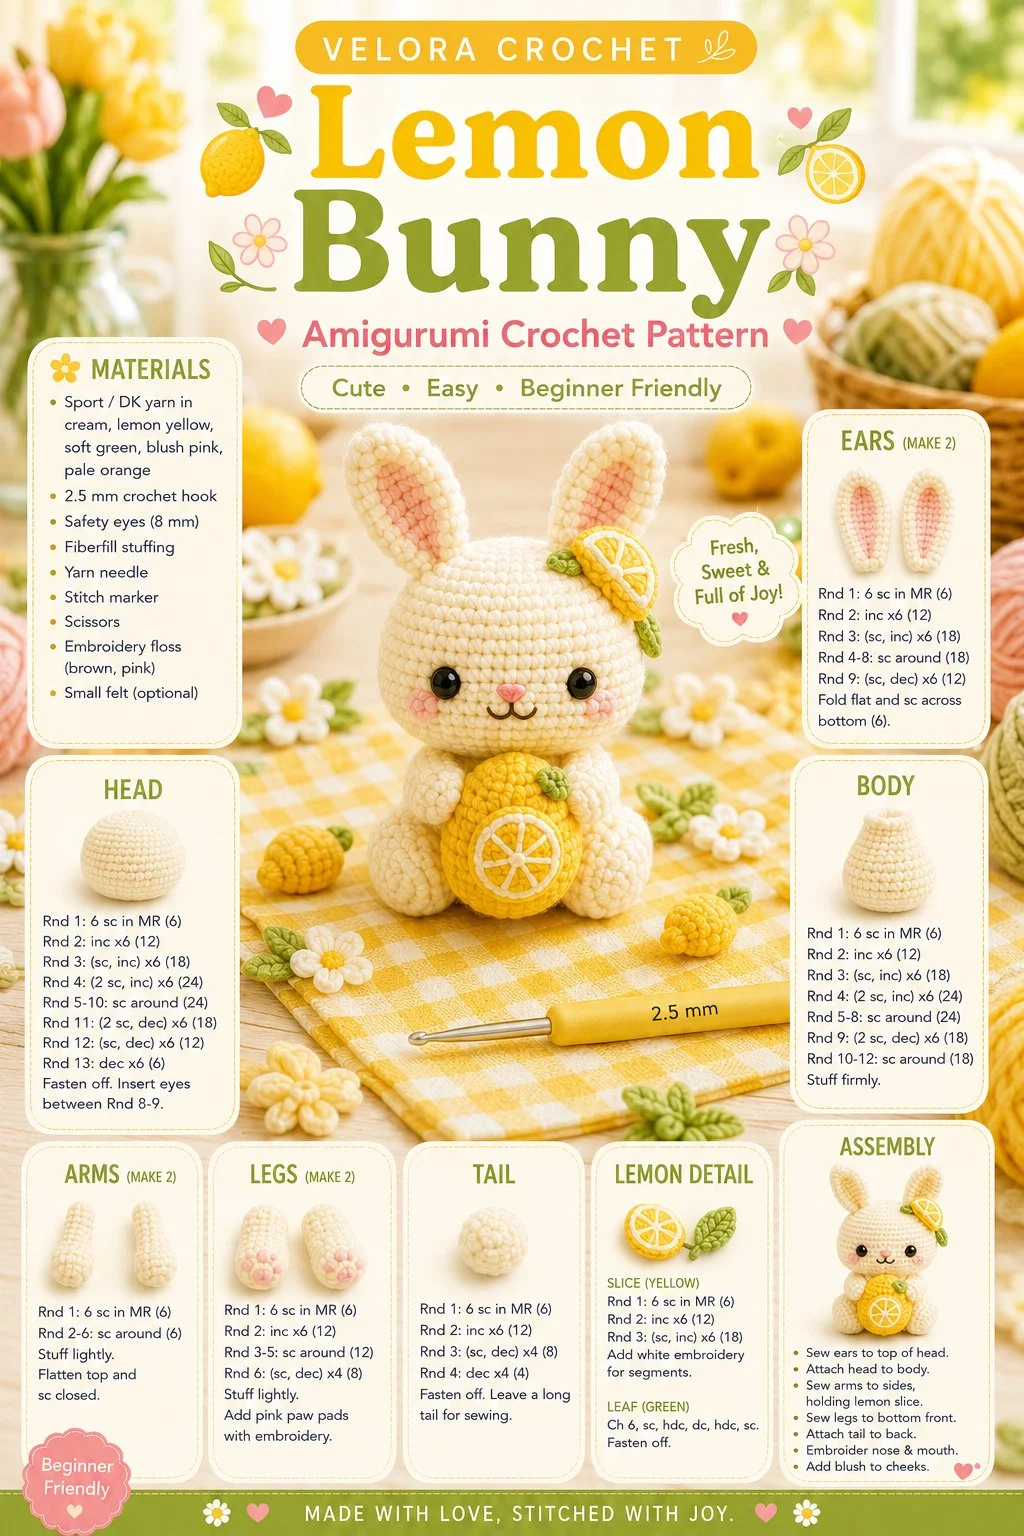
Get ready to create a delightful handmade crochet bunny that brings a touch of sunshine to your home! This adorable lemon-themed bunny features a soft body, long floppy ears, a tiny nose, small paws, and a round tail, plus a charming lemon slice or leaf detail near one ear. Perfect for spring and summer, this beginner-friendly crochet project is sure to add a fresh and playful vibe to your décor or serve as a lovely gift for the special ones in your life.
Materials
- Yarn: Soft worsted-weight yarn in white (for the body), yellow (for the lemon), and green (for the leaf)
- Crochet hook: Size G/4.0 mm
- Stuffing: Polyester fiberfill
- Tapestry needle
- Safety eyes (optional)
- Scissors
- Stitch marker (optional)
Abbreviations
- MR: magic ring
- ch: chain
- sc: single crochet
- inc: increase
- dec: decrease
- sl st: slip stitch
Instructions
Head
- Start with a magic ring.
- Round 1: 6 sc in MR (6)
- Round 2: inc in each sc around (12)
- Round 3: sc in next sc, inc in next repeat around (18)
- Round 4-8: sc in each sc around (18)
- Round 9: sc in next sc, dec in next repeat around (12)
- Insert safety eyes (if using) and stuff head lightly.
- Round 10: dec around (6)
- Fasten off leaving a long tail for sewing.
Ears (make 2)
- Start with a magic ring.
- Round 1: 5 sc in MR (5)
- Round 2: inc in each sc around (10)
- Round 3-6: sc in each sc around (10)
- Fasten off, leaving a long tail for sewing.
Body
- Start with a magic ring.
- Round 1: 6 sc in MR (6)
- Round 2: inc in each sc around (12)
- Round 3: sc in next sc, inc in next repeat around (18)
- Round 4-10: sc in each sc around (18)
- Round 11: sc in next 2 sc, dec in next repeat (12)
- Stuff the body lightly.
- Round 12: dec around (6)
- Fasten off, leaving a long tail for sewing.
Arms (make 2)
- Start with a magic ring.
- Round 1: 6 sc in MR (6)
- Round 2-5: sc in each sc around (6)
- Fasten off, leaving a long tail for sewing.
Legs (make 2)
- Start with a magic ring.
- Round 1: 6 sc in MR (6)
- Round 2-6: sc in each sc around (6)
- Fasten off, leaving a long tail for sewing.
Tail
- Start with a magic ring.
- Round 1: 6 sc in MR (6)
- Round 2: inc in each sc around (12)
- Round 3: sc in each sc around (12)
- Fasten off, leaving a long tail for sewing.
Lemon Detail
- Using yellow yarn, make a small circle.
- Ch 2, then work 3 dc, ch 1, 4 dc in the circle.
- Fasten off and sew a small green leaf detail next to it for added charm.
Face Details
- Use embroidery or felt to sew a tiny nose and mouth on the head.
- Position the facial features proportionally for a cute expression.
Assembly
- Sew the head to the body securely, ensuring it’s well-placed.
- Attach the ears to the top of the head with the long tails from the ears.
- Sew on the arms and legs, placing them symmetrically.
- Attach the tail to the back of the body.
- Finally, fix the lemon detail near one ear for a refreshing touch.
Tips for the Best Result
- Be careful not to overstuff the bunny; it can affect its proportions, especially the head and body.
- Secure all parts firmly to withstand play or decoration movement.
- Using a stitch marker at the start of each round can help maintain clarity while working.
As you complete this cute bunny, consider creating variations in colors or adding different motifs for a unique collection. This lemon-themed bunny makes a cheerful addition to any home or a thoughtful handmade gift for someone special! Happy crocheting!