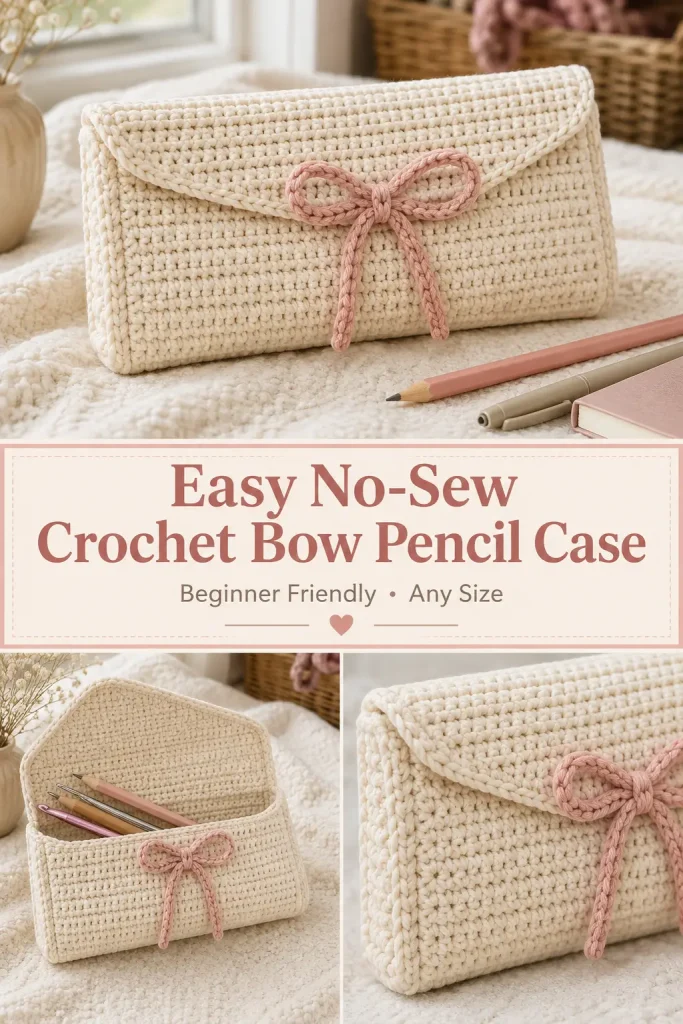
A handmade crochet pencil case is one of those small projects that feels useful from the very first stitch. This beginner-friendly design is worked as one simple piece, folded into shape, and joined with crochet stitches instead of sewing.
The softly textured pouch has a neat rectangular body, a slightly tapered flap, and two crocheted cords that tie into a sweet bow at the front. Because the foundation chain controls the width and the number of rows controls the height, you can easily turn the same crochet pouch pattern into a pencil case, makeup pouch, crochet-hook case, or small craft-supply organizer.
Description
This easy crochet pencil case has a simple rectangular shape worked in half double crochet, with the upper portion continuing into a gently tapered closing flap. The side seams are joined using single crochet, creating a tidy decorative edge without sewing. Two narrow crochet cords are attached at the center and tied into a bow to keep the pouch closed. Cream yarn with a dusty pink bow gives it a soft romantic look, while a matching pink version creates a cute monochrome accessory.
Materials
- DK or medium-weight yarn for the case
- Small amount of contrasting yarn for the bow cords
- Crochet hook appropriate for your yarn
- Stitch markers
- Scissors
- Yarn needle for weaving in ends, optional
A 4.5 mm crochet hook with medium/DK-weight yarn works well, but the size can easily be adjusted for different yarn weights.
Abbreviations
- ch – chain
- sc – single crochet
- hdc – half double crochet
- hdc2tog – half double crochet 2 together
- st – stitch
- sts – stitches
Pattern Notes
US crochet terminology is used.
The beginning ch 1 does not count as a stitch.
This pattern is designed to be adjustable.
For the sample pencil case, the foundation begins with 31 chains, which creates a width slightly longer than a standard pen.
To make a different size, simply chain until the foundation is the desired width.
Keep the same number of stitches in every straight row so the sides remain even.
The pouch is constructed as one long rectangle with the flap included at the top. The bottom portion is folded upward, and the sides are joined using single crochet instead of being sewn.
Step-by-Step Instructions
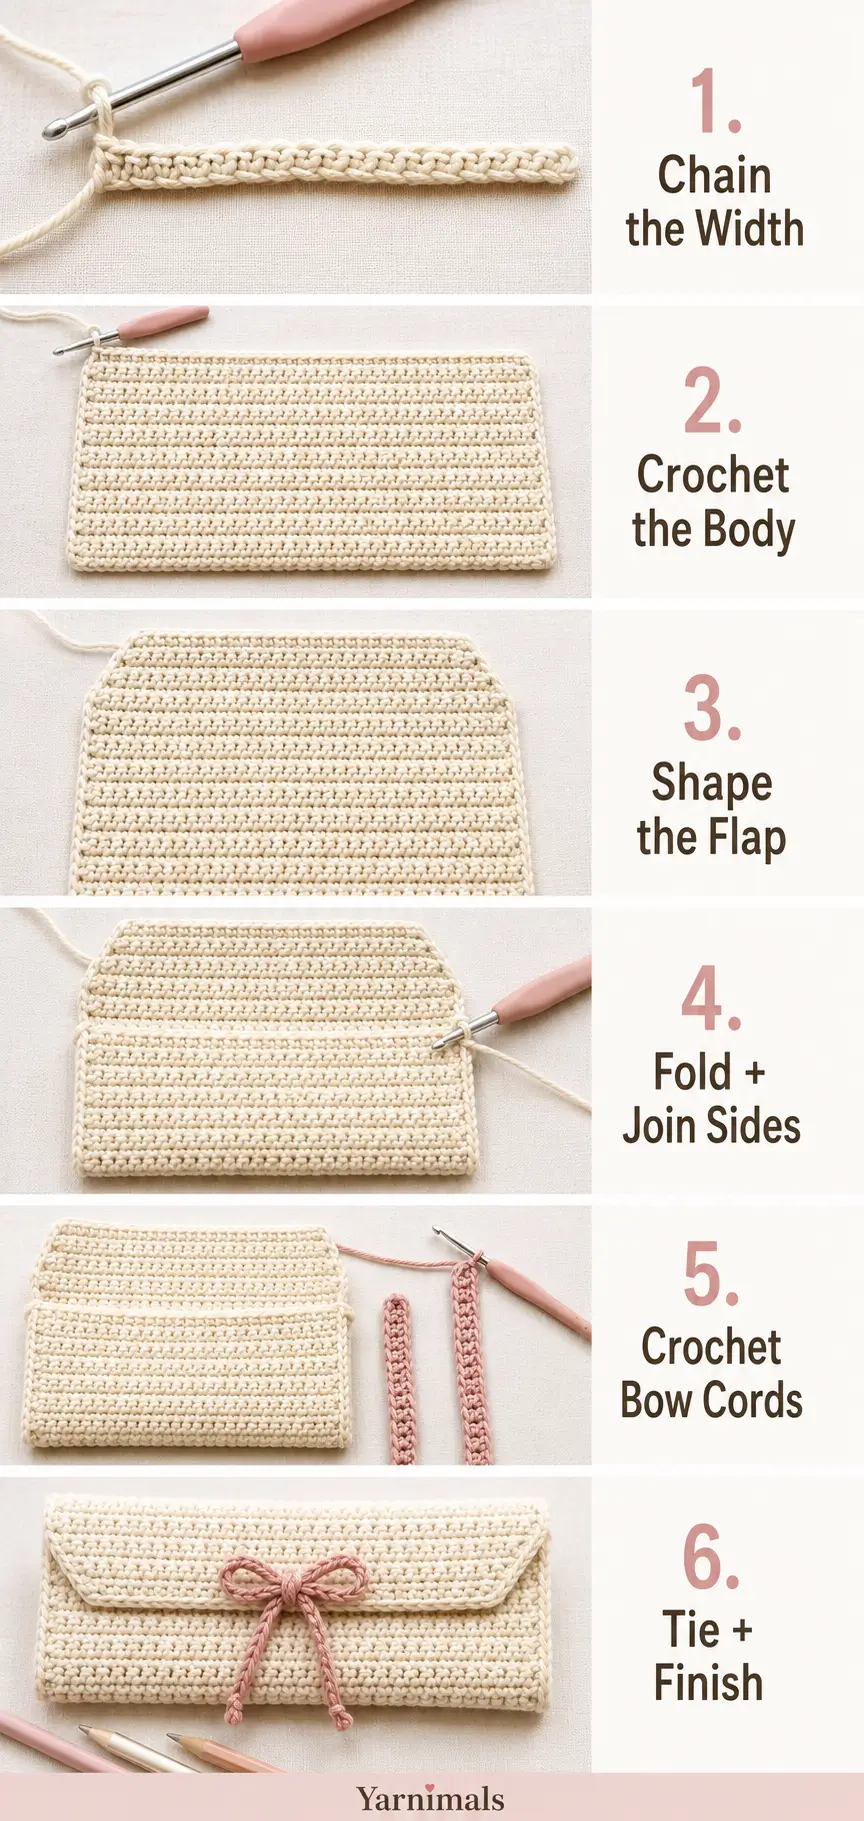
Main Body
Make a slip knot.
Foundation
Ch 31, or chain until the foundation is the desired width of your finished case.
Row 1
Skip the first ch.
Hdc in the second ch from hook.
Hdc in every remaining ch across.
Ch 1 and turn.
Row 2
Ignore the turning ch.
Hdc in the first st.
Hdc in every st across.
Ch 1 and turn.
Remaining Body Rows
Repeat Row 2 until the rectangle is long enough to fold into the pouch size you want while still leaving approximately four rows extending above the pouch for the beginning of the flap.
The sample uses 26 rows of hdc before shaping the flap.
Your work may curl slightly during the first few rows. This usually settles as more rows are added.
Shape the Flap
The final two rows decrease at both ends so the flap gently narrows instead of finishing with a completely straight edge.
Flap Decrease Row 1
Ch 1 and turn.
Hdc2tog over the first 2 sts.
Hdc in every st until 2 sts remain.
Hdc2tog over the final 2 sts.
Ch 1 and turn.
Flap Decrease Row 2
Hdc2tog over the first 2 sts.
Hdc in every st until 2 sts remain.
Hdc2tog over the final 2 sts.
Fasten off.
If you prefer a more dramatically tapered flap, additional decrease rows can be worked in the same way.
Fold the Pencil Case
Lay the long crochet rectangle flat.
Fold the lower edge upward to form the pouch.
Leave the shaped flap extending above the folded section so it can fold down over the opening.
Use stitch markers at both upper corners to hold the folded layers together.
Check that both sides line up evenly before beginning the border.
No-Sew Joining and Border
The sides are joined entirely with crochet.
Attach the main-color yarn at one bottom corner.
Ch 1.
First Side
Insert the hook through the edge of both layers.
Work sc through both layers to join them.
Continue working evenly spaced sc stitches up the entire side until reaching the top of the pouch section.
Try to keep the stitches fairly close together so large gaps do not form.
Around the Flap
Once you reach the point where the flap begins, continue working sc only through the single flap layer.
Work evenly around the first side edge of the flap.
Sc across the shaped top edge.
Continue down the opposite flap edge.
Second Side
When you reach the opposite upper corner of the pouch, begin working through both layers again.
Sc evenly through both layers all the way down the second side.
Fasten off at the bottom corner.
This creates both the side seams and the decorative outer border in one continuous crochet step.
Crochet Bow Cords
The bow closure is also crocheted, keeping the design nearly completely no-sew.
The sample cord begins with approximately 45 chains.
Make two cords.
Cord
Ch 45, or make a chain long enough to create the bow size you prefer.
Skip the first ch.
Sc in every remaining ch.
For medium-weight yarn, one row of sc is usually enough.
For thinner yarn, continue:
Ch 1 and turn.
Sc in every st across.
Fasten off, leaving a short tail.
Make a second identical cord.
Attach the Bow Closure
Lower Cord
Find the center of the front pouch approximately two rows below the opening.
Using the crochet hook, pull the cord end beneath a nearby crochet stitch.
Secure it firmly using several tight knots.
Pull the yarn ends through nearby stitches on the inside to hide them.
Flap Cord
Find the center of the flap.
Pull the second crochet cord through a central stitch with your hook.
Secure it in the same way.
Hide the remaining ends through stitches on the reverse side.
No sewing is needed.
Close the Case
Fold the flap over the front of the pouch.
Bring the two crochet cords together.
Tie them into a simple bow.
Adjust the loops until the bow sits neatly in the center of the case.
Custom Sizing
One of the easiest features of this crochet accessory pattern is that you do not need separate stitch counts for every size.
For a pencil case, make the starting chain slightly longer than your favorite pen or pencil.
For crochet hooks, make the foundation long enough for your longest hook.
For makeup, increase both the foundation chain and the number of body rows.
For a small notions pouch, shorten both dimensions.
The same construction works without changing the basic pattern.
Tips & Variations
Use firm tension for a structured pencil case. Very loose stitches can make the pouch stretch when filled.
Cotton yarn is a good option when you want a crisp shape, while acrylic gives the case a softer feel.
Try cream with a dusty-pink bow for the soft look shown in the reference design.
You can also crochet the case and bow in the same color for a simple monochrome finish.
A contrasting border is another easy variation. Work the joining round in a second color instead of matching the body.
For a thicker bow, use heavier yarn or work a second row of single crochet along each cord.
If your pencil case will carry very small objects, keep the crochet tension tight enough that the gaps between stitches remain small.
FAQ
Can I make this crochet pencil case without sewing?
Yes. The folded sides are joined with single crochet, and the bow cords can be attached directly through existing crochet stitches.
Can I make the case wider or smaller?
Yes. Increase or decrease the starting chain until it matches the width you need. Then simply crochet more or fewer rows to control the height.
Can beginners make this pattern?
Yes. The main body consists almost entirely of half double crochet. The only additional techniques are simple decreases, single crochet edging, folding, and joining two layers with single crochet.
Conclusion
This no-sew crochet bow pencil case is a lovely beginner crochet project because one simple construction can be adapted to so many uses. Make it long and narrow for stationery, wider for makeup or craft supplies, or smaller for crochet notions. A soft neutral body and contrasting bow create a sweet handmade look, but the simple design also makes it easy to customize with your favorite yarn colors.



